Crochet Plant Hanger crochet pattern
© June Gilbank 2018
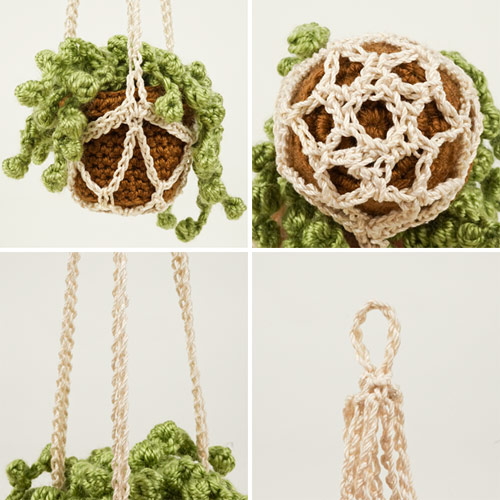
A modern crocheted take on macramé plant hangers, this is a lovely plant hanger designed to fit small (approx 2″/5cm diameter) plant pots.
This pattern is sized to match the small plant pots from my Cactus and Succulent Collection patterns, and you can use this pattern to make hangers for both your crocheted potted plants and for real plants in pots.
This pattern is Donationware – the Crochet Plant Hanger pattern is available for free, but if you like it please consider sending me a donation to show your appreciation:

Send me a donation and receive the easy-to-print PDF version of the pattern as a thank you!
As a bonus, the PDF version also includes additional tips, three options for the hanging loop, and any-size modifications for this pattern, so you can make a plant hanger to fit any diameter and height of round pot, using any yarn and any hook. You don’t need to take any measurements in advance – just hold your work up to the pot as you go, and you can custom-fit it as you crochet (much easier than it sounds!)
Donations of any size are much appreciated. Just add the amount you wish to donate, and, once you have checked out and paid, your pattern will instantly be available to download from your PlanetJune account.
The complete pattern and instructions for the small Crochet Plant Hanger are available below, regardless of whether or not you choose to pay for them 🙂 But please consider donating, so you’ll receive the any-size pattern (pictured above) too – perfect for making plant hangers for any PlanetJune potted plant patterns, or your real houseplants!
Crochet Plant Hanger is a free PlanetJune original crochet pattern. Feel free to use items made from this pattern however you wish, but I’d appreciate credit as the pattern designer. Please do not reproduce the pattern anywhere else; instead post a link to www.planetjune.com/planthanger
Not ready to make it yet? Add it to your Ravelry queue:
Terminology
| ch | chain |
| dc | double crochet (treble crochet for UK/Aus) |
| hdc | half double crochet (half treble crochet for UK/Aus) |
| sc | single crochet (double crochet for UK/Aus) |
| sl st | slip stitch |
| st | stitch |
| trtr | triple triple (treble) crochet (quadruple treble crochet for UK/Aus) – see Special Stitch, below, for instructions |
You will need…
- E US/3.5mm crochet hook (or size needed to fit pot, see pattern instructions for details)
- Small amount of size 3 crochet thread (e.g. Aunt Lydia’s Fashion 3) or light #3 (sport weight) mercerized cotton yarn (e.g. Patons Grace)
- Yarn needle to weave in ends
Gauge
Starting gauge is unimportant for this pattern; as explained later in the pattern, you can use a smaller or larger hook to make your hanger a good fit for your specific pot. I used an E US/3.5mm hook for all my samples.
Special Stitch: Triple Triple Crochet (trtr)
The triple triple crochet stitch is formed in the same way as a triple crochet, but starting with 4 yarn overs instead of 2:
Yarn over four times, insert hook into next stitch and draw up a loop, (yarn over and draw through 2 loops) five times.
Pot Holder
The pot holder will be worked from the top down, starting with a long chain that wraps around the top of the plant pot, and ending with a star-shaped mesh that supports the bottom of the pot.
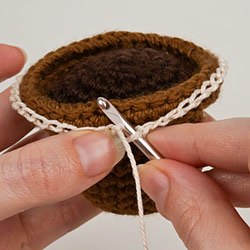
Ch 42. Check the chain length is right, by wrapping it around the top of your pot. If it’s the right size, the ends should just about touch (as pictured, right). It can be slightly loose, but not too tight for the ends to just meet.
- If your chain is too long, you can restart your plant hanger with a slightly smaller hook.
- If your chain is too short, you can restart your plant hanger with a slightly larger hook.
- (Or, see the PDF version of this pattern for the complete pot holder/plant hanger pattern that will work for any size of pot.)
Join your chain with a sl st into a ring, being careful not to twist the chain.
Tip: To get the neatest result, I recommend you work all stitches worked into chains into the back loop and the back bar throughout this pattern.
Rnd 1: ch 1, sc in same st as sl st, (ch 11, skip next 6 st, sc in next st) five times, ch 5, trtr in the first sc of the round.

Above, left: The ch 5 creates half of the final loop.
Above, right: The trtr stitch completes the final loop and leaves your hook at the top of the loop, ready to begin the next round.
Rnd 2: ch 1, sc in loop below, (ch 5, sc in next loop) around to last loop, ch 2, dc in the first sc of the round.
Rnd 3: ch 1, sc in loop below, (ch 3, sc in next loop) around to last loop, ch 1, hdc in the first sc of the round.
Rnd 4: ch 1, sc in loop below, (ch 1, sc in next loop) around to last loop, ch 1, sl st in the first sc of the round.
Fasten off and weave in the yarn end.
Tip: You don’t need to weave in the starting tail; you’ll be crocheting over it in the next step!
Top Border and Loops for Hanging Chains
To make the top border:
- Hold the pot holder upright, with the starting chain around the top edge.
- Fasten on by drawing up a loop in any chain just after a repeat point (pictured below, left), ch 1. Crocheting over the starting yarn tail as you go, sc in each chain around to the next point.
Tip: Also crochet over the starting tail from the pot holder whenever you reach it. - At the point, (sc, ch 5, sc) in next st (to make a loop, pictured below, right).
- Sc in the next 13 stitches, to bring you to the next-but-one repeat point.
- At the point, (sc, ch 5, sc) in next st.
- Repeat steps 4 and 5.
- Continue to sc around until you meet the start of the border round.
- Join with sl st to the first stitch of the round, or, for a neater finish, use an invisible join.
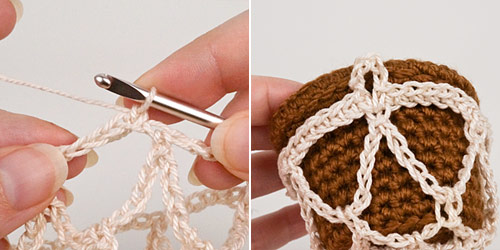
Above, left: Fasten on just after a repeat point (where the loops of Rnd 1 meet the starting chain).
Above, right: The finished top border and a loop for one of the hanging chains.
Hanging Chains
The hanging chains will be formed from three long chain loops, joined together at the top. To make the hanging chains:
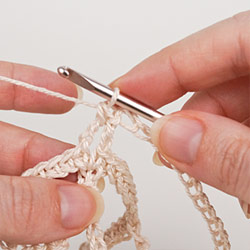
- Ch 45.
- Sc into the first (any) loop around the top edge of the holder (as pictured, right).
- Ch 90, then sc into the next loop around the top edge of the holder to form a long loop.
- Repeat step 3.
- Ch 45, then join with a sl st to the first chain of your starting chain to complete the third long loop, being careful not to twist the chain.
- Ch 1, sc in the loop below.
- Working around the hanger, sc into each long loop of hanging chain (as pictured, below), making sure not to twist any of the loops before you crochet into them.
- Sl st into the first sc (from Step 6) to join the top row into a circle. Do not fasten off yet…
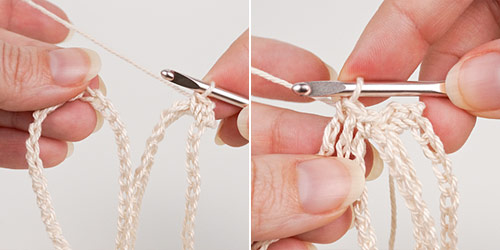
Above, left: Hold the next hanging chain to the first and sc into that loop.
Above, right: Sc into the loop of each remaining hanging chain to link them together at the top.
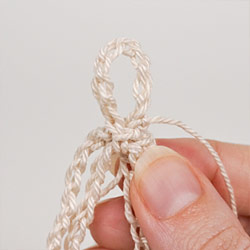
Hanging Loop
- Ch 8 (or longer if you need a larger loop).
- Anchor the loop with a sl st into a sc at the other side of the top circle.
- Fasten off, and weave in all remaining ends.


I hope you enjoy this Crochet Plant Hanger pattern.
Please leave me a comment below if you do, and consider leaving me a donation (don’t forget you’ll also get the any-size pattern with additional tips and hanging loop options as a bonus if you do).
Thanks!
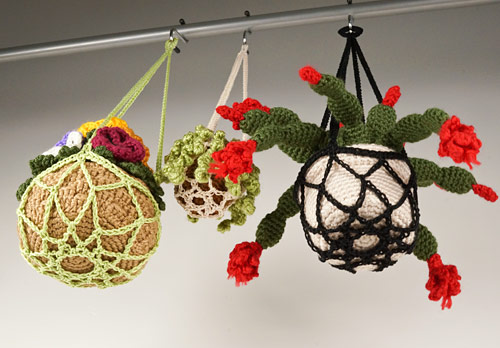
Psst! Wondering about the patterns for the crocheted plants pictured in these photos? They are (left to right):

- The large pansy basket from my Pansies crochet pattern
- The ‘String of Pearls’ plant from my Succulent Collection 2 crochet pattern
- The one and only Christmas Cactus crochet pattern


Erica said
Oh la la! This is such a pretty pattern. I hope you are doing well and staying crafty!