Crochet Braid Bracelet crochet pattern
© June Gilbank 2015
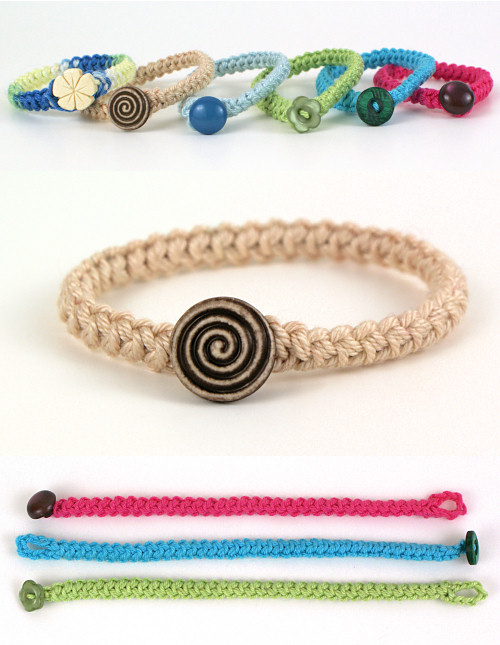
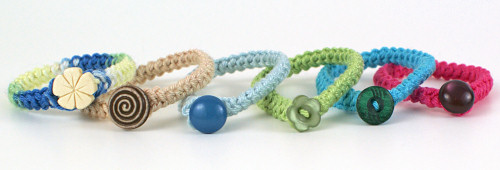
Crochet up a speedy braided bracelet with this decorative cord technique that’s deceptively easy to crochet as it uses only single crochet stitches! Customize the length and look to match your own style or make a personalized gift. Simply change the yarn colour and button fastener to go from playful children’s jewellery to a rugged man’s bracelet, or from a beachy summer look to a fashion accessory in your favourite colour.
Crochet Braid Bracelet is part of the PlanetJune Accessories range of crochet patterns by June Gilbank.
This pattern is Donationware – the pattern is available for free, but if you like it please consider sending me a donation to show your appreciation:
Send me a donation and receive the easy-to-print PDF version of the pattern as a thank you! It includes some additional info that you’ll only find in the PDF version:
– Step-by-step text and photo instructions for the Basic Crochet Cord (in right- and left-handed versions), so you can make the bracelet without having the video in front of you
– Bonus tips and advice
– Instructions to make a double-stranded variation – a neat two-strand bracelet with the button centred over the crossover point (pictured below).
Donations of any size are much appreciated. Just add the amount you wish to donate, and, once you have checked out and paid, your pattern will instantly be available to download from your PlanetJune account.
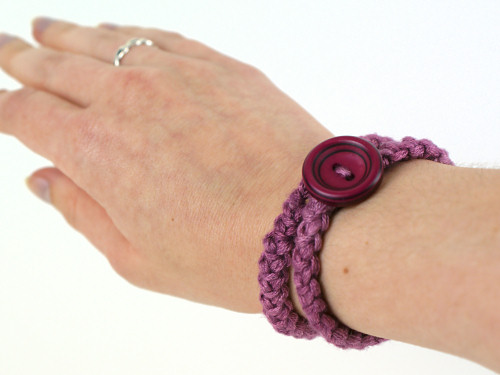 Double-stranded variation (available for any size donation)
The complete pattern and instructions for the basic Crochet Braid Bracelet are available below, regardless of whether or not you choose to pay for them 🙂 But please consider donating, so you’ll receive the photo tutorial for the cord, and the double-stranded bracelet instructions too!
This is a PlanetJune original crochet pattern. Feel free to use items made from this pattern however you wish, but I’d appreciate credit as the pattern designer. Please do not reproduce the pattern anywhere else; instead post a link to www.planetjune.com/braidbracelet
Not ready to make it yet? Add it to your Ravelry queue:
Terminology
| ch | chain |
| sc | single crochet (double crochet for UK/Aus) |
| sl st | slip stitch |
You will need…
- Yarn of your choice (I recommend a firm, smooth yarn like mercerized cotton in DK/light #3 yarn, or size 3 crochet thread, but you can experiment with different yarns to see what gives you a look you like). The quantity needed will vary depending on your yarn thickness, hook size, and bracelet length, but you’ll typically only need 3-6m for one bracelet.
Sample bracelets used light #3 mercerized cotton yarn (Patons Grace) - An appropriate hook for your yarn (see the yarn’s ball band as a starting point for the hook size, but see Gauge, below, for further tips)
Sample bracelets used E US/3.5mm hooks - One button or bead as a closure (see Choosing a Button, below)
- Needle to weave in ends (as small as possible, but large enough to fit your thread/yarn through the eye)
- Scissors
Gauge
Gauge is not critical for this pattern, as you can keep crocheting until the bracelet is as long as you’d like it to be. However, the hook size will affect how neat and firm the finished cord looks, as well as how easy it is to form the stitches.
The type of yarn and how tightly you crochet will make a big difference in how easy you find it to crochet the cord, so there’s really no ‘right’ answer here: use the hook size recommended on the ball band of your yarn as a starting point, or try experimenting with hook size by going up or down a couple of sizes to see which result you like best.
I find that going down one or two hook sizes often gives a tidy, regular-looking cord, but I suggest you try making a few stitches with each hook to see what you prefer.
Choosing a Button
The choice of button type, colour and size is up to you and is a great way to personalize your bracelet. Keep it minimal by matching the button colour to your yarn, or use your bracelet as a way to showcase a favourite decorative button.
I’d suggest a button size of around 0.5-0.75″ (1.3-2cm) diameter, but you can choose a button that’s any diameter (from slightly wider than the cord itself to as large as you like), as you’ll be crocheting the button loop to fit over the button.
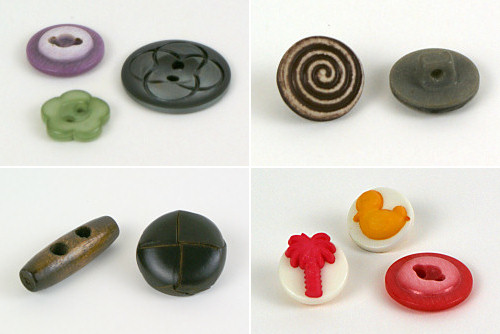
Button Ideas
Here are a few ideas for button styles, to get you started!
- For the flattest result, choose a standard button with 2 or 4 holes.
- For a stylish look that doesn’t obviously look like a button (because the holes are hidden on the underside), choose a button with a decorative top and shank back.
- Go rustic with a wooden toggle or bead.
- A metal, wooden or leather button looks good on a man’s bracelet.
- Look for a colourful plastic button to make a fun bracelet for a child.
Part 1: Crochet the Cord
The cord is crocheted using the technique I demonstrate in my Basic Crochet Cord video (click through to view it for right- and left-handers).
Note: If you’d like text-and-photo instructions for this cord technique, you’ll find them in the PDF version, available for any size donation.
- Leaving a 6″/15cm long tail, ch 2, sc in 2nd ch from hook.
- Turn your work and sc into the horizontal bar on the side of the previous sc (as shown for the first stitch in the video).
- Turn your work and sc into both horizontal bars on the side of the previous sc (as shown for the subsequent stitches in the video).
- Repeat step 3 until the cord is the desired length.
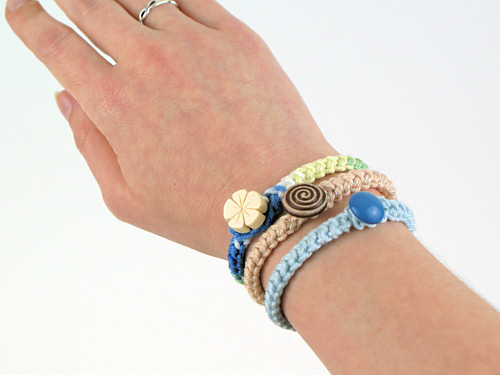
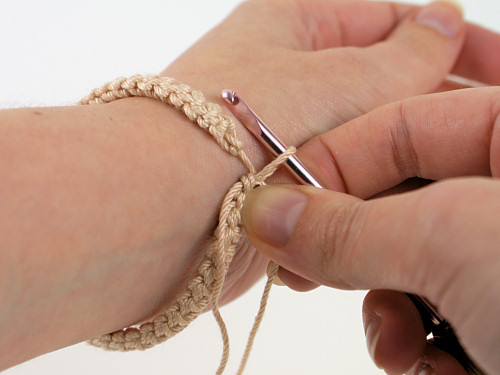
Tip: Test the cord length directly by wrapping it around your wrist (as shown below), or measure the recipient’s wrist with a measuring tape and crochet until your bracelet is slightly longer than the wrist measurement – it’s up to you how close a fit you’d like your bracelet to be!
Part 2: Crochet the Button Loop
The button loop is a tightly crocheted chain. You won’t be working back into these chain stitches, so feel free to pull the yarn as tightly as you want while you’re chaining, to make the finished chain compact and strong.
The length of the button loop depends on the size of your button and how large your chain stitches are, so you’ll need to check to make sure it fits.
To make the button loop:
- Chain a length that you think will be long enough to pass over your button (probably somewhere between 6 and 10 chains) then turn your work once more and join with a sl st to the two horizontal bars of the final stitch (as shown below, left). Do not fasten off yet!
- Take your button and check that it will pass through the loop you’ve formed (as shown below, right). If not, undo the slip stitch and add one or more chain stitches, then repeat the slip stitch under the bars of the final stitch.
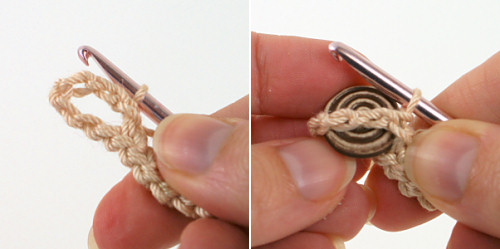
- Once the loop is the right size to allow your button to pass through, fasten off the yarn, leaving a 4″/10cm yarn end.
- Thread the end onto your needle, weave it down into the final stitch and knot it around a loop of the stitch so it’s securely fastened.
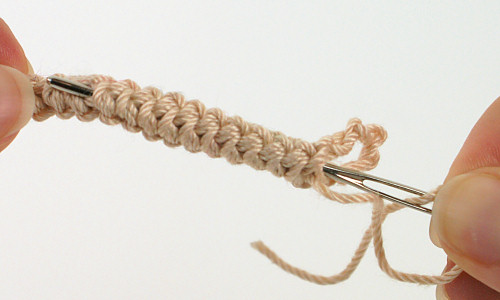
- Pass the needle along the middle of the crocheted cord, lengthwise along the cord (as shown below). Check before you pull the needle all the way through – if you’ve gone through the middle of the cord, the needle should not be visible on either side of the cord. Pull the needle through, pull the yarn end tight, and snip the yarn close to the surface.
Part 3: Attach the Button
- Thread the starting tail of the bracelet onto your needle and use it to sew the button to that end of the bracelet. (If the buttonholes are too small to allow your threaded needle to pass through, you can pass the yarn through the buttonholes by hand and then thread it onto the needle. If your yarn is too floppy to push through the hole, see my tutorial “Feeding Yarn Through Buttonholes or Beads” for an easy way to accomplish this!)
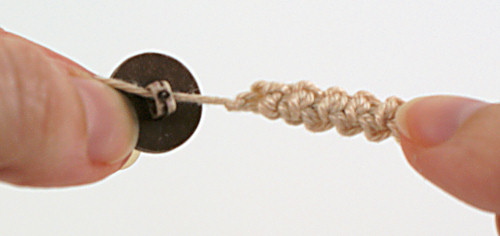
- Knot the yarn firmly around a loop of the bracelet beneath the button so it’s securely fastened.
- Weave in the remaining end (see Part 2, step 5 for instructions).
I hope you enjoy this pattern. Please leave me a comment below if you do, and consider leaving me a donation (don’t forget you’ll also get the exclusive photo tutorial for the cord and the double-stranded bracelet instructions if you do). Thanks!


Elysa said
So cute!! My 4yo accidentally dropped her bracelet in the potty so I have a good excuse to make her a new one 🤗 This is perfect, tysm 🤗
Courtney said
Hello. What size button do you recommend? Do you have links to some of the ones you have used? Thanks.
June said
Courtney, see the ‘Choosing a Button’ section for all my info and tips. I don’t have links to the ones I used, I’m afraid – they’re all random ones I picked up here and there and kept for the day I’d find a use for them! You can usually find a good selection of buttons at fabric stores or craft stores, and sometimes thrift stores can have a treasure trove of buttons too.
APARECIDA Sidneia said
Cada padrao que eu quiser tenho que pagar ou pago um e posso ter os que eu goste
Charil Eaton said
Thank you for such a great idea!
Susiejo said
Thank you for sharing. These are just perfect for my 3 year old Grand-daughter.
ana fulanah said
Thank you very much for your sharing
Teresa said
These are gorgeous.. Might make a few for Christmas gifts..
RASTACLAT CHINH HANG said
These hand-made bracelets look fantastic! I really love them and gonna try to make some of them for my own and my friends
Huong said
Thank you very much for your sharing. I love all your products. How beautiful they are!
ardith said
tx, again, june!
these little beauties are quite versatile! i’ve already made “seasonal” dog & cat collars [holidays,special days & such], which are SO much cheaper than buying those expensive collars! my furry kids are all indoor pets, so these are for “dress-up”, not actual leashed collars – tho’ they could be made out of a stronger nylon cord…hmmm…
i’ve also made little curtain tiebacks for my bedroom & kitchen – cute buttons just make ’em the best!
i made a really long one, then crocheted it using a much larger hook. don’t know what i’ll use this for, but it really is interesting!
point is, this is simple & versatile! thank you, AGAIN, for sharing with us!! best of everything to you & yours!!…ardith 🙂
Kathy Banfield said
I am scheduled for stomach surgery next week, and this would be a perfect project for me to do in the hospital! Thanks so much for sharing the pattern with all of us.
Leelou de France said
In France we call this “lacet roumain”…… But I don’t think to make a bracelet with it !! Thank you very much for the idea !! (and i beg your pardon for my bad english…..) and thank for sharing !! Leelou
June said
Leelou, yes, my technique is based on Romanian Point Lace! As I say on the video page though, this is my simplified version that’s easier to crochet – it’s not the correct method for making Romanian lace. (But you could also make the bracelet using real ‘lacet roumain’ if you want!)