Baby Snake crochet pattern
© June Gilbank 2023
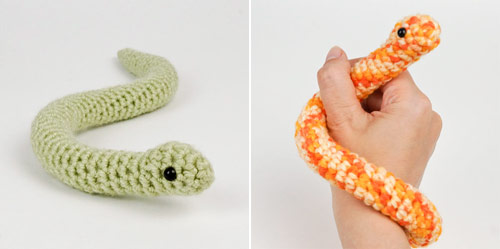
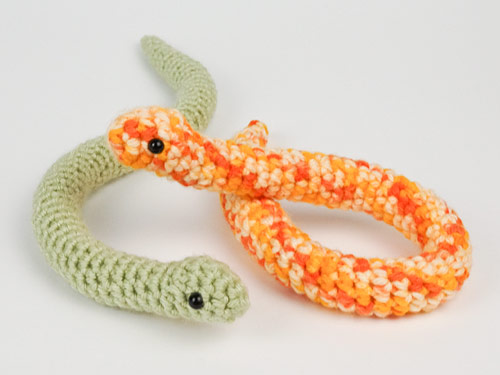
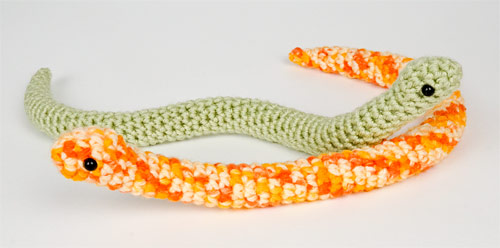
A small but perfectly proportioned no-sew baby snake! The narrow body makes it easy to pose in a variety of realistic positions, and you can make your snakes as long or short as you want.
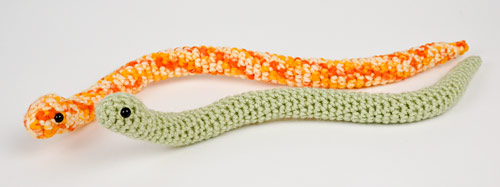
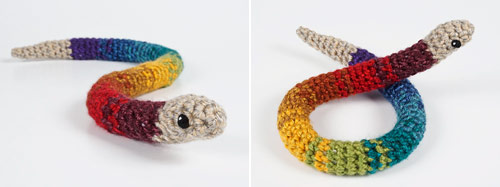
Make a baby snake in a single colour, use a variegated yarn for easy colour patterning, or combine it with my Ultimate Stripes technique to make a tiny striped snake!
This pattern is Donationware – the pattern is available for free, but if you like it please consider sending me a donation to show your appreciation:
Send me a donation and receive the easy-to-print PDF version of the pattern as a thank you! It includes also includes exclusive bonus content that you’ll only find in the PDF version (the beautiful Rainbow Ombré version of the pattern, instructions for managing the tiny eyes and choosing variegated yarns), and the crochet instructions are all included on one printer-friendly page, so you can save paper and ink by printing only that page.
Donations of any size are much appreciated. Just add the amount you wish to donate, and, once you have checked out and paid, your pattern will instantly be available to download from your PlanetJune account.
The complete pattern and instructions for the basic (single-coloured) Baby Snake are available below, regardless of whether or not you choose to pay for them 🙂 But please consider donating, so you’ll receive the lovely Rainbow Ombré pattern too!
This is a PlanetJune original crochet pattern. Feel free to use items made from this pattern however you wish, but I’d appreciate credit as the pattern designer. Please do not reproduce the pattern anywhere else; instead post a link to www.planetjune.com/babysnake
Not ready to make it yet? Add it to your Ravelry queue: 
Terminology
| ch | chain |
| invdec | invisible decrease Note: If you prefer, you may use a standard sc2tog decrease in place of each invdec. |
| sc | single crochet (double crochet for UK/Aus) |
| st | stitch |
You will need…
- E US/3.5mm crochet hook
- Small quantity of worsted weight yarn in any solid or variegated colour
- Polyester fibrefill stuffing
- 2 eyes, approx 6mm diameter (optional)
- Yarn needle to weave in ends
- Stitch marker
Size
Samples are approx 13-15″ (33-38cm) long, but you can make yours as long as you want by adding more repeats to the body! (Your gauge and yarn choice will affect the finished size slightly.)
Gauge
Gauge is unimportant for this pattern, provided the pieces are crocheted sufficiently tightly that they will not gape visibly when stuffed. To test a swatch, crochet the first 3 rounds and then push a piece of fibrefill behind it:
- If the stitches stretch open too much and the fibrefill is clearly visible, reduce the hook size.
- If you cannot insert the hook into the previous stitches, reduce your tension (crochet more loosely) or increase the hook size.
Notes
- Do not join at the end of each round; rounds are worked in continuous spirals.
- Use a stitch marker to mark the beginning of each round. Move the marker up each time you start a new round.
Stuffing Tips
This pattern does not include stuffing reminders! The snake is crocheted in one continuous piece, so you should pause every couple of inches as you crochet the body of your snake to add a small amount of stuffing. (A stuffing tool works very well for this!)
Your snake should be bendy and poseable, not rigid, so, once you get past the head, you don’t need to stuff it as firmly as you usually stuff amigurumi. Add just enough stuffing to fill the body, so it remains flexible.
Try to avoid forcing the stuffing into clumps as you stuff; you can squeeze and squash the snake from the outside to redistribute and smooth out the stuffing.
Tiny Yarn Eyes
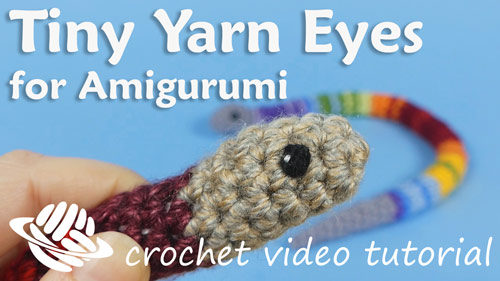
If you don’t want to use 6mm plastic eyes, see my Tiny Yarn Eyes for Amigurumi video tutorial that demonstrates my foolproof method for making a pair of perfectly matched tiny child-safe yarn eyes with a lifelike sparkle.
These yarn eyes are perfect for baby snakes!
Head
Make a magic ring, ch 1.
Rnd 1: 5 sc in magic ring. (5 st)
Rnd 2: (2 sc in next st, sc in next st) twice, sc in next st. (7 st)
Rnd 3: (sc in next st, 2 sc in next st) twice, sc in next 3 st. (9 st)
Note: In the next round (Rnd 4), complete the increase (‘2 sc in next st’), then mark the stitch you have just completed by slipping a stitch marker or a scrap of contrasting yarn through the stitch before you continue. This marks the top of the head and will be a reference for the position of the eyes.
Rnd 4: sc in next 3 st, 2 sc in next st, sc in next 5 st. (10 st)
Rnd 5: sc in next 9 st, 2 sc in next st. (11 st)
Rnd 6: sc in next 2 st, invdec, sc in next st, invdec, sc in next 3 st, 2 sc in next st. (10 st)
Stuff head and attach animal eyes (if using) halfway up either side of the head (2 or 3 stitches to either side of the marker you placed at Rnd 4), using the marker as a guide to which side is the top of the head.
Rnd 7: (sc in next st, invdec) twice, sc in next 4 st. (8 st)
Do not fasten off; continue to Body (below).
Body
Rnd 1: sc in each st around. (8 st)
Repeat Rnd 1 as many times as you want. (The tapered tail will add about 2″/5cm additional length.)
For each of my samples, I made 50 rounds for the body.
Do not fasten off; continue to Tail (below).
Tail
Rnd 1: invdec, sc in next 6 st. (7 st)
Rnds 2-3: sc in each st around. (7 st)
Rnd 4: invdec, sc in next 5 st. (6 st)
Rnds 5-6: sc in each st around. (6 st)
Rnd 7: invdec, sc in next 4 st. (5 st)
Rnd 8: sc in each st around. (5 st)
Rnd 9: invdec, sc in next 3 st. (4 st)
Fasten off, stitch the remaining hole closed and weave in the end.
I hope you enjoy this pattern. Please leave me a comment below if you do, and consider leaving me a donation. Thanks!



sissi said
Hi there! I loved this pattern, and my snake turned out so cute! I wanted to create some legs to create a dragon like creature. All I wanted to say this pattern was awesome and I’d like to thank you for this!
Charlotte Skok said
This pattern is great! I loved it! but I have one suggestion, to change 2 sc in the same st to an increase or inc. Other than that my snake is perfect!
June said
2 sc is a standard increase, there’s no need to change anything! (I always specify that the increases are “2 sc”, because you may sometimes need to do “3 sc”, or “2 dc”, or something else – those are also increases…)
Amy said
Does your paid pattern include how to the colors for the “adult” corn snake with the orange and reddish-orange pattern on the back?
June said
Hi Amy, yes, you’ll find the corn snake as part of my Snake Collection pattern 😊
Remington Newton said
Love the pattern!! i am making it for a friend.
Richard Evens said
This pattern is amazing! My snake turned out perfectly, it’s so cute! Thank you so much!
Giselle Kurbatova said
Hi I don’t understand after which increase out of the five increases in rnd 4 should I place a marker?
June said
Please check the pattern again, Giselle – there’s only one increase in Rnd 4 🙂
Pamela Hoelscher said
I really love your patterns, and my grandkids love the resulting presents from Nana.
I would, however, like to be able to download some of your free patterns and print them for personal use.
There are times when I don’t have use of the Internet or my computer, and would like to make these items away from them.
I don’t share other people’s designs. Others have stolen my designs and claimed them as their own,
so, I respect other’s work making a pattern and sharing for personal use.
June said
Thank you, Pamela! You can pay-what-you-want for the nicely formatted, print-friendly PDF version of each of my free patterns – just click the ‘make a donation’ button on the free pattern page and it’ll take you to my shop where you can donate for the printable version 🙂