Tissue Paper Carnations
This tutorial was originally published on my old papercraft site, Folding Trees.
Who’d have thought you could easily make such pretty and realistic carnations from tissue paper?! As well as beautiful decorations or gifts, these are perfect for weddings: make everlasting boutonnieres, table decorations and even bridal bouquets, and keep your wedding flowers forever as a memento of your special day.
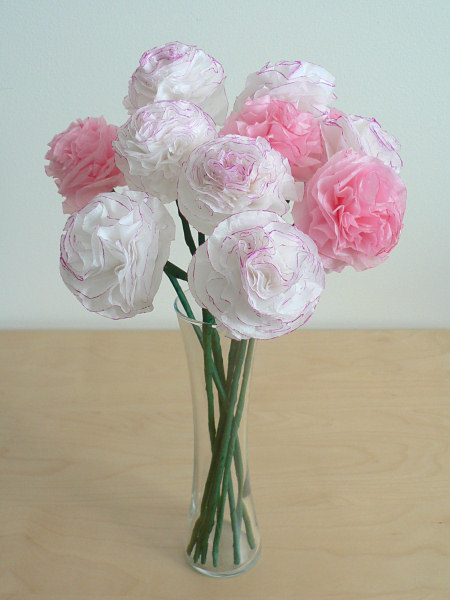
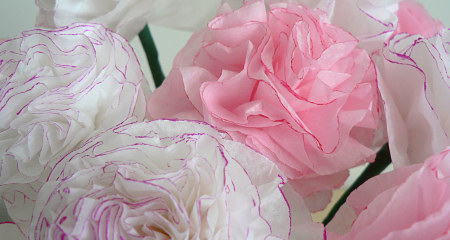
Below is a close up of the flowers – aren’t they lovely?
This tutorial is Donationware – the instructions are available for free, but if you like it please consider sending me a donation to show your appreciation:
Send me a donation and receive the easy-to-print PDF version of the tutorial as a thank you!
Donations of any size are much appreciated. Just add the amount you wish to donate, and, once you have checked out and paid, your PDF will instantly be available to download from your PlanetJune account.
The complete instructions are available below, regardless of whether or not you choose to pay for them 🙂
This is a PlanetJune original tutorial. Please do not share or reproduce this tutorial; instead post a link to www.planetjune.com/papercarnations
You will need:
- Tissue paper
- Scissors
- 2 large paper clips
- Pipe cleaners (chenille stems) or floral wire
- Coloured marker pen
- Optional: floral wire, floral tape, wire cutters
Instructions
You can make your carnations any size, but I found that a 3″ (7.5cm) circle gives a realistic-sized flower. Fold your tissue paper in half again and again until it is just larger than your circle size. I used a 20×24″ sheet of tissue paper, which let me cut 48 circles at once – enough for 4-5 carnations!
Find a suitably-sized circular container and draw around it with a pencil onto your folded tissue paper.
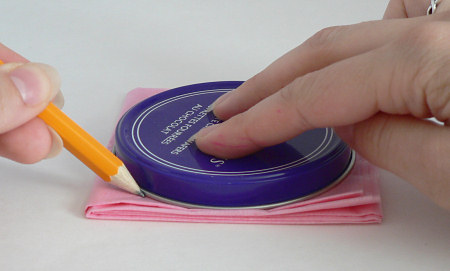
Start to cut out the circle, holding all the layers of tissue paper together. If you can’t cut through the whole thickness, try cutting half the layers at a time, then draw another circle to cut out the other half. I found that I could cut through 48 layers with no problem, as the tissue paper is so thin. You don’t have to cut too exactly, so don’t worry if some of the layers don’t come out as perfect circles. Use a large paper clip to help keep the layers together.
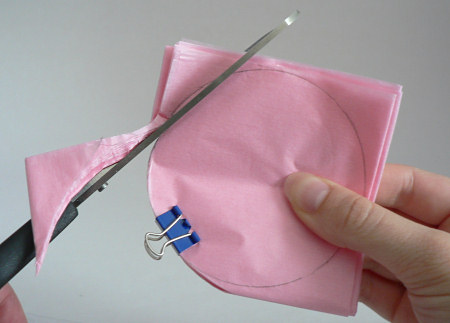
As you continue to cut, add a second paper clip on the opposite side of the circles to keep all the circles together.
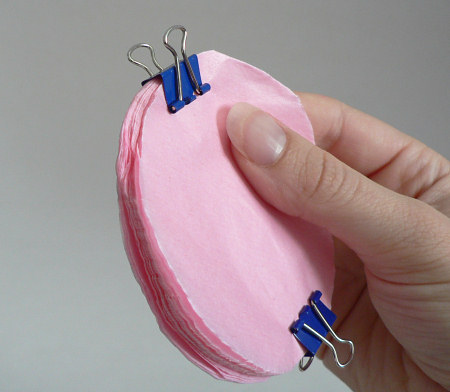
This next step is the key to making the flowers look more realistic than standard tissue paper flowers. If you are in a hurry or making them with children, you could skip this step and still end up with nice flowers. It is a bit tricky and takes a few minutes to complete, but I think it’s worth it!
Take a marker pen with a complementary colour (a cheap kids’ pen is fine). A bold colour will give a more effective result. Use your non-writing hand to hold the edges of all the tissue-paper layers together, and use the side of the pen nib to begin to gently colour the edge of the circles. Take this slowly – if you press too hard, the tissue paper layers will separate. Colour a small section of the edge at a time, and go over each section a few times to ensure the colour is intense and the ink has saturated all the edges.
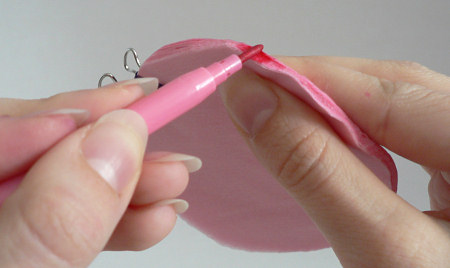
Continue to colour around the edge. When you are about halfway through, move the paper clips to areas you have already coloured, and fill in the gaps.
Note: I have switched to the white tissue paper for these photos as the coloured pen shows up more clearly!
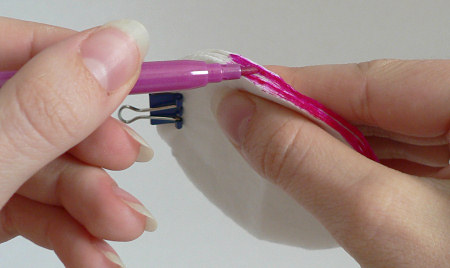
..Erm, yes. You may well end up with a coloured finger by the time you have finished (see below) as you have to hold the papers close to the edge to keep them together while you colour them! Don’t worry – it’ll wash off 😉
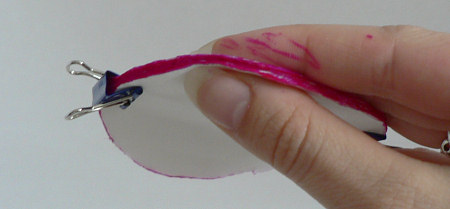
Remove the paper clips and select enough circles from the pile to make one flower. I used approx 12 circles per flower, but 8-10 circles would be fine.
Keep these circles together and poke two holes near the centre of the circles. I used the end of a pipe cleaner to do this, but if your pipe cleaners aren’t sharp enough you could use a large needle or similar.
Fold down about 1 inch of the pipe cleaner, and push the long end through one hole and the short end through the other hole.
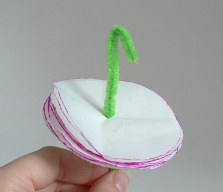
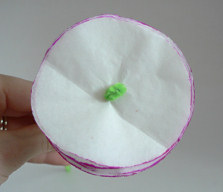
Pull the ends all the way through, then twist the ends of the pipe cleaner together underneath the flower to keep all the circles together:
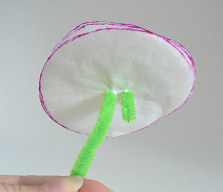
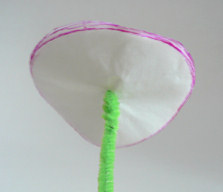
Now to make the petals. Separate the topmost circle and crumple it upwards from the centre. Scrunch up the paper randomly, but try to concentrate on the base of the petal (the centre of the circle) and leave the coloured edges alone.
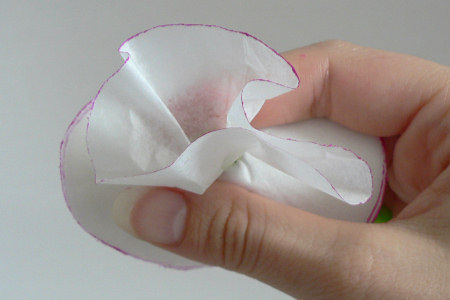
Now repeat with each circle in turn. Crinkle each circle up individually, and try not to have the folds in the same place each time. You can see (below, right) how I am squeezing my fingers around the base of the petal each time I add a new circle. This stops the coloured petal edges from being creased into folds.
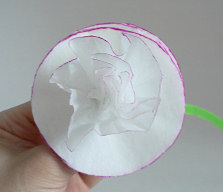
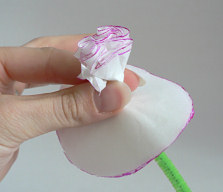
Keep scrunching… When all the circles have been crumpled up, you will end up with a lovely carnation like this:
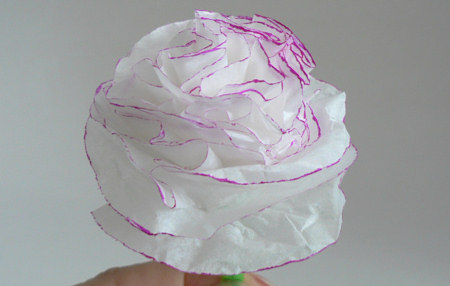
And that’s it for the basic tutorial! If you are making these with children, you probably want to stop at this point. If you want to make the stems look more realistic, here are some ideas:
Make a double-headed stem by cutting down one pipe cleaner to half its length (use wire cutters for this) then twisting it together with another completed stem:
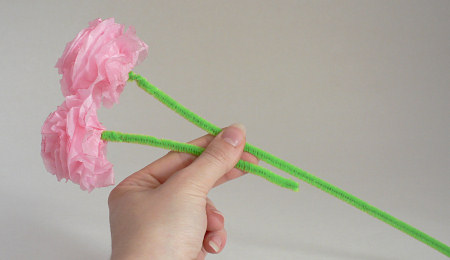
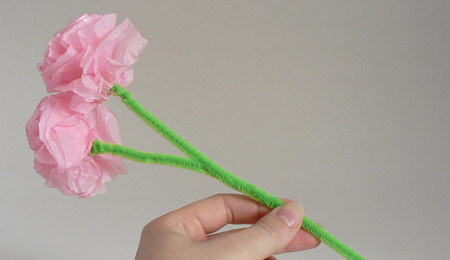
I wasn’t satisfied with my green furry caterpillar stems, so I converted them with some floral wires and green floral tape:
Cut the floral wire to the same length as your stem.
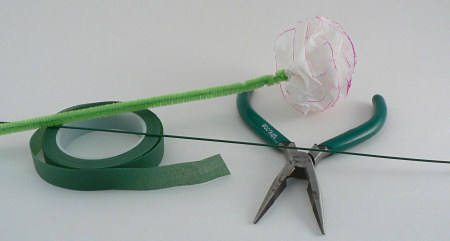
Holding the wire and pipe cleaner stem together, start to wrap the floral tape tightly around them. Start about 1″ down from the flower head (below, left) and wrap up the stem to the head. Then wrap all the way down the stem to the bottom. To wrap without the tape getting tangled up, hold the tape steady and at an angle to the stem with one hand (below, right), and use your other hand to twirl the stem around, winding the tape around itself as it goes.
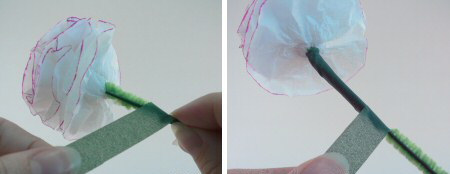
The floral tape will stick to itself, so there is no need to use glue to fasten it down. Remember to stretch the end of the tape as you wrap the end of the stem, to help it to stick securely.
Make just one as a paper buttonhole. Make about a dozen, and you have a beautiful bouquet!

I hope you enjoyed this tutorial! Please leave me a comment if you did, and consider leaving me a donation. Thanks!


Connie Ann Mearkle said
I am going to make these with the senior center in our area. Thankyou for the idea.
Garvin Toots said
Thank you for your cute n easy Carnation flower instructions. It’s such a relief to not have to decipher instructions. God Bless you.
Kathy said
Love the carnations instructions, easy and very lovely result. Thank you
Wanted to ask about the Folding Trees tutorial, is that still available and if so where can I find the instructions? Thanks for sharing.
June said
Thanks Kathy! You can find all my old Folding Trees tutorials at www.planetjune.com/paper 🙂
Anthony Louis Covello said
I made my own version for my wife for our first anniversary. I went with paper and carnations as well I made my pedals with gold another 1rst anniversary tradition! I have great pictures and my wife absolutely loved them and there great because they will last! Again thank you so much for your idea and tutorial hope to learn more. Best wishes- Anthony C.
June said
That sounds beautiful, Anthony – what a special gift! I’m sure your wife will treasure them 🙂
Sana Haris said
Paper flowers are nice we did this many many years ago we also made flowers out of milk pressing filters quite fun
Randy said
What an easy paper flower tutorial. This year i really want to get into papercraft flowers. This just might be the first one i create!
Claudora carrillo said
Paper flowers are nice we did this many many years ago we also made flowers out of milk pressing filters quit fun
Angela Bonanno said
Thank you for this super easy tutorial! I needed something to add to a diaper cake the stuffed tissue method looked trashy, but by adding these adorable carnations it really made it so much better! Thank you! I have a photo of my cake on my blog and will link back to yours for the carnation tutorial!
Tesia said
Hi June tnank you so much for the tutorial, I made my own and I think they came out amazing for a first timer.
Thank you
Henny-Lynn said
Hi June, Sorry to bother you before the holidays, but I just found your cute carnation tutorial on a German website that I’ve had in my crosshairs for stealing pictures and tutorials from around the world and repurposing them by just translating the instructions . . I’ve had a lengthy discussion with Alex that this isn’t strictly speaking legal, but he didn’t seem inclined to listen . . German doesn’t seem to be his first language! Anyways, just wanted to let you know and please tell me if he changed his m.o. and asked if you are ok with it . . otherwise you only have to tell him it’s illegal, maybe he’ll get it sometime soon . . as a source he listed icreative.com, which has this tutorial and I hope you know about that as well . . 😉 dekoking.com/nelke-aus-servietten-basteln/
Merry Christmas, Henny Lynn
June said
Henny-Lynn, thanks very much for alerting me to this copyright violation! I’ve just contacted DekoKing and icreativeideas.com (the source DekoKing copied that had also ripped me off!) to ask them both to remove my copyrighted material and instead post one photo and link back to my tutorial, as my linking policy allows. Fingers crossed I’ll be able to get the illegal copies removed.
Ann Gargett said
Absolutely brilliant idea for making carnations and quick enough to do in a workshop for people in a care home and arranged them for a little display for their room. Finished them off with a touch of glitter spray – lovely.
Mercy said
Muy lindo tu blog, te deseo muchos exitos. Desde Colombia con mucho cari
Gesine said
Hello June,
I made such flowers last weekend. Another possibility to colour the edges is to roll the finished blossom in some coloured chalk which was scraped with a knife before.
Thanks for the nice idea!
Gesine
Kelly said
Hi! I found your blog via Pinterest. When I clicked the pin, it told me that the blog contained “inappropriate content.” I almost backed out, but I had read a blog post from another blogger recently that said that her blog was wrongly targeted by Pinterest’s system. She emailed them and they cleared it up. Said it was an accident that sometimes happens. I know I’d want someone to tell me, so I thought I’d let you know so you can contact Pinterest. 🙂
June said
Thanks Kelly. This is actually happening because the original pin linked to my old papercraft site (Folding Trees) which now no longer exists, so the link now forwards you to the tutorial here on PlanetJune. Pinterest flags links that are redirected because they may lead to bad content – although it doesn’t in my case – and that’s why they give you a warning that the link may not lead where you want it to! (I’ll contact Pinterest, but I don’t think they’ll do anything about it, because it’s their standard policy for redirected links.)
June said
Update to my previous comment: Pinterest have been able to fix this for me, so all links from the old Folding Trees will no longer be marked as ‘suspicious’! Thanks Kelly (and everyone else who notified me about the Pinterest problem) – I’m very happy to know that PlanetJune won’t look like it might host’ inappropriate content’ any more 😉