Brushed Amigurumi
You can completely change the look of an amigurumi by brushing the pieces after you crochet them. Doing this drags some of the fibres free from the yarn and will give a soft, fluffy finish to your amigurumi. The brushed crochet technique can be used to great effect:
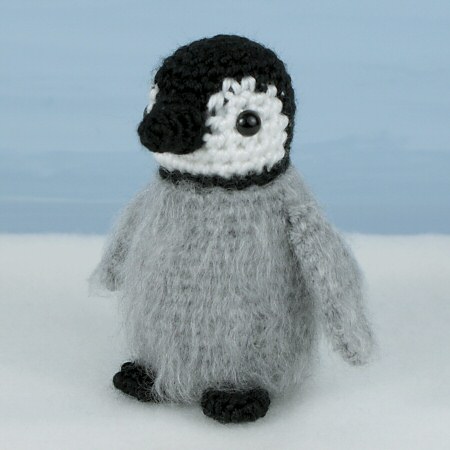
The body and wings of my Baby Emperor Penguin are brushed
Tools
You will need something with fine, hard, sharp teeth. A wire pet slicker brush works very well for larger pieces, or a miniature wire brush – called a Teasel Brush (UK), Nap Riser Brush (US), and Bunka Brush (Japan) – is ideal for smaller pieces. You can use either type of brush for any amigurumi, but a larger brush will bring up the fluff over a larger area more quickly, while a smaller brush is better suited for brushing specific areas or smaller pieces without scratching your fingers.
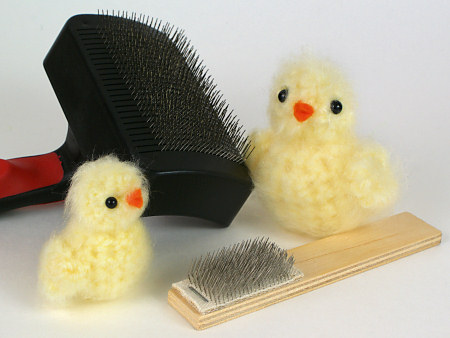
Brushed Fuzzy Chicks with a teasel brush (front) and pet slicker brush (back)
Suitable Yarns
To make brushed crochet amigurumi, you can crochet with any regular or fluffy yarn. Wool and other natural animal fibres work very well, but acrylic and other yarns work too. I always use acrylic yarns for my amigurumi, and they brush out nicely.
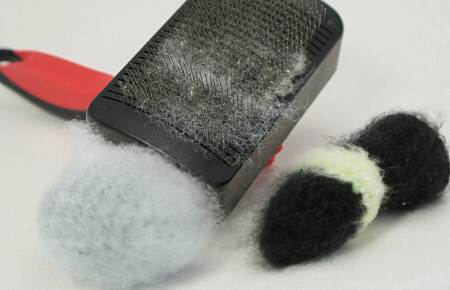
Brushed acrylic (left) and cotton (right) pieces
Method
While you’re crocheting…
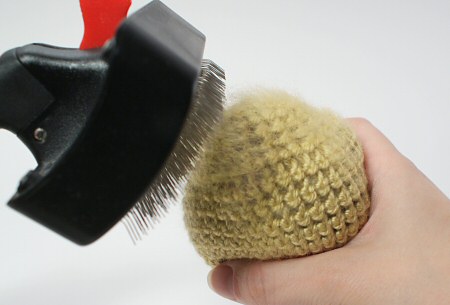
Brushing in action
- Brush each piece after crocheting it, and before stitching the pieces together.
- Brush with a reasonable amount of force – if you are too gentle you won’t generate any fluff.
- It will probably take around 10-20 strokes over each area of the piece for the fluff to start to come up.
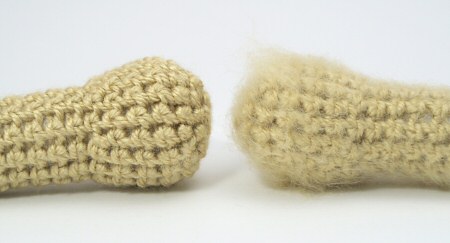
Fuzzy Bear arms, before and after a little brushing.
- Be sure to brush the head before attaching the eyes, so they don’t get scratched by the brush.
- Keep brushing until the piece is as fluffy as you’d like it to be – brushing for longer will obscure your stitches more and increase the fluffiness.
After assembly…
- Brush lightly over any seams stitched between two brushed pieces, to help to mask the joins, fluff out the yarn and disguise your sewn stitches.
- Optional: Trim the fluff around the face (particularly the eye area) – and any other areas you wish – with a pair of small sharp scissors, to get rid of any extra-long fibres and neaten it up a bit.
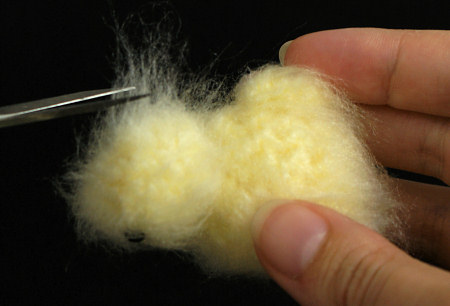
Trimming a Fuzzy Chick
Conclusion
Whether you strategically brush certain areas of your piece, or brush out the entire animal, brushing your crochet can add a new level of fluffy cuteness to your amigurumi, and it’s a great technique to add to your arsenal 🙂
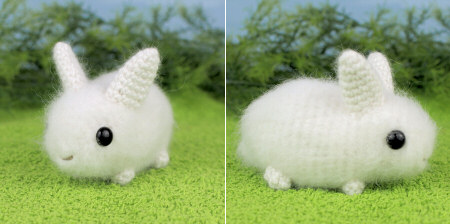
The brushed look makes a fluffy baby angora bunny extra adorable!
Loved this tutorial? I have so many more amigurumi tips and tricks to share with you!
Boost your amigurumi skills with my latest book, The Essential Guide to Amigurumi, your comprehensive guide to amigurumi techniques and tips.
Do you find my tutorials helpful? If so, please consider making a contribution towards my time so I can continue to create clear and concise tutorials for you:
Thank you so much for your support! Now click below for loads more crochet video and photo tutorials (and do let me know what else you’d like me to cover in future tutorials…)


Louise Fong said
Thank you for your tutorial on brushing amigurumi. I have a question – why does one have to brush each piece BEFORE sewing together rather than brushing the assembled amigurumi? Thank you.
June said
You don’t have to brush before stuffing – and sometimes it’s unavoidable, for example if the entire animal is brushed, you have to stuff, finish and close the amigurumi and then brush that last part out after you finish the piece.
The problem with brushing after stuffing is that you have to be much more gentle: if you brush firmly, you’ll drag fibres of stuffing up to the surface, which makes your amigurumi look really messy! So, by brushing as much of the piece as you can before you add the stuffing, you can brush more firmly and generate the fluff much more quickly.
Louise Fong said
Thank you so much for your quick response, June – that makes so much sense!
Lavie said
Will this technique work on cotton yarn ?
Thank you
June said
Lavie, see my brushed crochet experiments for my results with cotton yarn. Ultimately, as I say above, I’d always recommend you try brushing a small sample piece made from the same yarn to see if it gives an effect you like before you risk ruining an amigurumi!
Lydia said
Hi, I just started amigurumi and I have a problem with the stuffing showing between the stitches. I have tried to use a smaller crochet hook but still doesn’t help. Any suggestions?
Thanks
Lydia
June said
Two suggestions, Lydia:
Brenda Wallace said
I can hardly wait to give this a go! I should have read this before applying the eyes to my bear;however I think I can manage (carefully).
The rest of the pieces have yet to be crocheted!
Thank-you for sharing this idea and photos!
Susan McClenahan said
Thank you for advising me to look at this tutorial instead of using fluffy wool!!! Because I am making the cat for a friend I wanted it to be just right and by following these instructions I feel more confident. I really enjoy using your patterns June as they are so well designed and easy to follow. Thank you so much for taking the time to reply to my query.
Margarite said
wow. always wondered how to do this. its easier than i thought. good thing there’s plenty of cat in my house and i happen to have a brush or two :p
thank you June. i’ve been crocheting for two and a half years now, and learned it from blogs and tutorials like yours.
love from Portugal ^^
Marcia Purse said
The first amigurumi I ever made was one of your fruit pieces, and it was a success. Now, thanks so much for this tutorial – I feel much more secure now about brushing out a cat I made some time ago. It’s already sewn together, but I’ll do the best I can!