Thanks to Heather and Jesse, I now have a very cool vintage umbrella swift, with one slight problem: the spinning part is missing, so all I had was the umbrella part to hold the yarn. I’ve been waiting for months to find the time to buy wood and get my handy husband to help me make 1) a new base that I can clamp to the table and 2) some sort of rotation mechanism so it can spin freely. So far, we’d only got as far as finding a Lazy Susan bearing mechanism.
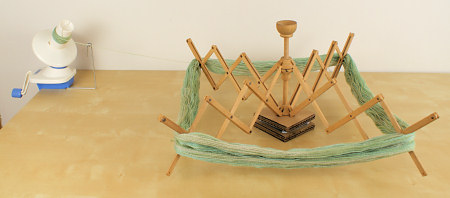
Yesterday I got sick of waiting and decided to rig something from available materials: cardboard, craft glue, and thumbtacks. Less than an hour later, I had a functional yarn swift and ball winder combo:

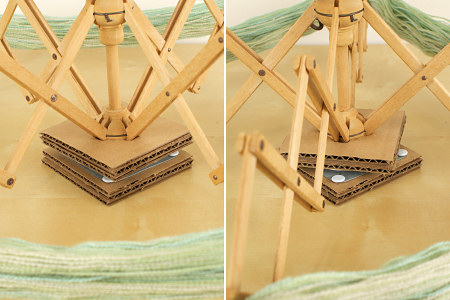
All I did was build 2 cardboard blocks, each made from 3 layers of corrugated cardboard glued together. Corrugated cardboard is very strong, especially if you stack each piece at 90 degrees to the last so the ribs run perpendicular to each other. Here you can see the swift in action: the bottom block remains still, while the top block and swift both rotate as the ball winder pulls on the yarn:

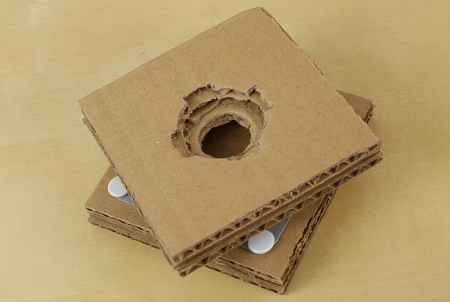
This was my magic idea that would allow it to work without damaging the swift with glue or nails: before I assembled the top block, I cut a fitted hole into each layer of cardboard. With the swift snugly embedded into the cardboard, the two should be able to rotate together:

Here you can see the Lazy Susan ball-bearing mechanism between the two cardboard blocks. I attached it to the blocks with a simple thumbtack through the screw hole at each corner and pushed into the cardboard:

The moment of truth – does it really work? I wasn’t sure if it’d need some sort of non-slip mat underneath the bottom cardboard block, or a clamp to attach it to the table, but it was perfectly stable without either; as I turned the handle on the ball winder, the swift started to spin easily, allowing more yarn to be wound…

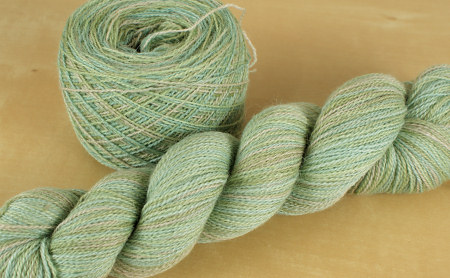
…until, within minutes, the entire hank had become a beautiful centre-pull ball. This is the first time I’ve ever been able to wind an entire 400m laceweight yarn hank without getting into a terrible tangle.

Once the umbrella is folded up, the whole thing is very conveniently small:

It’s so refreshing for me to take a break from my usual perfectionism and just MacGyver a ‘good-enough’ solution to a problem. It may not last forever, but I can easily make replacement cardboard pieces (or a sturdier solution, when I have time) – it’d only take seconds to remove the thumbtacks and have the bearing mechanism ready for reuse. But this is the perfect solution for now.
Mission accomplished: now I can crochet my gorgeous yarn into a new design!


futuregirl said
Hooray for good enough! Don’t you just want to eat those little fluffy cakes of yarn? I always do.
Leah Bommarito said
Hi.. I just wanted to take a moment to say your blog is really inspiring in so many crafty ways. I also wanted you to know that I nominated your site for The Versatile Blogger Award here: thewearymom.wordpress.com/2012/06/05/the-versatile-blogger-award/
June said
Thank you very much, Leah 🙂
Chrisie Merriman said
What a great solution!
I’ve been eyeing the KnitPicks yarn swift and ball winder… the first (and only) time I’ve tried to hand-wind a lace skein did not turn out well. 🙁 Maybe I just need the right tools.
June said
I’d definitely think about getting the KnitPicks set, if you’re going to be winding yarn regularly – the ball winder I bought locally (in Canada) was twice the price of the KnitPicks one, and having a swift makes a huge difference! If not, most LYSs will wind your purchased yarn for you instore, if you ask them (I know that’s not much help for the yarn you’ve already bought!)
Birdie said
Lovely! You are so creative! I’m glad you figured out a way to get it to work!
(wish I had one) 😉
Jesse said
Brilliant! So glad you got it working!
June said
I’m glad too! Now it’s all ready for you (and any other Capetonians who have yarn to wind) to come over and use it 😀