Lucky Wishing Stars Tutorial
This tutorial was originally published on my old papercraft site, Folding Trees.
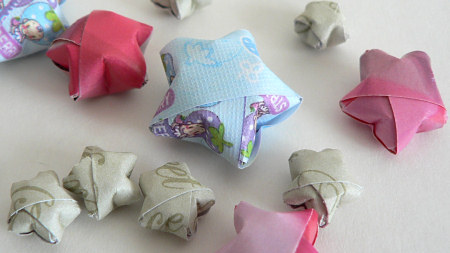
These sweet little 3D origami stars are easy to make from a single strip of paper. Known as lucky stars, wishing stars, or dream stars, they are supposed to bring luck when you make them and more luck if you give them away. Whether or not you believe that, they look beautiful arranged in a glass bottle or bowl, or strung together into garlands!
This tutorial is Donationware – the instructions are available for free, but if you like it please consider sending me a donation to show your appreciation:
Send me a donation and receive the easy-to-print PDF version of the tutorial as a thank you!
Donations of any size are much appreciated. Just add the amount you wish to donate, and, once you have checked out and paid, your PDF will instantly be available to download from your PlanetJune account.
The complete instructions are available below, regardless of whether or not you choose to pay for them 🙂
This is a PlanetJune original tutorial. Please do not share or reproduce this tutorial; instead post a link to www.planetjune.com/luckystars
Instructions
You’ve probably seen these little puffy origami stars before. They’re really quick to fold, and you don’t need any special materials to make them. You can buy lucky star pre-cut strips from origami stores, but you can just as easily make your own from medium-weight coloured paper, e.g. scrapbooking paper, or even strips cut from magazine pages – as the strips are so narrow, the original text or image won’t be obvious in the finished star.
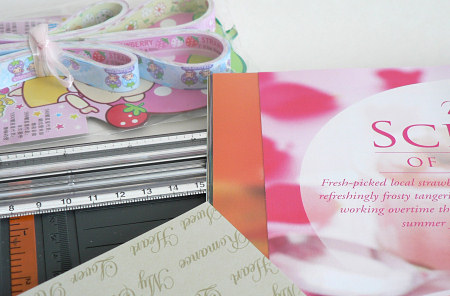
Anti-clockwise from top left: pre-cut strips, paper cutter, scrapbook paper, magazine page.
To give you an idea of size, I’ve made stars in 3 different sizes to show you:
- blue stars (from pre-cut strips): 35cm x 1.25cm
- pink stars (from a magazine page): 30cm x 1cm
- green stars (scrapbook paper): 15cm x 0.6cm
The finished star will be approx 1.5 x the width of your strip, so pick an appropriate size for the size of star you’d like to end up with. If you’re making your own paper strips, try using a paper cutter or a craft knife with a ruler and cutting mat, so you can easily make straight parallel cuts.
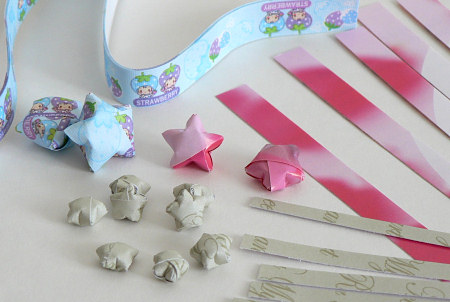
For the rest of this tutorial, I’ll be using a paper strip cut from a magazine page. For reference, the front of the paper is pink and the back is peachy orange with black text.
Step 1: Make a loop at one end of your strip, and pass the short end through the loop as if you’re forming a basic knot:
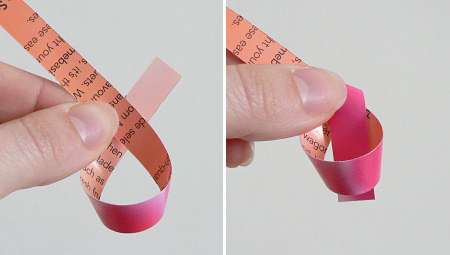
Step 2: Pull both ends of the paper slowly to close up the knot. As it pulls tight, it will magically form a pentagon (5-sided) shape!
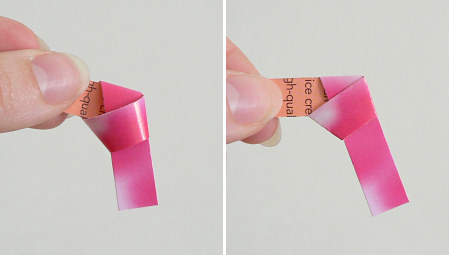
Step 3: Fold the short end up out of the way (right side facing out). If it’s too long like mine, and sticks out beyond the edge of the pentagon, trim the end down. Turn the shape over so the side with the short end is facing you, then tuck the short end under the flap that runs across the pentagon:

Step 4: Now you can begin to wrap the rest of the strip around the pentagon. Fold the strip up over one side of the pentagon, making the fold line along the side of the pentagon. Do not crease the fold tightly. Continue to fold the strip over and over each side:

Step 5: When you get to the end of the strip, trim off the end if it sticks out beyond the edge of the pentagon, then tuck the end inside the flap that runs across the pentagon:

Step 6: Hold the pentagon between thumb and forefinger of one hand, then use a fingernail on your other hand to push in the middle of one of the other sides:
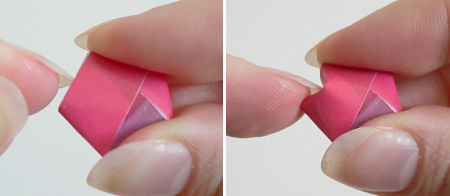
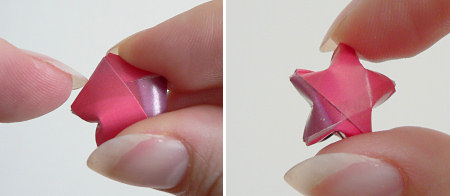
Step 7: Rotate the pentagon and repeat until all 5 sides are pushed in, et voilà! A puffy paper star!
Ideas for Use
Making stars is addictive, and you may be wondering what to do with the piles of stars you’ve accumulated! They’re often used to fill little glass jars or bowls, which can look very decorative. But my favourite use is to string them into decorative garlands:

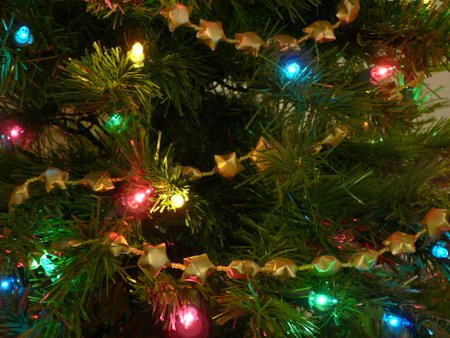
As the stars are made from paper, they’re easy to pierce with a sharp needle and thread onto a string. Insert the needle from the centre of a ‘dent’ in the side of the star, going right through the centre of the star and coming out at the opposite point. String them alone, or space them out with beads for a different effect. With appropriate colours of paper for your stars you could also make beautiful Christmas tree garlands:
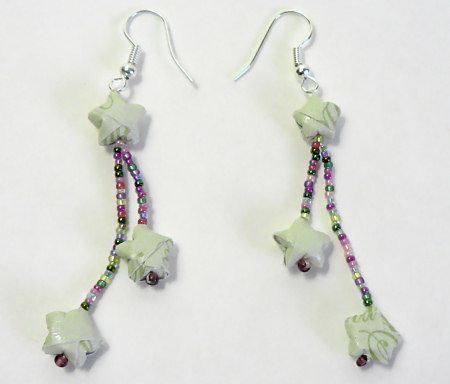
I’ve also made some quick earrings using the same idea. I sealed the stars with Mod Podge (an acrylic glaze/sealer) to protect and strengthen them and make them more water resistant, then I threaded them with some tiny sead beads onto earring hooks:
I’m sure you can think of many more uses for these sweet paper stars!
I hope you enjoyed this tutorial! Please leave me a comment if you did, and consider leaving me a donation. Thanks!


dhhsu said
i couldnt seem to get the last parts right
Sydney said
Thank you for the simple walk-through. I loved how you explained it!!. By the way, your Crochet is AMAZING
Richard said
Great
B. Noble said
This is a really good tutorial. Not everyone has access to good videos. The different colors helped me see where the folds were meant to be. Thank you so much sister!
souang said
Thank you so much for helping me with inspiration. I was wondering why this site was so familiar and then I saw that it is related to Folding Trees. I first stumbled upon your site in 2013 when I worked at home and wanted to make some sort of paper craft while on the phone with customers. The Kusudama Flowers were perfect and I made lots of them from IKEA magazines. Good times. Thank you so much!
-souang
Jennifer said
I never knew about your paper crafting stuff! I’m so glad you mentioned it in your crochet newsletter! Thanks for telling us!