I’ve collected all my crochet and amigurumi tutorials into this master list! My tutorials take two forms: videos or step-by-step photos with written instructions.
 |
All video tutorials include both right- and left-handed versions on the same page. |

 |
As photo tutorials take up more screen space, some are split into separate right-handed (RH) and left-handed (LH) pages, and you’ll see both links below, in those cases. |
Scroll down through the tutorial list, or jump to a specific section:
Note: If you’re having a specific problem, check my
Amigurumi Troubleshooter first, to find out which of these tutorials many solve your problem!
Amigurumi Essentials
To make great amigurumi, you need these techniques!
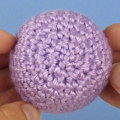
Ultimate Finish for Amigurumi
Close up the remaining hole neatly with a smooth, gap-free finish.


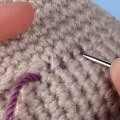
Amigurumi Seamless Join
Create a smooth, almost invisible join when you stitch an open-ended piece to a closed piece.

Back to top
Basics
New to crochet or amigurumi? Start here first.
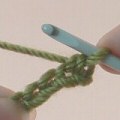
Crochet Basics
Basic crochet stitches for amigurumi.


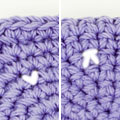
Which is the ‘Right’ Side?
Which side of your work should face outwards? (And does it matter?)


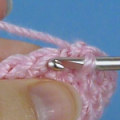
Front, Back, Both Loops
Which loop(s) should you work into to make a crochet stitch?

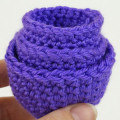
Stitch Tension
How to get perfect neat small stitches (without hurting your hands by crocheting extra-tightly!)

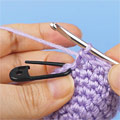
Using Stitch Markers
How to use stitch markers in amigurumi, to mark the first stitch of your round or to mark a specific point.

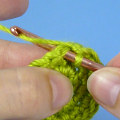
Yarn Over
How exactly should you wrap the yarn over your hook for crochet?

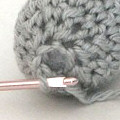
Fastening Off
How to fasten off open and closed pieces in amigurumi.

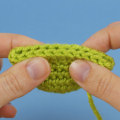
Flattened Pieces
What does it mean when a pattern says to flatten a piece of an amigurumi after crocheting?

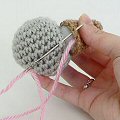
Joining Amigurumi
The basic method for stitching open-ended pieces to closed pieces.

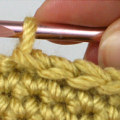
Chains and Slip Stitches
Are your chs and sl sts difficult to work into? Learn how to avoid this.

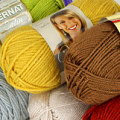
Worsted Weight Yarn Comparison
What is ‘worsted weight’ yarn, and are all worsted weight yarns the same? I’ve compared dozens of ww acrylic yarns for you!

Back to top
Perfect Finish
Tips to get a neater result from any amigurumi pattern.
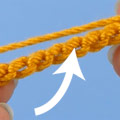
Crochet into the Back Bumps of a Chain
This technique gives you a very neat bottom edge, with a row of Vs across the bottom of your piece.

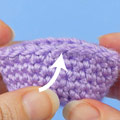
Invisible Finish for Open Edges in Amigurumi
How to make an invisible join at the end of the last round of an open-ended piece in amigurumi.

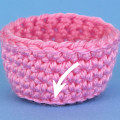
Better Back Loop Only Details
A better way to make back loop only details in amigurumi, eliminating the holes below the BLO stitches.

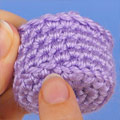
Jogless Back Loop Only Round
A simple modification to minimise the jog between the start and end of a back loop only round.

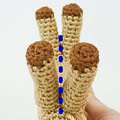
Attaching Legs Evenly on a Standing Amigurumi Animal
Attach legs neatly and evenly so the animal can stand straight, with all four feet touching the ground.

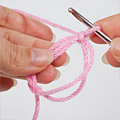
Double Ring
A more secure version of the magic ring for crocheting in the round.


Invisible Increase
Reduce the size of the hole created by your sc increases with this optional technique.

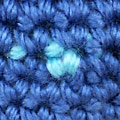
Perfect your Invisible Decreases
Are your invdecs not as ‘invisible’ as advertised? Let’s fix that!

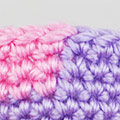
Changing Colour: Managing the Yarns
How to deal with the other yarn when you work with more than one colour.

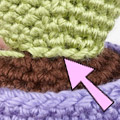
Amigurumi Clean Edge Join
How to make a neat join with a straight, clearly defined edge between two pieces (even if they’re different colours).


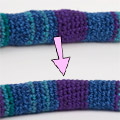
Fix lumpy stuffing
My pinch-and-push technique to make your stuffing more smooth and even.

Back to top
Embellishment
Add features to your amigurumi.
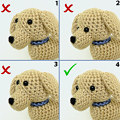
Positioning Amigurumi Eyes
Guidelines for positioning eyes on your amigurumi animals to give a realistic result.

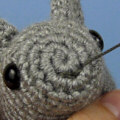
Amigurumi Faces: Secure Stitching
Easily hide the starting and ending tails of your thread and keep your stitches secure when embroidering noses etc onto amigurumi faces.

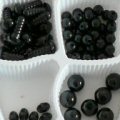
Eyes & Noses
A rundown of options for creating eyes and noses for your amigurumi.

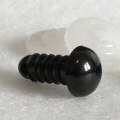
Eye Sources
Online sources for two-part animal eyes (aka
safety eyes or
craft eyes) for amigurumi.

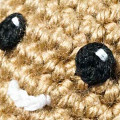
Glinting Eyes for Amigurumi
A technique that brings your amigurumi to life when you don’t use shiny plastic eyes.

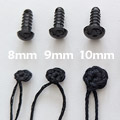
Crocheted Eyes for Amigurumi
Crocheted eyes can be a great child-safe (and pet-safe) alternative to plastic eyes.

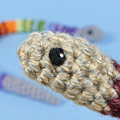
Tiny Yarn Eyes for Amigurumi
An embroidery-free foolproof method for making tiny yarn eyes, spots and dots for amigurumi.

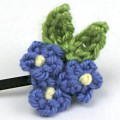
Crocheted Embellishments
How to securely attach multiple embellishments so you can make custom accessories (appliqués, brooches, hair decorations, etc).

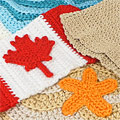
How to Attach Crochet Appliques
How to make strong, decorative yarn-wrapped stems that match the look of your crocheted flowers, so you can display them in a vase or bouquet.


Easy Yarn-Wrapped Stem for Crochet Flowers
How to make strong, decorative yarn-wrapped stems that match the look of your crocheted flowers, so you can display them in a vase or bouquet.


How to Design and Arrange a Crocheted Wreath
A wreath can be a lovely way to display small crocheted amigurumi, appliques and other embellishments, to celebrate an occasion or just to look pretty.

Back to top
Speciality
Advanced or less common techniques.
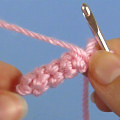
Narrow Pointed Tubes for Amigurumi
My tips for making thin pointy bits on amigurumi, such as spikes, legs, horns and tails.


Yarn Colour Swatch Box
If you have lots of amigurumi yarns, try making a box of yarn swatches so you can see at a glance all the yarns you have available.

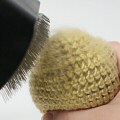
Brushed Amigurumi
How to create a fluffy crocheted animal with regular yarn by brushing the pieces after crocheting.

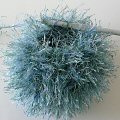
Fuzzy Yarn Tips
Advice on how to crochet amigurumi toys using fuzzy (aka
eyelash or
novelty) yarns.


Resizing Amigurumi
How to adjust a pattern to scale the finished amigurumi up or down in size while keeping it in proportion.


Make ‘Baby’ Amigurumi Animals
How to convert almost any animal pattern to make a baby version – with no pattern modifications.

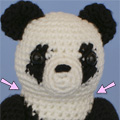
Needlesculpting
Improve the shape of your amigurumi with this finishing technique, using only a yarn needle and length of matching yarn.

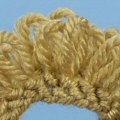
Crochet Loop Stitch
Loop stitch (aka
fur stitch) is a decorative stitch with an added long loop of yarn formed on the back of the work.

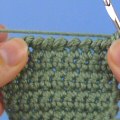
Reverse Single Crochet
Reverse single crochet (aka
crab stitch) makes a decorative twisted cord edging for your crochet.

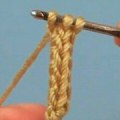
Crocheted i-cord
Non-knitters can create i-cord (typically knitted) with a crochet hook – it’s an easy way to make fine tubes.

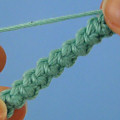
Basic Crochet Cord
This decorative cord makes a strong flattened non-stretchy braid. It’s easy to crochet as it uses only single crochet stitches!

Is something missing? I’m building this page into a reference library of crochet tips and techniques, and I’m always happy to hear your requests and ideas for new tutorials I can make! Let me know if you have requests for additional technique or stitch tutorials.
Try more free PlanetJune content!








Lisa said
I’ve been crocheting for what seems like forever. I just want you to know that I LOVE your tutorials. They have made my amigurumi look so much more professional. I’m even linking your tips from my own blog. On the Dobby Pattern that I wrote, I had to link your Magic Circle tutorial. Everyone needs to know the magic circle. It’s great for starting granny squares as well. Anyways, I just wanted to say thanks. 🙂
Florence said
I love your video tutorials.
I am a beginner in crochet and amigurumi and I am at the point where I needs to join the legs together and continue onto the body. have you done a video on this. I haven’t found anything.
Thanking you in advance
June said
Florence, I post tutorials for general crochet techniques. How to join the legs and continue to the body will vary from pattern to pattern – there are several ways to accomplish this, and none of them is the only correct way! – so the best thing to do is to follow the instructions in your pattern. All PlanetJune patterns that join legs and then continue (and the Girl and Boy patterns in my amigurumi book) give detailed illustrated instructions for how exactly to join the legs for that particular pattern.
Pat said
Hi June. I’ working on a striped hat for a newborn and I want to use the invisible join for the stripes. I’m unsure how to proceed from the first round . Do I work in a spiral until I want to make a color change and then do the invisible bind off or do I do the sl st, ch 1 and end with an invisible bind off? Does it make a difference ? Thanks so much for your hard work in creating these videos. They are enormously helpful to us senior citizens who need to see something many times before we can perform the task.
June said
Pat, please see my reply to ChiWei for my answer to this 🙂
Brianne said
I Absolutely Love to Crochet.! I think this Website is Awesome.! I would have really Appreciated to have this site back when I was learning how to Crochet. It took a few days, but I caught on.! Then after about a week or two, I was A Pro, Lol.. &now, today.. I’m a bit rusty, because it’s been a little while since I’ve Crocheted last. But after going over the different Categories, on this Website.. I’m Pretty Sure my mind has been Refreshed, +Some.!
You are Awesome at Crocheting.! Thank you So Much for taking the time to make this Site.! Not Only does it Teach people, How To.. (The Basics) But also It Teaches, The Many Techniques, & The Many Different things you can Crochet/Idea’s.! (BrainStorm) Then it’s Refreshing for some people as well.! I’m Definitely Now Ready to Start on My Babies Blanky.! &I Actually Observed A few other New Different Thing’s, I’ve Either, Never Tried or Never Even Seen Before..!
*I Absolutely Envy The Techniques.! & Talents.!*
(As Sandi Erwin Commented)
*So EXCITED to Get Started Crocheting Again*
Sandi Erwin said
You are absolutely amazing! Such a great sense of whimsy, and just so creative. I’m in awe. I’m 67 years old, and just now teaching myself to crochet. And, to top that off, I’m very left-handed! I so appreciate your taking the time to help us lefties. I learned to knit right handed because of the person who taught me, but crocheting is so much more creative. Would you believe my goal us just being able to crochet in the round?!!!! I just don’t know where to increase. My brain works best if I watch a video tutorial. To see written instructions is a nightmare, ha!
Again, you are dang amazing – envy your talent.
Pam Cross said
Thank you so much for your clear and simple explanations of how to crochet. Not only am I left handed, but I’m now in my 70’s. How I wish I’d found you years ago. My late Mum tried her hardest to teach me, but as she was right handed, we found it impossible, ( although very funny ). I was determined to learn, and you were my inspiration to give it a go. Now I’m trying all sorts of projects and loving it. Again, many thanks.
Elaine said
Thanks for your information, it helps. I love doing amigurumi but have trouble mostly with putting together and not be so noticeable. Thank again hope there will be other information coming in future.
Andreja said
Dear June
Thank you very much for all the tutorials. They are really easy to folow. I am looking forward to recive the book Idiot’s Guides: Crochet.
Greetings from Slovenia
Andreja
Michelle said
Hi June. I just happened upon your website and am thrilled to have found it. I’ve recently begun crocheting, by using YouTube to teach me from scratch. While there are enormous numbers of brilliant videos to be found on YouTube, I find that with amigurumi, sometimes a more specific tutorial is required. I love your patterns – they are exactly the type of thing i want to make, so I’m happy you also provide tutorials in line with them, so newbies like me can tackle them. Thanks for your excellent site. 🙂
Patsy Dennis said
THANK YOU June for your assistance. Your website is AWESOME. I know I will be using it often.
Sincerely,
Patsy
Jen said
Would love a tutorial on stuffing.
sandy said
I love your photo tutorials as I have a problem learning from a video. Hopefully you will add photo tutorials to the ones that only have video. I am left handed and they really help. I have your Amigurumi book and also the essentials kit, but being able to print out the photo’s larger and in color really help. Thank you soo much..
mazda said
tanks alot.its so beautyfull and graets.tnkyou again
Nancy said
Hello -love the way you explain how to crochet (finally i have managed to crochet something!!
Can you please give me a photo tutorial on double crochet stitch and treble/triple crochet stitch…
Thanks
Dianne said
Could you give some advice on how to create a curve in an item. I’m making a little “thing” with a head that flows into a hat that looks rather elfish – with a definite curve that ends in a crocheted ball tip. (It’s all crochet). The directions just say to continue decreasing, but this doesn’t create the curve that shows in the pic. I’ve tried stuffing it in different ways, but that doesn’t do the trick. HELP!! I’m getting so frustrated, but want this for my grandson who is to arrive soon. Your website and tutorials are SO helpful and you are always my go-to site for anything amigurumi. I’ve learned so much and have become better in making my items because of YOU!! Thanks so much for any help you can give me, and all that you have given to all of us who come here. You deserve a halo and wings, you give so generously. You are my crochet angel!!
Margaret said
I would love to see some various advice like; for beginners- how to hold the yarn in your non-stitching hand and yarn tension, and ergonomics/comfort.
lisa said
Hello,
I have done basic crochet items since a child but never got into reading patterns, just did scarves and such that did the same stitch over and over. I am now trying to advance my abilities but am having a hard time understanding the terminology used in patterns. I would love to see a basic tutorial library that would show how to make each of the stitches. You could add to it as others requested more stitches or offered stitches they have found. You would type in the name and it would be alphabetized by name. It would be a crochet stitch dictionary of sorts. Just a thought.
Also, along this line, how do you make a double crochet loop?
June said
Lisa, if someone offers to pay me to make this complete crochet tutorial library, I’d be happy to do it! Until that day, I’ll continue to make tutorials that support my patterns – I’m afraid I can’t offer free support for other patterns or stitches .
Maria Jose said
Amigurumies are a very recent thing for me, I found out about and started working on them only this year, and I’m HOOKED! They are freaking addictive! Thank you soo much for your tips and help, there are so many things to learn and to do, I want to do everything, but I want to do the best work I can and your site is going on my bookmarks lol.
Charlotte F said
I wanted to know if, for the I-cord bracelet, which I am dieing to make, if you could include a tutorial on how to end it with some pizzazz. I saw a pic of one which was joined at the end with a large button. I’m not that smart to know how to do this myself. Is there a way you can help me. Thank you.
June said
I’ve never made an i-cord bracelet – I suggest you contact the person who made the bracelet in the photo you saw, to ask how she did it!
Megan said
Hello June! Thanks for all your amigurumi help. You are always my number one source! I am following a Japanese pattern (Ami Ami Dogs book) and I am a little confused on how to finish a round. Does the slip knot go into the starting chain of the round, or do you skip the starting chain and slip knot into the first single crochet (but this would shift everything…)? Do you count the chain/slip knot as part of you count? thank you!
June said
I can’t really advise on other people’s patterns, as I may not be giving correct advice: the position of the slip stitch and whether it counts as a stitch is dependent on how your pattern is written; there isn’t a definitive ‘this is always the correct way to do it’ solution. Your book should have a tutorial section that explains these details; if not, I suggest you ask in an appropriate forum on Ravelry 🙂
Lori said
Hi June,
I used your i-cord tutorial and a multi-colored, medium weight yarn (Sugar ‘n Cream Twists) to make a simple bracelet today. I slipped memory wire down into the channel created by the third column of crochet (where the tube folds onto itself) and curled over the wire ends so they wouldn’t snag the yarn. A quick slip stitch through the inside stitches keeps the memory wire inside the i-cord. Voila! Simple, beautiful, ready to wear bracelet that looks deceptively complicated. That’s pretty cool! Thank you so much for the i-cord tutorial!
Regina said
Hello June
My english is not good.I just want to say that they. Instructions very good and thanks for the many suggestions n
J. Niskanen said
I really like the tutorial on the loop stitch and I know how to make a double loop stitch as well but when I used it to make a wig for me doll I noticed the two loops that make up the single crochet part on the back are rather noticeable at the hairline. Should I have folded them in when sewing on the wig or something?
Do you have any other suggestions about doll hair, particularly for boy dolls. I also tried to embroider on a smile but I don’t really know a lot about embroidery. I watched your video with the bunny nose but it was more about starting and stopping rather than what you can do with embroidery and how to go about it. I would particularly like to know how to make a good doll nose that sticks out and know the best way to embroider doll hair for a different straight haired look.
may said
I justed started amigurumi a month ago and love your tutorials.
I’ve used the magic ring several times, and the hole does not stay closed.
It invariably opens enough to leave hole. I’m pretty sure I’m doing it correctly, so I don’t know what’s wrong.
Any help is greatly appreciated.
Lyn said
Is there a pictorial for Amigurumi seamless technique? I find them easier to follow than the video. Thank-you.
Florence said
The Amigurumi essentials kit that you put together is really good and well thought out. The quality of the items in the kit are good. Very useful for beginners like me and also for anyone who want a set of basic and essential tools.
I also enjoy reading your book and learning from your online tutorials.
Thank you 🙂
Patty said
I am lookin for instructions for a chain stitch that includes sc
(you need to chain 12 turn and single c.
with this stitch sc & chain are in one thank you
Melanie said
June:
What techniques do you employ to minimize the size of holes that appear at the point of insertion in regular sc (worked under both loops)?
I have switched to fluffier yarn, (not bulkier, just springier in any weight), moved to a smaller hook, and have tightened my stitches a bit. Each of these changes has helped a little, but I am still not satisfied. As you point out, BLSC & FLSC actually create larger holes than regular (both) sc.
I’ve considered using similarly dyed roving as stuffing, (for example, brown roving in a brown bear, but I’m not sure it would hold up/stay well rounded with use & cleaning), working over an extra strand throughout the piece (tedious and adds very little to the stitches) or even lining the pieces which is really carrying perfectionism a little over the top. The only real success I’ve had is with increasing length of the second loop (one closest to hook) while keeping first (working) loop snug: this adds extra yarn to middle of stitch while keeping the all important top loops tight for next round. But, I’m courting disaster if the Ami is washed or handled a lot since the top loops will get bigger if the tension begins to even out, so this won’t work at all for toys/baby gifts.
But seeing those little windows of white stuffing really does bug me and I keep thinking there must be an elegant answer. Your solutions for other Ami issues are so well thought out and executed, so I’ve climbed the mountain, bowed respectfully with my hands clasped together, and am requesting your wisdom, sensei!
June said
You may be asking for the impossible, Melanie – you’ve already tried my suggestions (as you said, smaller hook and springier yarn)! But, for what it’s worth, here’s my advice:
1. I find that a thick but compressible yarn with the smallest hook possible (without the hook being so small that it starts to split the yarn) give the smallest holes, as the yarn can bounce back to fill the holes once the hook has moved on. Vanna’s Choice is a good example of this, and the absolute best yarn I’ve used to give no holes at all was a roving yarn (unplied) – you can see that my crazy-coloured octopus and squid have no gaps at all between/beneath the stitches; that’s just because the hook was small and the yarn is extremely compressible and springs back to full thickness when released.
2. Use my invinc technique if you want to minimise the extra-large holes caused by increasing.
Tiffany said
After reading your question Melanie and living your frustration first hand as well, I would like to just share what eased my frustration on this same issue. I began to save my yarn trimmings and keep them color separated in their own baggies. Try using your yarn trimmings of the same color yarn your working with as your stuffing. It saves money and although you will end up “double” if not “triple” stuffing your project, you should see the desired results you are looking for. Yes, occasionally the yarn pieces do start to peek through the holes of my work, but it is so simple to just take a crochet needle and poke it back in. I hope this helps! Good luck!
Carla said
I have trouble with front and back post stitch. I’m not always sure which post they talk about on the patterns. Could you add a tutorial on how to do this stitch. Please.
Thank you.
Carla
June said
Will do, Carla – actually, making a post stitches video tutorial was already on my to-do list!
Kim said
Thank you for your wonderful tutorials! My amigurumi look so much better after learning how to do the invisible decrease. Could you please make a video tutorial showing how you make the foundation single crochet (fsc) that you use in your scalloped scarf pattern?
June said
Will do, Kim! It’s actually already on my to-do list 🙂
Mar said
this is so helpful thank you!
i appreciate tutorial about half double crochet, double crochet and triple crochet! =)
Rosalyn said
Looking for definition and directions for a “wa”. I was directed to your blog for help but I cannot find what I’m looking for….please help!
June said
I’m sorry, Rosalyn, but I’ve never heard of a ‘wa’! I suggest you try asking in the Crochet group on Ravelry.
Rosalyn said
Okay, thank you!
Maryann said
I just started crocheting again and stumbled across amigurumi… I am in love but i am really rusty so thank you for having easy to understand instructions.
Heather said
Do you have any tips for attaching beads to a finished piece? I plan to add beads as “sprinkles” on a cupcake I am crocheting, but I am not certain how to sew them on securely and neatly.
June said
Not exactly, Heather – my tutorials are all to support my patterns, and I don’t have any designs that require small beads to be stitched on! But I think you’d find my Amigurumi Faces: Secure Stitching video useful – just substitute sewing thread for the embroidery thread, keep your stitches small, and add a bead on each stitch. The video shows my recommended way to fasten off the thread ends securely – the method is the same whether you’re using beads or not 🙂
Heather said
thank you!
Cara Louise said
A great website, and a great master list June. Thank you so much for sharing all these wonderful tutorials! I am linking back to you in my blog post today at Cara’s Handcrafted Crocheted Ornaments. Love and prayers, Cara Louise
Cheryl said
June can you do a crocodile stitch tutorial??? I am so interested to learn it but no tutorial.I can find makes as much sense as yours do!!!!! Love you!!!! X
Lorene said
I love your tutorials…thanks so much…I am a lefty…sometimes its hard to learn new stitches…I taught myself how to crochet when I was 19 and I am now 65…back then there were no left handed directions…so I propped up a crochet magazine in front of a mirror…and that is how I learned the basic
stitches…what you see in the mirror is left handed…thank heaven for computers where I now can get all kinds of help for lefties…thanks so much for all your help…I just learned to do the lovers knot and I love it…now I am going to try your I-cord…keep up the great work…
Niler Fernandez said
Hermosisimo blog, felicitaciones !!! AMO EL CROCHET ..saludos
Anita Peens said
I am so happy to get hold of a website with all your wonderfull explaining and patterns.
Can you please explain what is Amigurumi crochet is – how do you do it – is it only single crochet?
Do you perhaps have Bavarian crochet?
June said
Anita, amigurumi is typically crocheted all in single crochet, in continuous spiral rounds without joining or turning, with increases and decreases for shaping. If you look at my patterns, they are almost all amigurumi (although I also have an accessories range). Essentially though, amigurumi is just a word to describe crocheted (or knitted) toys – not all patterns are worked in exactly the same way; for example, many Japanese amigurumi patterns are worked in joined rounds, not a continuous spiral.
I create tutorials to accompany my patterns, and I haven’t designed anything using Bavarian crochet (yet!) so I don’t have a tutorial for that technique at present.
Maddy said
Hi! I am new to crocheting and I am picking up some skills quit quickly while others not so much.. I am confused on how you read the amigurumi patterns. I don’t understand how at the end of a round that starts off with 2 chains how you can end with 6 stitches. Thank you! -Maddy:)
June said
Maddy, I expect the pattern tells you to make 6 stitches into the 2nd chain – so that’s where the 6 come from. If you’re having trouble, I suggest you contact the designer of the pattern you’re using to ask for help 🙂
Beth said
A video tutorial showing your ultimate finishing method would really help, if you wouldn’t mind! Haha 🙂 thanks!
June said
No problem, Beth, that’s already on my to-do list! 🙂
teresa nadal said
Quisiera un patron para hacer un delfin, como podr
Tiffany.huynh4 said
Hi June I just found out about amigurumi and I found it very interesting and cute . But I’ve been having some problems finding where the tools are sold in Sydney . And I’m not sure if they sell the tools kit or not and I hope that you could help me . Thanks
Tiffany
June said
Tiffany, I’m not sure what you mean by tools; all you really need to start making amigurumi is a crochet hook and some yarn! I’m sure you can buy those from a craft or wool shop in Sydney.
If you’re talking about my amigurumi tools (Detail Stuffing Tool, my Stitch Markers, Amigurumi Essentials Kit), those are PlanetJune-exclusive products and you can only buy them from my shop (www.planetjune.com/shop) – I do ship worldwide though 🙂
Emmy said
I love all your wonderfully made patterns and you have inspired me to start creating my own patterns! I am wondering if there is a way to make the crochet icord curly? I guess my problem is that I don’t want to do the simple chain then increase back to create squiggly octopus legs, I would like something a lil rounder. Any help would be greatly appreciated! :3
Tonja said
Yes, I would love a Magic Circle Video Tutorial too. Love your site!
Eleanor said
Hi June,
I am a huge fan of your patterns and tutorials! I’d like to make a request for a video tutorial on stuffing amigurumi of various sizes. In principle, stuffing seems straightforward, but I often find after stuffing and closing my pieces that they don’t look at even and polished as your creations. I want to get an idea on the ideal size of stuffing pieces I should be inserting in order to get a very even stuffing of ideal firmness.
Thanks!
Eleanor
PS. What are your favourite yarn suppliers? Do you know any good online suppliers?
Angela Hicks said
Do you have a video showing how to do a left-handed version of a popcorn or bobble stitch? Thanks.
Nana said
Hi! I’d like to know how to make a cone shape like the horn of the unicorn. Thanks
June said
Nana, there isn’t one set formula – it depends on the length and thickness of the horn you want! But, basically, start with very few stitches in your magic ring to make the pointy tip (4 if you can manage it, otherwise no more than 6). Then increase gradually using the same pattern of increases to make the cone smooth and non-lumpy (for example, try increasing by 1 stitch per round, or 1 stitch every other round). The more often you increase, the faster your horn will widen. Continue until the horn is long enough.
Karri said
I would like to see the magic circle, the pictures didn’t get it across to me. I have no idea how to start the circle even with the pictures I tried, twice, got mad and gave up, videos ate better for me, so that would be great if you ate making tutorial videos for watch and learned like me:)
June said
Don’t worry, Karri, that’s right at the top of my to do list!
Anne said
Hello, June.
I have absolutely no crochet experience. What tools do I need to begin creating amigurumi? I see a whale pattern on your site. Is that a good place to start? Any help is appreciated!
SiobhanC said
Hi I have a question on what tools should I buy, because I was going to buy a pattern and I think it may be too hard for somebody who has not learned anything about amigurumi. Do you have any good FREE pattern ideas
-Siobhan
June said
Siobhan, please see my beginner’s advice at www.planetjune.com/beginner 🙂