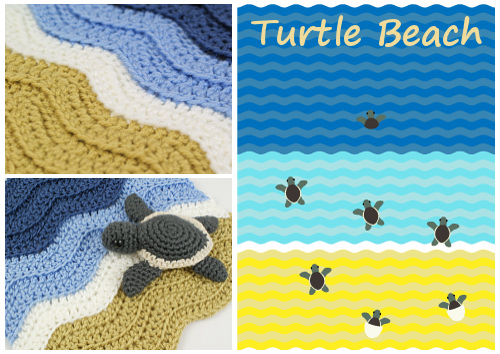
Since I published my Baby Sea Turtle pattern two years ago, several people have attached the turtles to afghan squares or blankets showing the babies hatching on a beach and making their way to the sea. It’s such a sweet idea, as the turtles are quite flat, so they work well as an appliquéd element on a blanket or square.
About a week ago, one of these blankets went viral on Facebook and I’ve consequently had dozens of requests for a beach blanket to attach my baby sea turtles to, so I thought I’d modify my eyelet ripple crochet pattern into a ribbed ripple, to depict wavelets moving towards a beach. And here it is: Turtle Beach!
Note: The Baby Sea Turtle pattern is sold separately, here!
You can stitch Baby Sea Turtles to it, or just use it as a play mat or display background for turtles and other small aquatic amigurumi (like my Baby Cephalopods, perhaps!)
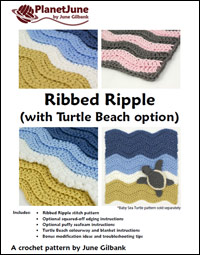
This is a Donationware pattern – my ribbed ripple stitch pattern, the basic pattern for a 10″ Turtle Beach square, and general instructions for making a Turtle Beach blanket are free for you to view on my website (links at the end of this post), but the PDF version includes lots of bonuses:
- Full patterns to make 3ft x 4ft Turtle Beach blankets with either 4 or 5 shades of yarn (yellow, white, and 2 or 3 blues)
The modifications required to turn my Hatching Turtle (from the Baby Sea Turtle Collection pattern) into a Swimming Turtle that looks like the back half of its shell is submerged.(Now included in the Baby Sea Turtle Collection pattern instead.)- Optional edging instructions to square off the rippled top and bottom edges, so you can use this as a beach-themed square in a larger blanket, or turn it into the front of a cushion cover, for example – and there are lots more applications.
- Any-size modification instructions, so you can make any size afghan square, a baby blanket, or even a huge blanket to fit a king-sized bed!
Both versions include the written stitch pattern, a charted stitch diagram, and suggestions for how to make the beach and sea colouring (and how to arrange the turtles).
You can also use the Ribbed Ripple stitch pattern with any other colourway if you don’t want a beachy blanket – a 2-row repeat in 2 or 3 colours would look amazing too. Here’s a small sample showing an alternate colourway and the bonus edging you’ll get in the PDF version:

I hope you’ll enjoy this pattern and that you’ll share what you’ve made with me, on Ravelry and/or on your favourite social media (tag me @PlanetJune to make sure I see it!)
We’re also running a Turtlemania CAL in the PlanetJune group on Ravelry from now until the end of April, and we’d love it if you’d join in if you’re making PlanetJune turtles, a Turtle Beach blanket, and/or a Wavy Stripes blanket from the Ribbed Ripple pattern!
Go to the free Ribbed Ripple stitch pattern >>


cindy bakenhester said
ive always wanted to make this. thanks
Cristina said
“This is a PlanetJune original crochet pattern. Feel free to use items made from this pattern however you wish, but I
June said
Don’t worry, Cristina – I don’t claim to have invented either the concept of a beach-and-sea blanket, or a blanket with turtle appliqu
Theresa said
What a brilliant idea and a beautiful set of patterns.
Judy Carlson said
So cute! I made a small square of the Ribbed Ripple Stitch and it works up really nicely and feels good! Really easy to memorize and go!
Jenni said
I’m having a problem with this one; when I get to the end, instead of having three stitches left over, I have four. How do I fix this?
Jenni said
Still doesn’t work for me 🙁 And on my second row, I’m one short. What’s going on?
June said
Jenni, as per my previous reply, it sounds like you’ve misread the instructions for the last part of Row 1 and haven’t made enough stitches (there should be 5 more stitches after the end of the final repeat). If you’re continuing onto Row 2 without fixing this mistake, that would explain why you’re a stitch short in Row 2. Unravel back to the end of the last repeat of Row 1, and follow the pattern carefully; it should all work out from there!
Jenni said
Got it, thank you!
June said
Jenni, if by ‘the end’ you mean the end of the last repeat, you should actually have 4 chains left at this point, so it doesn’t sound like you’ve made a mistake up to here! You just need to read the end of Row 1 carefully so you make the final 5 stitches into those remaining 4 chains to end the row correctly.