PlanetJune Craft Blog
Latest news and updates from June

PlanetJune Blog: Latest News, Patterns and Tutorials

Cape Town wildlife II

This is the second post in my monthly series on the fascinating nature I encounter here in South Africa.

Fair warning: if you hate all insects and reptiles, you might want to close this window and not read the rest of my post.

Although I already have some interesting birds lined up for my next post, I’m going to focus today on cold-blooded creatures I’ve spotted in my new garden. Don’t worry, there are no spiders or snakes in this post, I promise! But I’d like to share a few very cool and unusual creatures with you, if you’re up for it.

Ready to continue?

First up, something very exciting to me: geckos! Of course, I have a crocheted one already, but that’s not the same as this:

left-toed gecko
I think this is a Marbled Leaf-toed Gecko. They are very small; only about 3 or 4 inches long. We have at least 3 of them (and probably more) living at the bottom of our garden. They eat lots of small insects, so I’m very happy to have them around! This one is a bit camouflaged hiding amongst the fallen leaves in the above photo, but it’s the best I’ve been able to get so far – they usually scuttle for cover before I can get into range, so we hear them more than we see them.

And next… you won’t believe this one…

praying mantis

A Praying Mantis!! Amazing! (She’s on the outside of the window, by the way, or I might be a little less excited and a little more freaked out.) She’s quite small, as mantids go; only about 2 or 3 inches long, and she mostly just sits around on the palm fronds outside our window, like this:

praying mantis

One day we saw her devour, over several hours, a baby gecko almost as long as she is – that was fascinatingly horrifying to see, but we couldn’t stop checking back to see how much of the poor gecko was left. I did take a photo, but you mustn’t look unless you’re sure you want to… Sure? Okay, but don’t say I didn’t warn you: praying mantis eating.

And finally, when we first moved in, I wondered what these disgusting-looking blobs were up under the eaves of our roof:

garden acraea chrysalises

The answer is quite magical: it turns out we have a butterfly pupation station on one wall of our house! These spiky-looking Garden Acraea (acraea horta) caterpillars (below, left) climb up the wall to the safety of the eaves, where they pupate and develop a patterned chrysalis (below, right) while they undergo their metamorphosis:

garden acraea caterpillar and chrysalis

After a time, they abandon their cocoons and emerge as beautiful butterflies:

garden acraea butterfly

Apparently these Garden Acraea are one of the most common butterflies in Cape Town, but that doesn’t make it any less special for me to be able to watch their transformation in my own garden! In the photo below, you can see that their top wings are transparent and only the lower set have the spotted patterning – cool, huh? On my to do list: find a native butterfly-friendly plant so we can encourage more pretty butterflies to visit.

garden acraea butterfly

I hope this post hasn’t made you too squeamish! I just thought these wild visitors to my garden were too interesting to ignore. I’ll be back to the pretty warm-blooded animals and birds for my next wildlife report, I promise πŸ™‚

Comments (11)

inspiration/influence vs copying: drawing the line

This isn’t the post I wanted to write today, but thanks to recent events, I’d like to discuss the difference between inspiration/influence and copying when creating designs (I’m talking specifically about my crochet patterns, but the same applies to any designer in any field, whether they produce patterns or sell finished items based on their designs).

Many times in my almost 5 years as an amigurumi designer, I’ve experienced other ‘designers’ copying my designs and selling the resulting patterns. I’m not talking about the outright theft where a person buys a pattern, copies it, and then sells it as their own work: my experience is a less obvious, less tangible theft, where people look at my photos and replicate my design without ever having seen the pattern.

For those designers, I’m giving you the benefit of the doubt by assuming that you may not yet realise you’ve done anything wrong, and I hope that this blog post will help to clarify the distinction between inspiration/influence (acceptable) and copying (not acceptable).

My design process

To start, I’ll talk you through the design process of one of my most distinctive designs: my Pteranodon (a type of Pterosaur). I spent many hours doing research before I could begin to create my design:
(Image attribution: all images below are links to the sites I found them on.)

  1. I read up all about Pterosaurs and viewed photos of skeletons and pictures of artist’s renditions.
  2. I looked at commercially-produced Pteranodon/Pterosaur/Pterodactyl toys, both plush and plastic/rubber type.
  3. I looked for existing knit and crochet Pterosaur patterns, so I could make sure my design would be original.
  4. I checked to see if there are any Pterosaurs in popular culture (books, movies, TV shows, etc) that may influence people’s perceptions.
  5. Now, armed with all my research, I could begin my design process. I figured out what, to me, are the essential characteristics for my design, and what I could omit and still have it be recognisably a Pteranodon.
  6. I interpreted those features to create shapes and an overall look that would fit in with my ‘PlanetJune’ style.
  7. I worked out elegant methods to build those features into an amigurumi design.
  8. I created a sketch of what I envisioned my final Pteranodon would look like.

amigurumi pteranodon: from sketch to design

Finally, after going through all those steps, I could pick up my crochet hook and begin to crochet my sample and to create my pattern. As you can see from my sketch (sorry about the quality, it was never intended for anyone other than me to see!), 90% of the design was created before I ever picked up a hook – I just refined the proportions while I was crocheting to make it more elegant.

Two Scenarios (Designers A and B)

Now, let’s say that a couple of fellow designers (for the sake of simplicity in writing I’ll assume both are female) see my dinosaur patterns and are inspired to create their own.
Is this acceptable? YES, of course. I am not the first person to crochet a dinosaur, and I wouldn’t want to be the last.

Designer A does some research of her own and creates her own interpretation of a Pterosaur in her own design style. Maybe it’s crocheted in more than one colour; maybe it has an open beak; maybe it has legs; maybe its proportions are more realistic (or more cute’n’cuddly) than mine; maybe it has embroidered detail or crocheted textures; maybe it has felt accessories glued on; maybe it has big cartoon eyes, or any of a million other differences that make it her own design. Yes, it’s a Pterosaur, but it’s clearly a ‘Designer A Pterosaur’ – it fits in with the style of her other designs, and naturally any resemblance to mine will be based on the fact that we both used a real animal as our inspiration. Designer A decides to sell her Pterosaur pattern.
Is this acceptable? YES, unquestionably. I’m happy if I can inspire another designer in this way.

Designer B looks at my Pterosaur, figures out what crochet shapes and stitches she would need to replicate it, and makes a close copy of her own.
Is this acceptable? Let’s say MAYBE. I’m not thrilled, but if people have the talent to replicate my work without purchasing my pattern, for their own personal use, I can’t stop them. It happens. I’ll survive. Those people would never have bought my pattern anyway, so I’m not out of any money as a result.

Designer B now decides to sell the pattern for ‘her’ Pterosaur.
Is this acceptable? NO, absolutely not.

What’s the distinction between A and B selling their pattern? Let me explain:

  • Designer B has copied my design. No, she hasn’t copied my pattern, but those design elements that I created in my research and development process listed above produced a design that is my artistic creation and my intellectual property; it’s my interpretation of a Pterosaur. She has directly copied that without going through any of the work I went through to create it in the first place. If you show a picture of my Pterosaur to anyone who is familiar with the field of amigurumi, they’ll know it’s mine and will recognise my style.
  • Designer B is harming my income. By replicating my design style, she has cut into my market: anyone who wanted to buy a pattern for a Pterosaur and likes my style now has two choices for who to buy from. If she decides to sell at a lower price point, how many unwitting Etsy customers will choose my pattern over an almost-identical cheaper version? Designer A’s Pterosaur does not harm my income: a customer will either like my style or hers, or both, and will buy the one they like best, or both. But nobody would choose to buy two patterns for practically the same design.

I’d like to make it clear that although events of this week have precipitated this post (and thank you to everyone who notified me of the copying in question), my intent is not to single out any one person – I’ve experienced copycats for years now, but I’m intentionally not showing any specific examples. It is possible that some cases of ‘Designer B’ that I have experienced are purely coincidental, but the more identical design elements that exist between the two patterns, the less likely it is that we reached the same point independently.

In Conclusion…

Recreating an existing design serves only one person: the person who has recreated it. Pattern buyers gain nothing from the addition of a second copy of the design, and the original designer only loses by the existence of the copy. If you’re looking to build a career (or even a hobby business), then getting yourself known as a copycat is not the best long-term strategy.

If you instead put the effort into creating your own style and your own original designs, you can build a loyal following and, in time, become known and respected as an artist and a designer. It’s not the easiest path, but it is, ultimately, the most rewarding.

Comments (40)

book review: Crochet Compendium

Let’s get this out of the way first: I was given a copy of this book to review. But I’m not being compensated for this review in any other way, and the following is based on my honest opinions!

Overview

Annie’s Attic say, about their new book Crochet Compendium: The Ultimate Collection of Crochet Techniques:

We’ve combined our best-selling technique books into the ultimate reference book of crochet techniques – great for newcomers and expert crocheters too!


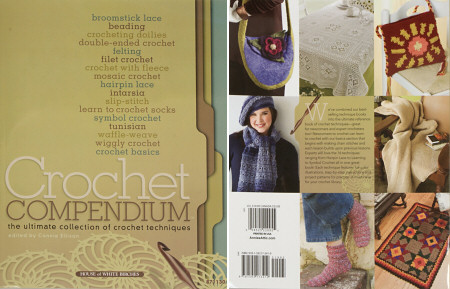
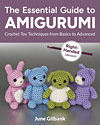
Crochet Compendium front and back covers

While I’m not sure that this is the ultimate reference book (it’s hard to imagine any book that could cover every crochet technique, and especially one with less than 140 pages!), what this book does include is a collection of a variety of lesser-known crochet techniques, some of which, I was happy to see, were brand new to me.

Each technique is covered with between 1 and 10 pages of illustrated instructions, followed by one or two projects using the technique. In all, this book includes 16 techniques (plus the ubiquitous crochet basics) and 20 projects. It provides an overview of many crochet techniques that you may not be familiar with, including:

  • beaded crochet
  • broomstick lace
  • doilies
  • double-ended crochet
  • felting, filet crochet
  • crocheting with fleece
  • mosaic crochet
  • hairpin lace
  • intarsia
  • slip-stitch crochet
  • crocheting socks
  • symbol crochet
  • Tunisian crochet
  • waffle-weave
  • wiggly crochet

Annie’s Attic previously published each of these techniques as separate booklets, and in this book you get all the instructions from those booklets (but fewer patterns for each than if you bought the individual booklets), so it’s a very good deal if you’re interested in learning new techniques – you get a lot of value for money here.


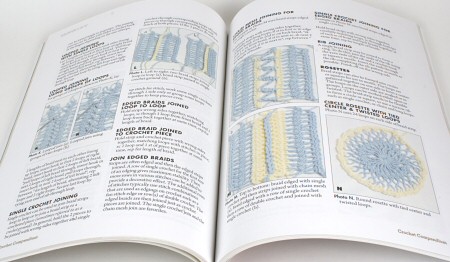
Part of the extensive hairpin lace instructions

Tucked away at the very end of the book, there’s a 31-page section on crochet basics, which seems like a strange place to hide it, as it’s not referenced anywhere else in the book. Most of this is the general “how to sc”, “how to dc” etc, but the final few pages include tables of standard abbreviations, metric conversions and international hook size conversions (and knitting needles too – oops!), skill levels, and yarn weights – this is actually useful reference information to keep handy, as now I won’t need to keep looking it up at yarnstandards.com! The final page is a one-page stitch guide covering abbreviations (again), international stitch conversions, and basic stitch instructions (again), but it’s in a nice single-page format.

The various techniques require and provide differing amounts of well-illustrated instruction before jumping into the project(s): crochet with fleece, for example, needs no more than a page on how to cut and join fleece strips to make your ‘yarn’, while hairpin lace includes 10 pages of braid variations and methods for joining them together.

My Experience

For my review, I thought I’d trying jumping in as a beginner to see how I’d cope with a totally new (to me) technique: Mosaic Crochet. I started out like a good little student, by reading the 4 pages of provided instructions. It seems very thorough, but I wasn’t at all clear what the fabric would look like: there are no photos of the wrong side of the fabric in either the technique or project instructions. I assumed (as the provided project is a scarf) that this technique produces a double-sided fabric – it would be strange to have a scarf that you have to keep flipping over to make sure that only the ‘right’ side shows! – but I thought from what I’d read that there would be strands of chains visible on the back of the project… What would that look like? Why hasn’t the book shown me, so I can tell if I’m doing it right..?!

Clearly, I was overthinking: time to jump in and start the project so I could see how it really works! I decided to make a swatch sized such that I could turn it into a slip case for my lifeline (aka my BlackBerry). I chose two blackberry-ish shades of Patons Grace and a C hook. I followed the ‘charts with repeats’ sample on p50-51, using 2 repeats instead of 3 to fit the width of my BlackBerry.


The pattern I followed for my sample

Mosaic crochet is not a simple technique to learn. The chart looks very easy to follow, but each square represents two rows, not one, and you have to either sc, dc, or chain into/over each stitch, depending on both the colour of the stitch and the colour of the stitch in the row below – so there’s a lot to get your head around. Luckily, the sample includes both the chart and row by row written instructions, so you can check you’ve understood the ‘rules’ when interpreting the chart.

By Row 5, I was starting to think I’d got the hang of it, but then the written instructions disagreed with what I understood from the chart. I followed my instincts and went with my interpretation of the chart, and it turns out that the written instructions were wrong (it said “sc in each of next 6 sts” instead of “dc, sc in next 4 st, dc”). After that, I figured I had the technique down and followed the chart up to the top (Row 14), ignoring the text. Luckily I checked the text again as I finished my first repeat – it turns out that none of the included charts include any rows that are all one solid colour (Rows 15-16 in this case), so you do have to follow the written pattern instructions as well as the chart.


Finished sample (right side)

I had the technique and the stitch pattern figured out by this point, and so I could complete the case without any more problems. (To make my sample rectangle into a case, I just folded the top down by a small amount and the bottom up to meet it, and then single crocheted the front and back together along each side.)


My BlackBerry case

I’m really happy to have learnt the technique (although I do feel that I could have explained it more clearly than these instructions did). The result looks really cool, don’t you think? I love the patterning. And FYI, the reverse side looks like this (below): not the same as the front, but the chains look like slight wavy bumps against the stripes, so it forms its own interesting pattern.


Mosaic crochet (wrong side)

Peeves

In my cursory glance through the book, I did spot a couple of other errors (e.g. the double-ended crochet instructions had two photos showing the first vertical bar, where one should have shown the first horizontal bar). This was surprising as the book is excerpted from other, previously-published books, so I’d have thought the instructions would have gone through 2 technical editing processes and be super-accurate as a result. [If any publishers are reading this, I’m a qualified and thorough technical editor and an experienced crocheter and I’d love to improve your crochet books for you!]

This book feels disjointed – it is a compilation, and that’s very obvious: the style is varied throughout (colour or black and white photography and/or dimensional or flat illustrations), and no chapter references any other. In some cases one chapter even contradicts another, e.g. US slip stitch is given as equivalent to UK slip stitch (p86) and to UK single crochet (p134). In practice, though, you probably wouldn’t even notice these inconsistencies, as you’d only be working with one technique/chapter at a time. The wealth of information included here definitely makes up for the lack of cohesion.

Final Thoughts

If you view Crochet Compendium as a collection of booklets in one convenient binding, you won’t be disappointed. I really enjoyed browsing the variety of lesser-known techniques that are included, and I’ll definitely return to this book in future; I can tell that it’s going to be a useful title to add to my reference collection.

For non-crocheters, I wouldn’t recommend this as your learn-to-crochet book, as the crochet basics section is instruction only: there are no basic projects to practice on. But if you’ve conquered amigurumi and granny squares and are wondering where to go from here, Crochet Compendium: The Ultimate Collection of Crochet Techniques would be a great book to whet your appetite for some very interesting crochet techniques – I’m sure you’ll find something that’s new to you inside!

Comments (7)

how to make a seamless join in amigurumi

Link easily to this tutorial in your patterns: www.planetjune.com/join

After winning the 2011 Flamie Award for Best Crochet Video (Amateur), I feel a little pressure to make my next videos even better, to live up to that honour, especially as I only started the channel last year and have very few videos as yet. So, from now on, my crochet tutorial videos will all be in HD quality, and I hope you’ll be able to see my demonstrations even more clearly. My first HD video is below; I hope you’ll leave me a comment if you liked it!

Amigurumi Seamless Join

Stitching the pieces of an amigurumi together has always been my least favourite part of making amigurumi, as it’s so time-consuming – you have to be extremely neat and careful to stop your stitches from showing and spoiling the look of the ami. That irk led me to develop and refine this new method that will easily create a practically seamless join between your pieces.

amigurumi seamless join by planetjune

My Amigurumi Seamless Join technique allows you to create an almost invisible join in amigurumi when you stitch an open-ended piece to a closed piece. This is the type of join you’ll use for almost all amigurumi joining, for example: joining a muzzle and ears to a head; or joining a head, legs, and a tail to a body. (The only time you can’t use this method is when a pattern calls for you to join two open pieces together; in that case, whipstitching makes the best join.)

I hope you’ll watch the video and then give my Seamless Join method a try on your next amigurumi: I guarantee that your joins will look smoother and neater, with much less time and effort on your part.

Amigurumi Seamless Join (right-handed)

Click to watch this video on YouTube.

Amigurumi Seamless Join (left-handed)

Click to watch this video on YouTube.

Note: The videos may look a little small embedded in the blog: if so, you can fullscreen them or click through to YouTube to watch them full-sized πŸ™‚

If you enjoy my crochet tutorial videos, please help to spread the word about them, and/or subscribe to the PlanetJune YouTube channel.

crocheted dinosaurs by planetjune

And, in case you missed my announcement last week, the crochet pattern for the Dimetrodon dino featured in this video is now available in my shop, both individually, and as part of my new pattern set: Dinosaurs Set 3.


The Essential Guide to Amigurumi book by June Gilbank

Loved this tutorial? I have so many more amigurumi tips and tricks to share with you!

Boost your amigurumi skills with my latest book, The Essential Guide to Amigurumi, your comprehensive guide to amigurumi techniques and tips.


Do you find my tutorials helpful? If so, please consider making a contribution towards my time so I can continue to create clear and concise tutorials for you:

Thank you so much for your support! Now click below for loads more crochet video and photo tutorials (and do let me know what else you’d like me to cover in future tutorials…)

See more helpful PlanetJune crochet tips and technique tutorials

Comments (37)

Review and Win monthly contest

Every month, I draw a winner from all the reviews received in my shop that month, to receive a free pattern of their choice. I thought the contest was worth a post of its own this month, as the number of new reviews has been dropping off lately. I only had 5 reviews in June, and while that means my reviewers had excellent odds of winning, I’d really like to see more people adding their reviews.

The June ‘Review and Win’ contest winner is Heather L, with her review of my Stegosaurus pattern:

amigurumi stegosaurus by planetjune

This is a super cute little dino. Don’t let all the pieces concern you. The pattern is well written, and finishing instructions make it a snap to put together. I’ve made it twice so far, and I expect I will be making more.

Congratulations, Heather – I’ll email you to find out which pattern you’d like as your prize!

I hope you’ll all visit my shop and add reviews for any of my patterns that you’ve enjoyed, and continue to do so as and when you make more of my designs. Reviews are really useful to help other customers make an informed decision as to whether to buy my patterns.

Adding reviews is a great way to support my business without any cost to yourself except a couple of minutes of your time. And, of course, you may win a free pattern too πŸ˜‰

Thanks so much!

Comments (2)

Dinosaurs… Set 3!

I’m very excited to finally be able to publish what will (probably) be my final set of Dinosaur crochet patterns! I crocheted them before I left Canada, but problems with editing on my netbook meant that I couldn’t do the patterns justice, so I made the frustrating decition to wait for my stuff to arrive so I could publish them to my usual standard with my desktop PC.

With each new set it gets harder to maintain the aesthetic of the previous patterns while coming up with totally new designs, but I think I’ve risen to that challenge – I’ve developed new shaping techniques for each of these dinos, that I haven’t used in any patterns before, to give them distinctive, unique shapes, but they still use the same yarn (Vanna’s Choice), eyes, and overall size as the previous dinos, so it’s pretty clear that they inhabit the same prehistoric amigurumi universe…

First we had Dinosaurs Set 1 (L-R: Brachiosaurus, Stegosaurus, Triceratops):
crocheted dinosaurs by planetjune

Then Dinosaurs Set 2 (L-R: Pteranodon, Plesiosaurus, Tyrannosaurus Rex):
crocheted dinosaurs by planetjune

And now, let me introduce you to Dinosaurs Set 3 (L-R: Dimetrodon, Parasaurolophus, Ankylosaurus):
crocheted dinosaurs by planetjune
Click to see them larger!

Meet The Dinosaurs

amigurumi parasaurolophus by planetjune

Parasaurolophus was a duck-billed dinosaur with a distinctive long crest on the back of his head. He was a 40 ft long herbivore and lived in the Cretaceous period. I think that Parasaurolophus may be my favourite dinosaur – I love that head shape!

amigurumi dimetrodon by planetjune

Dimetrodon was a small, sail-backed carnivore with legs that sprawled out to the sides. He was only about 13 ft long, but was a top predator in his time (the Permian period) – and that huge spiny sail must have helped with scaring away potential threats! For the sake of scientific accuracy, I should mention here that, just like Plesiosaurs and Pterosaurs, Dimetrodon also wasn’t technically a dinosaur. In Dimetrodon’s case, he actually lived before the time of the true dinosaurs, and he’s properly called a pelycosaur. And that’s the end of today’s prehistory lesson πŸ™‚

amigurumi ankylosaurus by planetjune

Ankylosaurus was probably the best-protected dinosaur ever to have lived: he had a heavily armoured back, a row of spikes along each side, and a club-like tail. Despite this fearsome appearance, he was a herbivore. He was about 30 ft long and lived in the Cretaceous period. Definitely a fun one to design with all those textural features!

My dinosaurs are consistent best-sellers in my shop, and I hope I’ll have continued the trend with this final set! As always, you can buy the three patterns individually in the shop, or enjoy the savings when you buy the complete Set 3.

Direct links to buy the patterns from my shop:

[Although I do intend this to be my final set of dino patterns, if I’ve missed your favourite and it doesn’t look too similar to one of my existing designs, let me know the name(s) of the dino(s) and I’ll keep a note of them. If this set is as popular as the other two and I receive requests for another 3 interesting-looking dinos, I’d consider creating a 4th set, but otherwise I’m content to leave it at this trio of trios.]

crocheted dinosaurs by planetjune
Dinos galore! RAWR!

Comments (15)

(belated) 5th blogiversary

Better late than never: my blogiversary was a over week ago and I’ve been so busy and unwell that I totally missed it! Still, I want to note this milestone: I can’t believe that I’ve been blogging for 5 years now. I owe so much to this blog; I wouldn’t have my crafty career without it…

Year 5 Review

This was a year of turmoil. Between finding out we’d be moving to South Africa, preparing to move, 2 months of bronchitis, selling the house, actually moving, living out of a suitcase in temporary accommodation for months, and a second bout of bronchitis, I’ve been forced to spend far less time on PlanetJune than I would have liked.

Despite all that, I have had some accomplishments in Year 5:

  • I designed and published 16 new amigurumi crochet patterns.
  • PlanetJune year 5 amigurumi patterns

  • I launched the PlanetJune Accessories pattern range with 6 published designs.
  • PlanetJune year 5 accessories patterns

  • My first crochet book, The Complete Idiot’s Guide to Amigurumi, was published and very well received (4.9 out of 5 stars on amazon!)
  • The Complete Idiot's Guide to Amigurumi by June Gilbank

  • My kingfisher was published in Inside Crochet magazine in the UK, and, in the US, Create and Decorate magazine ran a feature on PlanetJune.
  • PlanetJune year 5 magazines

  • I completed two major art projects: my punchneedle-embroidered 3D globe, and an amigurumi Reepicheep (from The Chronicles of Narnia), who won the Craftster Fantasy Crochet Challenge.
  • PlanetJune year 5 art projects

  • I started the PlanetJune YouTube channel to create high quality crochet tutorial videos, and it won the Flamie award for Best Crochet Video (Amateur)!
  • I also received Flamie nominations for Best Crochet Blog (for this blog) and Best Instructional/Technical Crochet Book (for The Complete Idiot’s Guide to Amigurumi).
  • Hmmm, it doesn’t seem so bad when I look at my work all together like this… Imagine what I could do without sickness and international moves occupying all my time!

    Goal Review

    Last year, I had grand plans for Year 5:

    My goal for the coming year is to build my business to the point where I no longer have that niggling feeling that I should really go and get myself a β€˜real’ job – a feeling that comes down to the grim reality of earning enough money to continue to support myself.

    …and I’d taken significant steps along that road before I hit the major roadblock of moving to another continent and having months and months (still in process) with very little time to devote to the business.

    Here’s a very clear illustration of that: of my 22 new patterns this year, 16 were released in the half-year before Christmas, and only 6 in the half-year since then! But, looking on the bright side, that was a pretty good record until my life took its detour, so I know I can get back to being prolific once things settle down here.

    What’s Next?

    For the upcoming year, I’m not going to set any real goals, as so much is still unknown at this point. I need to figure out the logistics of operating from here and how to get myself back on track under such different conditions. It’s certainly going to be a challenge! For starters, it may be another month or more before I can get internet hooked up at our new house, and that obviously makes a huge difference to how I operate.

    I need to prioritise getting settled into my new life and getting my health back. Only then can I really focus on making PlanetJune everything I know it could be if I only had the time… It will happen – I am determined to keep moving forward, no matter how hard this road is to travel. Losing the past few months (and maybe one more) isn’t going to ruin me. My ideas aren’t going anywhere – I just have to have the patience to keep them on the back burner until I have time to fulfill them to the standard I expect from myself.

    Thanks!

    I just wanted to add a thank you to you, my readers, for all your support and for following on my journey. This has been the hardest and loneliest time of my entire life, and knowing that you’re out there means a lot to me. I’d never have made it this far without you!

    Now, onto Year 6…

Comments (18)

home at last!

After a very long 10 weeks of being without any of our stuff, the delivery team arrived yesterday with our shipping container! We spent most of the day re-assembling pieces of our IKEA furniture and discovering long-lost treasures in some of the many boxes we now have stacked up all over the house. The day ended when we went back to our flat to collect Maui and bring him to his new home πŸ™‚

Here’s my craft room this morning:

new craft room - boxes galore
Yay – a whole room full of my craft supplies! It’s going to take some effort to turn this into a functional craft room though…

I also just realised that with all this moving craziness, I missed my 5th blogiversary last week. Let’s pretend that didn’t happen, and I’ll write my end of year roundup post later today – I’ll need to take a break from unpacking at some point and this will be a good reason πŸ˜‰

There’s a lot more work ahead of us to get everything sorted out, but I’m just so happy and relieved that we finally have a home again!

Comments (1)

    navigation: arrow

    buy crochet patterns and accessories from my online store

    'Everyday Crochet' and 'The Essential Guide to Amigurumi' crochet books by June Gilbank

    Crochet video tutorials and step-by-step photo tutorials

    Free PlanetJune crochet patterns

    Frequently Asked Questions

    navigation: arrow

    Punchneedle Embroidery information, ebook & patterns

    Papercraft ebook & tutorials

    Free PlanetJune craft projects & tutorials

    Ravellenic Games: Team PlanetJune
    PlanetJune Reindeer Games
    PlanetJune Temperature Snake CAL

    June Gilbank

    Hi, I'm June. Welcome to my world of nature-inspired crochet and crafting. I hope you enjoy your visit!

    If you'd like to get in touch, you can contact me here.
    crocheted Canadian flag by PlanetJune
    Proudly made in Canada!
    A fanned-out pile of the books Everyday Crochet and The Essential Guide to Amigurumi, with text 'The answers to all your crochet questions at your fingertips - find out more'

    Want to say thanks? You can send me money in seconds at paypal.me/planetjune (over $20) or paypal.me/planetjune2 (under $20) or send me a donation through my shop.

    Or simply click through from my links before you shop at Amazon, Etsy, KnitPicks, LoveCrafts and more, and I'll make a small commission on your purchase, at no cost to you! Start here:

    ♥ Support PlanetJune ♥

    Tip: This link is also in the footer of every page!

    Thank you so much for your support!