PlanetJune Craft Blog
Latest news and updates from June

PlanetJune Blog: Latest News, Patterns and Tutorials

Crochet Pattern Re-releases

When I launched my new PlanetJune logo last March, I took the opportunity to completely redesign my pattern stylesheet at the same time. You may have noticed that all my patterns released since then have a subtly different look from my older designs.

old PlanetJune pattern layout

My game plan is to convert my entire back catalogue into the new format, and, at the same time, add any tips and clarifications that I think would improve the patterns – after all, I’ve come a long way in my 6 years of pattern design, and I’d like my older patterns to include my new-found wisdom!

new PlanetJune pattern layout
An easy way to tell old from new – the new editions have my yarn planet logo at the top of every page.

The improvements are all functional, to make my patterns easier to use, easier to print, and easier to understand. Here are the improvements you’ll see in the re-releases (and all new patterns since April):

Design and Layout:

  • The layout has much less wasted space, so each pattern is an average of 1 page shorter, saving on paper if you decide to print them.
  • My new page size is designed to print perfectly onto both letter and A4 sized paper.
  • I’ve updated the font to be cleaner and more readable, especially if you’re reading on-screen.
  • The design is intentionally clear and simple so you won’t waste ink printing decorative borders, coloured backgrounds, etc.

Terminology:

  • Abbreviations list gives UK/Aus equivalents for all stitches used, to prevent confusion.
  • Invisible decrease: all patterns will now say invdec instead of sc2tog (except in places where a sc2tog stitch is specifically needed).

Size: The finished size will now be included in the patterns.

Added tips and links to tutorials: I’ll link to my relevant tutorials in any pattern that would benefit from a specific technique, e.g. any patterns with colour changes will link to that tutorial.

Clarifications: Any areas in the patterns that I’ve had several questions about over the years will be revised to include additional explanations. I’ll also re-edit all patterns to check for anything else that can be clarified.

Improved photos: Especially in the older 2007 patterns, some of the photos aren’t up to my current standards. I’ll be reprocessing those to be brighter and clearer.

Get the re-releases – free!

Of course, if you’ve happily used the existing versions and had no problems, you won’t need the updates, but I’ll offer them to all my customers, so you can save/print a copy of the latest version.

As I have 124 patterns to reformat, the thought of trying to create all those new editions for one grand re-release day was hugely intimidating. Instead, I’ll be re-releasing them in manageable batches over the coming month, starting next week. Look out for my announcements, as, for 2 weeks following each batch announcement, you’ll be able to download the new version of any of the patterns you’ve already purchased, at no extra charge, directly from your PlanetJune account!

If you’d like notification reminders, as well as posting about them here, I’ll always announce them in my monthly newsletter. And, to make sure you don’t miss out, I’ve also set up a special mailing list: Crochet Pattern Updates. This list is just for pattern re-release announcements. If you sign up for it, you’ll get a short email notification every time a new batch of patterns has been re-released (no more than one or two emails per month until the reformat project is complete).

Once all 124 patterns have been reformatted, there’ll be another 2 week window for you to download all your previously purchased PlanetJune patterns in the new format, so you’ll be able to download any you missed. (That window will also be announced in both newsletters.)

* * *

This is a big project for me and it’ll take many more months to complete, but re-editing all my patterns has been one of my long-term goals – it was just waiting for my logo and new stylesheet to be completed so I could make all the updates for each pattern at once. I’ve been working steadily through the list whenever I’ve had a moment over the past few months, and, although I still have a long way to go, I think it’s well worth my time to revisit all 124 of the pre-logo patterns to make them more useable, so they’ll hopefully answer any future customers’ questions before they’re asked!

Comments (7)

PlanetJune at Ralph Lauren!

Today I have an amazing PlanetJune story for you: how my Fruit Bat design ended up in the window display of the Ralph Lauren Children’s Store on Madison Avenue, New York!

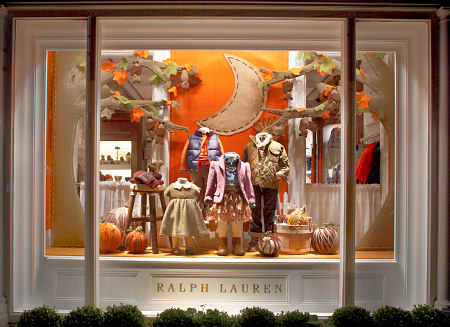
Here’s the Ralph Lauren window. It’s a beautiful display, combining seasonal elements (autumn leaves, pumpkins) with a handmade crafty theme (stitched details on the trees and moon, yarn-wrapped pumpkins) and their fall childrenswear range. And the perfect finishing touch is the 8 PlanetJune amigurumi fruit bats hanging from the trees:

Ralph Lauren Children's Store window with PlanetJune Fruit Bats
Can you see the bats yet?

I was approached by Ralph Lauren to make some of my fruit bats for their window. As you probably know, I don’t accept commissions for finished items any more, instead pointing enquirers in the direction of my Sellers’ List, which lists the shops of my customers who sell items made from my patterns. (I love being able to help out my customers in this way.)

In this case, with multiple bats needed and a fairly tight timeframe, I decided to go one step further and recommended a specific seller for this commission. Most of my sellers are active members of my Ravelry group, and post about how they are doing in the selling PlanetJune-designed items thread. As I read all the messages in my group, I get a good feel for how busy each of them is, and who might currently have the time and inclination to take on a large commission like this.

Note: I never make any money from these commissions – connecting buyers and sellers is just a service I offer my customers and people looking for handmade amigurumi.

So, I put Monica from Magical Amigurumi in touch with the Ralph Lauren people, they sorted out all the details of their transaction, and, a few weeks later, these cute-but-unassuming little bats…

Ralph Lauren Children's Store window with PlanetJune Fruit Bats

…were high-fashion superstars on Madison Avenue!

Ralph Lauren Children's Store window with PlanetJune Fruit Bats

I do love how the window dresser arranged all the bats in different positions, some with wings open and some folded.

The funny thing is that this was the third time my amigurumi designs have been requested by fashion designers! Maybe I need a new tagline for my website: PlanetJune: Amigurumi with Style 😉

If you’ll be in Manhattan in the near future, do stop at the window of the Ralph Lauren Children’s Store (878 Madison Avenue) and take a look at Monica’s PlanetJune Fruit Bats:

Ralph Lauren Children's Store window with PlanetJune Fruit Bats

Handy links:

If you’d like to sell PlanetJune-designed items, even if you don’t sell online, please come and hang out in the PlanetJune Ravelry group! I occasionally announce special commission opportunities in the group itself, and, if I know from the photos you post in my group that you do good work, I’m happy to match you up with a potential buyer. Who knows when the next big commission opportunity will arise?!

Comments (15)

review: ruffle yarn

The team at Kollabora thought I might enjoy playing with a crochet kit (and they were right!), so they sent me their tutorial for making One-Skein Finger Crochet Scarves, and 2 skeins of Red Heart Boutique Sashay yarn. I’ve been curious about these new novelty ruffle yarns, so I thought I’d review the yarn for you and these two very different scarf projects I used it for…

ruffle yarn scarves
Ruffle yarn scarves

About Ruffle Yarn

As this yarn is so unusual, let’s take a better look at it…

ruffle yarn
Straight off the skein, it looks like a ribbon

ruffle yarn
Opened out – you knit or crochet into the top edge; the decorative sparkly bottom edge will be on the outside of the ruffles

If you want to try out a ruffle yarn, Red Heart Boutique Sashay isn’t the only yarn of this type – ruffles are a hot novelty yarn trend and many yarn producers have jumped on board, so you can probably find similar yarns, from different brands, wherever you live.

Project One: Finger Crochet Scarf

I’ve never tried finger crochet, so I thought this would be fun. And it really was! The yarn was actually a perfect match for this project – straight from the skein without stretching the mesh out, it’s very thick and works up quickly. The colour changed every couple of stitches to keep things interesting. If you have kids, this project would be a great way to get them chaining, maybe as a prelude to teaching them to crochet with a hook. Even small children could easily make a necklace/scarf they could wear proudly afterwards.

You can find the One-Skein Finger Crochet Scarves instructions on Kollabora. As an experiment, I tried varying my tension from tight loops, through normal tension, and then then intentionally elongating each loop. The end results are noticeably different, but all 3 look good:

ruffle yarn
Tension variations, top to bottom: loose, normal, tight

I must admit, I didn’t think this scarf/necklace thing was for me, especially in such bright colours (this colourway is called Twist) – I intended to unravel it and reuse the yarn in the ruffly way it’s intended. But then, just for fun, I tied the ends together, coiled it into 4 giant loops, then wound those 3 times each around my neck to make a giant cowl with 12 wraps, and I kind of love it!

ruffle yarn scarf: finger crocheted
Finger crocheted cowl (12 wraps of giant chain stitches)

Even with my tension experiments, it looks good, but perfectionist me thinks I might just unravel it all and redo it at even tension – it was so fast and fun that it wouldn’t be a hardship to remake it anyway.

Project Two: Frilly Ruffle Scarf

I thought that using the ruffle yarn without opening it out to reveal the texture was a bit of a waste of the special ruffly properties, so I decided to try the knitted ruffle scarf pattern from the yarn’s ball band with my second skein. (It’s the free Frilly Knit Scarf pattern. If you don’t knit, Red Heart have a companion free Frilly Crochet Scarf pattern, but I didn’t realise that until I’d already knitted mine..!)

The knitting part is really really simple – knit 6 stitches and turn – so if you’ve ever knitted before, you won’t have a problem with that. It’s also very fast, and the end result looks much more impressive and complicated than it really is. The most difficult part is wrapping your head around the fact that you don’t use this type of yarn like a conventional yarn: you only insert your needle or hook into the holes along the top edge of the yarn, and ignore the rest of the mesh (which will form the frilly ruffles) – I recommend you look on YouTube for assistance if this confuses you.

ruffle yarn
Ruffles!

A little tip: if you’re trying to knit this particular frilly scarf, knit into every other space at the edge of the yarn. (The pattern doesn’t mention this.) If you knit into each space, you’ll end up with a dense spiral and no ruffles! I only figured this out after I’d knit about a foot of scarf and realised it looked nothing like the photo… Luckily it’s very easy to frog, as the mesh is smooth, so there are no fluffy fibre strands to get snarled together. After restarting:

ruffle yarn scarf: frilly knit scarf
Frilly ruffle scarf

Ooh! The finished scarf is wonderfully lacy and ruffly, but, even in in this lovely muted colourway (called Shuffle) I think it’s a bit too dramatic for my typical understated style – I felt like I was wearing a feather boa 🙂

Ruffle Yarn Verdict

Although it’s a ‘waste’ of the ruffles, a finger-crocheted scarf made from unstretched variegated ruffle yarn is fun, and would be a great first yarn craft project for children. You could easily get 2 scarves from one skein – I’m sure 6 wraps of chained scarf around my neck would have been plenty instead of the 12 I got from using the full skein!

A frilly ruffle scarf – either knitted or crocheted – would make a great gift for the right person, without a huge time commitment in making it. And you can really impress your non-crafty friends who don’t realise how simple it is to make – the yarn does almost all the work for you!

I also think that, in cream or white, this type of yarn would be a perfect way to make easy frilly ‘lace’ collars and cuffs for costumes, but I can’t think of many other uses for it. Even the patterns on the Red Heart site only show it used as an edging, to make a quick flower, or in several (apparently identical except for colour) frilly scarves…

I’d been wondering about these new novelty yarns, so I really enjoyed playing with the Boutique Sashay. As it works up quickly (both in ribbon and mesh forms) you can complete a project in no time, and with only one skein of yarn. It’s a bit limited in use, but, provided you have the right project for it, it’s fun and easy to work with (once you’ve figured out where to insert your hook/needle!)

Thanks very much to Kollabora for sending me these yarn projects to try out.

About Kollabora

kollabora: we are what we make
Kollabora is a new community site for makers offering DIY inspiration, learning, sharing, and supplies. They offer curated fashion-forward projects in sewing, jewellery and knitting categories (‘knitting’ includes crochet, btw) and, if you feel inspired, you can buy the pattern and all the supplies you’ll need directly from their page.

Their blog includes trend-spotting, how-tos, maker interviews and more, and they also have some wonderful original projects and patterns available at no cost – for example, I love the knitted Anchored Beach Wrap by Ruby Submarine.

Here’s what they have to say:

We believe that we are what we make, and that people should have a creative alternative to just buying products. They should have the opportunity to make what they’re inspired by. Every project on Kollabora feeds and fosters your creativity, and, above all, offers you the choice to make it yourself—a fun, unique and truly fulfilling alternative to simply buying an end product. We hope that you’ll share your adventurous experiences and expertise as we continue to craft our site into a wondrous, one-stop destination for everything you need to make something awesome.

I love this idea! In this time of disposable one-season fashions and cheap, low-quality imports, people are looking to make clothes and accessories instead of buying, and Kollabora’s projects show that you can be just as fashion-forward and on-trend when you choose to make it yourself.

I’ve only explored the knitting (& crochet) section of Kollabora so far, so I’m looking forward to checking out the sewing and jewellery categories to see what else I get inspired to make…

Comments (8)

Pine Cone Collection crochet pattern

I’ve had to reshuffle my plans a bit this month, as I polled my Ravelry group and discovered that mid-November (my intended release date for this year’s festive pattern) was far too late, so here we are, a month earlier, and it’s time to announce my Christmas design, complete with a launch week discount…

My Pine Cone Collection crochet pattern includes 6 different pine cone designs (3 thin and 3 round). Each cone is worked in one piece, with a clever, easy-to-memorize stitch pattern that results in highly realistic pine cones with perfectly offset scales.

pine cone collection crochet pattern by planetjune

I’m very happy with how realistic these pine cones look in any shade of solid or variegated brown (I used 6 shades of Red Heart Soft and Bernat Satin for my cones; the exact shades are also given in the pattern) and I just couldn’t stop making them once I got started. Once you grasp the concept for the scales it’s really simple, with no counting involved, so they make a perfect TV-watching project where you don’t have to concentrate much on what you’re doing.

Make them in any colour(s), and pile them in a bowl or vase, make them into a wreath, hang them from your Christmas tree, or string them into a garland.

pine cone collection crochet pattern by planetjune

Of course, pine cones don’t only make lovely Christmas decorations – especially in natural colours, they can be used as decoration throughout autumn and winter, or for natural woodland-look decor at any time of year.

If you are thinking about Christmas, wouldn’t they’d also look wonderful in bright and/or sparkly yarns as tree ornaments, or grouped together into wreaths or garlands? (You’ll have to use your imagination a bit here: apparently mid-October is far too early to find Christmas trees in South African shops!)

pine cone collection crochet pattern by planetjune

Pine Cone Collection includes the complete patterns for the 6 different sizes of pine cones pictured, 3 thin and 3 round, with sizes varying from 2-4″ (5-10cm) tall. The pattern also includes modifications that will enable you to make cones of any size, with the same overlapping scale pattern.

pine cone collection crochet pattern by planetjune
Thin cones: A (long), B (medium), C (short)
Round cones: D (small), E (medium), F (large)

If you like it, please don’t forget to favourite/queue Pine Cone Collection on Ravelry:

This week only, you can pick up the Pine Cone Collection pattern with a special launch week discount. (There’s no code needed; you’ll see the special price automatically in the shop.) I love my bowl of pine cones – I think they are perfect for fall/winter decor – and I hope you’ll enjoy the pattern too!

Comments (15)

polymer clay shawl pin

A few weeks ago I was browsing the time-suck known as Pinterest and this caught my eye:

faux wood by art-rukodelie
Faux wood grain polymer clay tutorial from art-rukodelie

I loved the wood-grain effect and it gave me an idea: I had a shawl that needed photographing, and I hadn’t played with my polymer clay for months, so it seemed like a good use of my time to see if I could make my own polymer clay shawl pin.

Now, in case you’re expecting a highly-skilled project from me, I should probably preface my results by saying that I like to use polymer clay in a similar way to how I crochet amigurumi: I combine shaped pieces into 3D sculptures. Patterned clay isn’t something I’m good with – you have to get the shape right immediately, because you lose the colour pattern if you try to do much reshaping or add/remove pieces. Okay, now onto my pin…

I made a ring shape from leftover scrap clay, and covered it with a sheet of faux wood clay that I made by (loosely) following the tutorial, which was written in Russian but you can easily get the gist of it from the photos. Here’s the result, on my Rippled Lace shawl:

shawl pin

I’m fairly pleased with how it turned out – it polished up nicely, although it doesn’t have the warmth and depth of real wood. I was a bit disappointed to see that the pattern I ended up with on my ring doesn’t really show any of the concentric ring grain alignment from the tutorial(!), but it’s still an interesting pattern and fairly realistic.

I had to scrap my original idea for the actual pin (I was planning to make it from clay-covered wire) as I couldn’t get the clay to form around the wire without completely smooshing my wood-grain pattern into a murky brown mess. So, before my clay veneer got too brittle to work with, I cut two more small disks from it and baked them at the same time as the main piece so I could try to figure out a solution for a matching pin later.

(I couldn’t wait any longer to release my shawl pattern, so I had to stage the photos without the aid of a shawl pin. So much for my justification for embarking on this project, but at least it’ll be ready for my next shawl design!)

In the end, I figured out what to do to make the pin: I found a single ivory-coloured knitting needle in a thrift shop that complemented the natural look of my ‘wood’ quite well. I cut the needle in half, then carved a groove into the back of each of my baked disks and sandwiched them together around the cut end of the needle with some more clay smoothed into the join. After baking, it made a secure and decorative pinhead, so the pin matches the ring.

shawl pin

I enjoyed making this, and it works exactly as I’d hoped it would – it holds my shawls securely in place without damaging them. Hopefully it’ll look photogenic enough to use in future pattern photography too – if not, I’ll just have to treat myself to a real one 😉

I think my handmade pin looks pretty good for a first attempt, but this project has reminded me why I prefer sculpting to patterning, and I think I’ll stick with what I’m good at for future clay projects. Hopefully I won’t wait so long before I play with the clay again… I wonder what I’ll be inspired to make next time!

Comments (9)

October update

Earn more with the PlanetJune Affiliate program

Did you know you can join the PlanetJune Affiliate program, and make 5% of the total of any orders that come when you refer people to my shop?

When I sent out the third-quarter payments to members, I noticed that some affiliates hadn’t reached the $2 minimum for payout, and a few hadn’t made any sales through their affiliate links. I want you to succeed – larger affiliate payments to you means more new customers for me, so we all win!

I’ve come up with some Top Earning Tips to help you earn more through the program. If you’re a new affiliate, or would like to earn more through the program, read on for my top 3 tips for success…

Go to PlanetJune Affiliates: Top Earning Tips >>

Review and Win contest

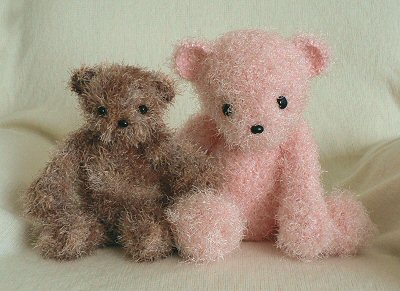
October’s ‘Review and Win’ winner is Brigitta W, with her review of the pattern that launched my PlanetJune business, Fuzzy Bear:

fuzzy bear amigurumi crochet pattern by planetjune

Just finished my first bear and it looks just like the pictures! (which is not always the case, lol) The pattern is written so well and was so easy to follow I completed the bear in only a couple of hours. As it was for a baby I used a soft baby yarn with very little fuzz. (I didn’t want alot of fuzz for the baby to suck on) Although the stiches could be seen it did not take away fron the cuteness of the bear. I also stictched on the eyes and nose with yarn (and thanks to Junes recent post on eye placement, went very smoothly) I did have a little trouble with attaching the pieces but nothing that caused a great problem and I figured out some tricks to help me the next time. This will be a pattern I will use again and again. I highly recomend it!

Congrats Brigitta – I’ll email you to find out which pattern you’d like as your prize 🙂

To be entered into this month’s draw for a free pattern of your choice, just write a review of any product in my shop – thank you!

New Donationware

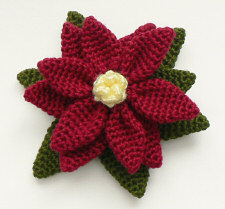
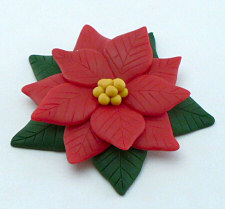
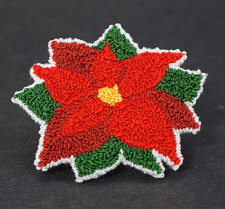
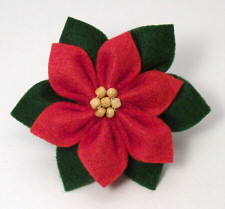
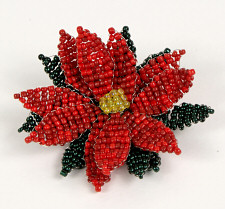
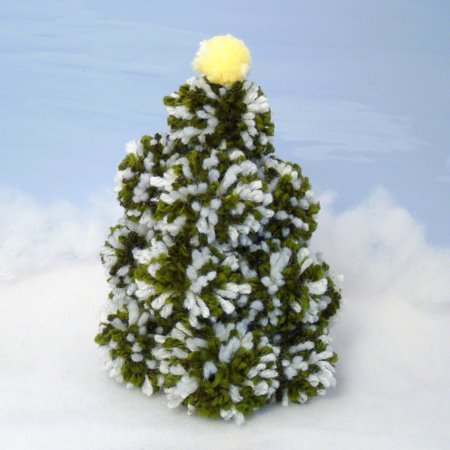
With Christmas approaching, I wanted to make sure I had all my seasonal craft tutorials available as easy-to-print donationware for you. Now you can find all 5 Poinsettias (made with crochet, punchneedle, beaded, felt, and polymer clay) and my Pom-Pom Christmas Tree instructions available as PDFs in the shop for a minimum donation of $1 apiece:

crochet poinsettia by planetjune polymer clay poinsettia by planetjune punchneedle poinsettia by planetjune
felt poinsettia by planetjune beaded poinsettia by planetjune pom-pom christmas tree by planetjune

You can easily find them all – and my other seasonal patterns – by searching for Christmas in my shop.

And my new Christmas crochet pattern is on its way too – all being well, I hope to launch it later this week…

Comments (3)

amigurumi acorn donationware

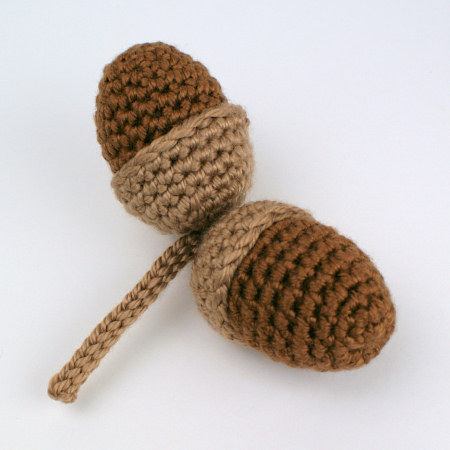
Amigurumi Acorn was one of my first free patterns, from 2007. I created it before I came up with the idea of donationware patterns and I’ve been meaning to add it to my donationware library for a long time. I wanted to show that this popular pattern is far more versatile than just the cute smiley acorns I originally made, so I’ve made a second example set of acorns to showcase the more realistic look you can also easily achieve with this pattern:

amigurumi acorn crochet pattern by planetjune
Cute acorns and realistic acorns – both from the same pattern

To bring the pattern up to standard before adding it to my shop, I’ve revisited and updated the text, and reprocessed the photos to be brighter and clearer. If you’d like to donate for this sweet pattern, I’ve also included lots of additional bonus info in the PDF version:

  • Eye positioning tips
  • How to invisibly stitch the acorn to the cup
  • An unwired (child-safe) twig pattern (you can see this on my realistic acorns, below)
  • Suggestions for use, and bonus tips

amigurumi acorns crochet pattern by planetjune
My new realistic acorns have a child-safe wire-free twig (bonus pattern only in the PDF)

The improved Amigurumi Acorn pattern is perfect for an autumn wreath or other fall-themed decor; I hear that some people even have an autumn-themed Christmas tree! Although the worsted weight acorns are about 2″ tall, you can miniaturise the pattern with finer yarn or thread and a smaller hook and make adorable acorns that are closer to life-sized.

As always, the basic pattern is free for your use, but you’ll get the bonus tips if you choose to donate for the PDF version. I hope you’ll enjoy it!

Go to Amigurumi Acorn crochet pattern >>

Comments (2)

free pattern: Frosty Windows Scarf

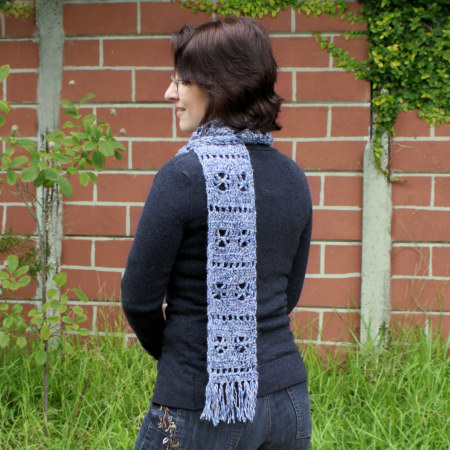
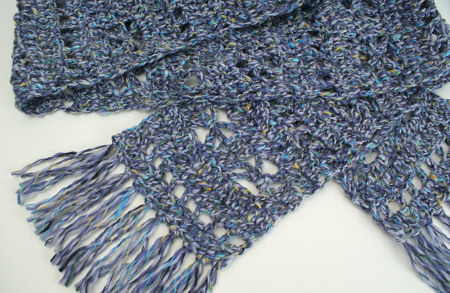
Today I have a new PlanetJune Accessories donationware pattern for you: the Frosty Windows Scarf. With a pretty but easy-to-memorise stitch pattern, you can work up this scarf in almost any yarn. Once you’ve crocheted a couple of repeats, you’ll fly through it – it’s a perfect pattern for handmade gifts or for stashbusting!

PlanetJune Accessories Frosty Windows Scarf crochet pattern

Work it in any weight yarn – although I’d recommend DK weight (#3 light) or heavier for a snuggly scarf – with an appropriately sized hook. As with all my accessory patterns, this pattern has both written instructions and stitch diagrams, and it also includes full instructions for increasing the length and width if you’d like to make a wrap or shawl version!

Frosty Windows Scarf by PlanetJune

As always with my donationware, the Frosty Windows Scarf pattern is free for your use, but if you’d like to send me a donation towards it (completely optional), you’ll receive the nicely formatted and easy-to-print PDF version of the pattern as a thank you. As a bonus, the PDF also includes some additional exclusive info:

  • Step by step photo tutorial for the ‘tr2tog over next 5 st’
  • How to calculate how much fringe you’ll need
  • Step by step photos for making and attaching the fringe

I hope you’ll enjoy crocheting this scarf for yourself, and maybe you’ll make a few extras as Christmas gifts for friends and family?

Go to Frosty Windows Scarf pattern >>

Crochet Along with us!

Please share photos of scarves you’ve made from this pattern in the Accessory-Along CAL in the PJ ravelry group. We’ll be crocheting accessories from now until the end of the year, so you have plenty of time to join in and make even the largest, most ambitious accessory projects – or maybe multiples of the faster ones to give as gifts…

PlanetJune Accessories CrochetAlong
You can find all these patterns in the PlanetJune Accessories section of my shop.

Please join us at the Accessory-Along thread in the PlanetJune Ravelry group if you’d like to crochet a Frosty Windows Scarf – or any other PlanetJune Accessories – along with us!

Comments (1)

    navigation: arrow

    buy crochet patterns and accessories from my online store

    'Everyday Crochet' and 'The Essential Guide to Amigurumi' crochet books by June Gilbank

    Crochet video tutorials and step-by-step photo tutorials

    Free PlanetJune crochet patterns

    Frequently Asked Questions

    navigation: arrow

    Punchneedle Embroidery information, ebook & patterns

    Papercraft ebook & tutorials

    Free PlanetJune craft projects & tutorials

    Ravellenic Games: Team PlanetJune
    PlanetJune Reindeer Games
    PlanetJune Temperature Snake CAL

    June Gilbank

    Hi, I'm June. Welcome to my world of nature-inspired crochet and crafting. I hope you enjoy your visit!

    If you'd like to get in touch, you can contact me here.
    crocheted Canadian flag by PlanetJune
    Proudly made in Canada!
    A fanned-out pile of the books Everyday Crochet and The Essential Guide to Amigurumi, with text 'The answers to all your crochet questions at your fingertips - find out more'

    Want to say thanks? You can send me money in seconds at paypal.me/planetjune (over $20) or paypal.me/planetjune2 (under $20) or send me a donation through my shop.

    Or simply click through from my links before you shop at Amazon, Etsy, KnitPicks, LoveCrafts and more, and I'll make a small commission on your purchase, at no cost to you! Start here:

    ♥ Support PlanetJune ♥

    Tip: This link is also in the footer of every page!

    Thank you so much for your support!