With all crochet, to keep your stitches even, you keep the yarn under tension, so a controlled amount of yarn forms each stitch and all the resulting stitches will be the same size. This is particularly true for amigurumi; if your stitches aren’t consistently tight, it’s very obvious.
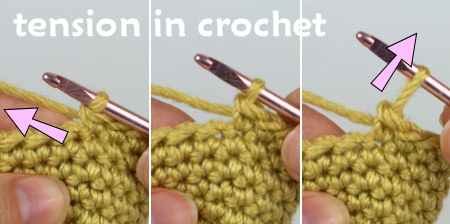
Tension is created by balancing the forward pull on the yarn from the hook (right) with the backward pull of your other hand on the yarn (left). Consistent tension keeps all your stitches the same size (middle).
Chains and slip stitches are different, though, because each stitch consists of only one loop. If you maintain the same tension as you use for single crocheting amigurumi, as well as tightening the stitch you’re forming, you’ll pull on the previous stitch and make that stitch much smaller and very difficult to work back into.
If you learnt to crochet the traditional way (working in rows to make scarves, afghans, etc) and then progressed to amigurumi, you’ll be familiar with making your starting chain loosely so you can easily work back into it (you can also achieve this by using a larger crochet hook, just for the foundation). But if you began your crocheting adventures with amigurumi, you may never have even made a starting chain foundation!
Problem: Too-Tight Stitches
In the examples of chains and slip stitches below, the ‘too tight’ photos show the results of using the same tension I use for single crocheting amigurumi, while the ‘just right’ photos show how your chains and slip stitches should look:
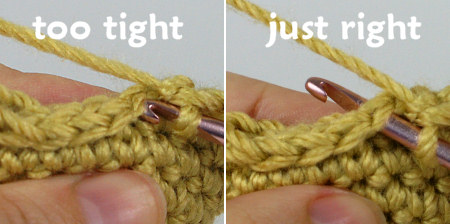
Chains:
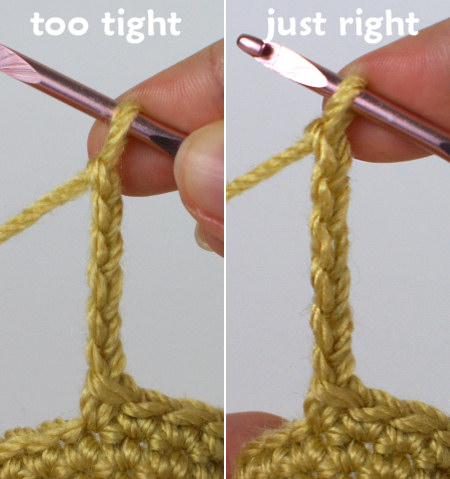
Each example has 6 chains. The difference may not be clear for each stitch individually, but notice how short the overall length of the tight chain (left) is compared with the correct chain (right).
Slip stitches:
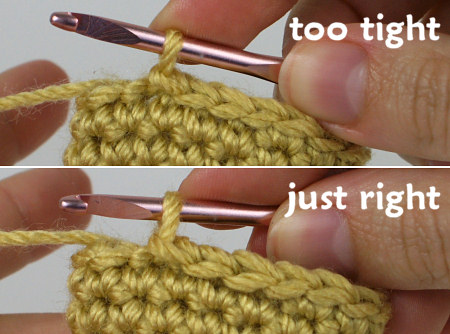
Each example has 4 slip stitches. In the tight example (top), the sideways Vs along the top of each stitch are noticeably smaller and stretched more tightly than in the surrounding sc stitches. In the correct example (bottom), the Vs of the 4 sl sts are indistinguishable from those of the surrounding sc stitches.
Not only do these stitches not match the rest of my work visually, but they are very difficult, or even impossible, to work back into: the loops are smaller than the head of my hook and there’s no slack in the yarn. Here I’ll try to work back into the slip stitched examples:
I can’t work back into the left slip stitches without a serious struggle! The right slip stitches are almost as easy to work into as a normal sc stitch.
Solution: Reduce Tension
The goal with chains and slip stitches is to have the sideways V shape of each stitch be exactly the same size as the sideways V along the top of a single crochet stitch (see the ‘just right’ examples above). That requires relaxing your tension considerably and may feel strange and wrong if you’re only used to tight amigurumi control. Here are some tips to practice:
- Slow down and pay attention to your stitches when you make a chain or slip stitch.
- As you form each stitch, don’t tug on the yarn with your hook; draw it through smoothly.
- Check the size of your stitch by comparing it with the Vs at the top of your sc stitches.
- Only draw the yarn back with your non-hook hand if the working loop looks too large; it should sit loosely on the throat of the hook so the hook can move freely within the loop.
Once you get used to it, chaining with low tension should become easy – it just takes a little practice to make your chains evenly sized. Slip stitching with low tension is slightly trickier when you’re used to amigurumi: the stitches are so similar to single crochet stitches that I still have to remind myself with every slip stitch to keep it loose, so my stitches don’t shrink and tighten.
If you’d like to practice these stitches, here are a couple of examples from my amigurumi pattern collection that make great use of chains and slip stitches:
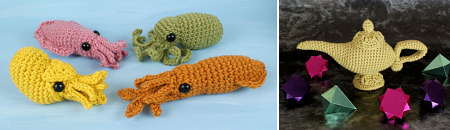
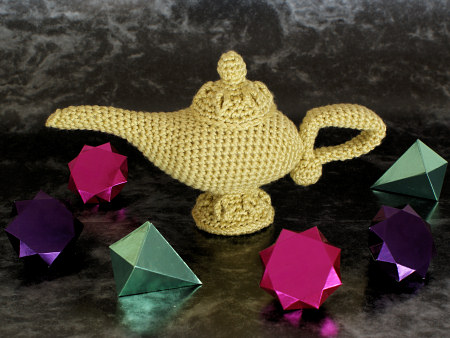
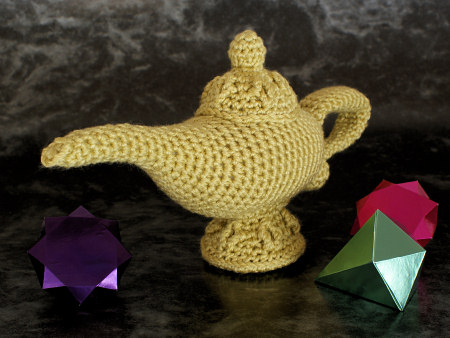
These patterns use chains (Baby Cephalopods, left) and slip stitches (Magic Lamp, right).
With this low tension technique, you’ll no longer have to battle to work back into chains and slip stitches, and your work will look smoother, tidier, and more even. It’s one more step along the road to becoming an amigurumi expert!
Loved this tutorial? I have so many more amigurumi tips and tricks to share with you!
Boost your amigurumi skills with my latest book, The Essential Guide to Amigurumi, your comprehensive guide to amigurumi techniques and tips.
Do you find my tutorials helpful? If so, please consider making a contribution towards my time so I can continue to create clear and concise tutorials for you:
Thank you so much for your support! Now click below for loads more crochet video and photo tutorials (and do let me know what else you’d like me to cover in future tutorials…)


 And there was one other stitch I couldn’t understand from the diagram: the bobble at the end of the tail. I decided to go with a 3 hdc bobble, but now I look again it looks more like an hdc on the right (or an arrow? maybe it’s a long pulled-up loop?), and then a 2hdc bobble. No idea what the black triangle means. (ETA: arrowheads in a chart mean ‘start’ or ‘end’.) Still, my bobble is close enough.