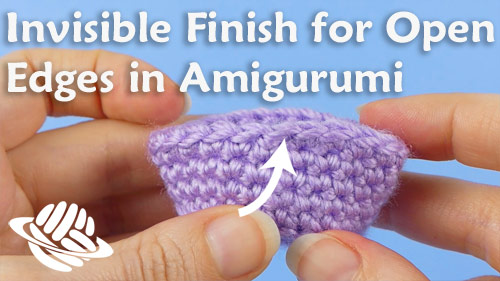
Crochet Investigation: Invisible Finish
The standard way to finish an open-ended piece in amigurumi is to join with a slip stitch (sl st) to the next stitch, to reduce the height jog of the spiral between the first and last stitches of the final round. It’s a quick and easy method, and is perfectly fine if you’ll be stitching the piece down to something else so the edge won’t show in the finished amigurumi.
That’s not always the case, though – sometimes the edge will be visible in the finished piece, and in this case the sl st finish isn’t the best choice – it leaves a little bump that’s impossible to hide completely.
When I decided to make a video tutorial to show the most invisible finish for an open edge in amigurumi, I realised that, while there’s a standard method for amigurumi worked in joined rounds (and this actually forms the basis of my Perfect Stripes Invisible Join), there’s no consensus for amigurumi worked in spirals…
And you know what that means: it’s time for another crochet investigation!
Method
All my candidates are based on the standard invisible finish for joined rounds, but I considered two ways that the method can be varied that may affect the look of the finished edge:
- Should there be a slip stitch before the join, or not? A slip stitch would reduce the height difference before the join, but might end up more visible than without.
- Should there be a duplicated stitch, or an additional stitch added? The additional stitch was my original preferred method from 2009 (there’s no need to maintain the stitch count if the edge won’t be worked back into, so the duplicate stitch isn’t necessary) but is that a good reason to keep doing it? (Of course not – not if there’s a better way…)
So that gives us four candidates for the experiment:
C: no slip stitch, join in next stitch
D: no slip stitch, duplicate stitch join
E: slip stitch, join in next stitch
F: slip stitch, duplicate stitch join
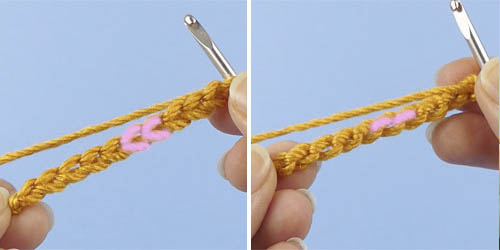
The photos below show the results of each test, together with:
A: the piece after the final stitch is worked, before any join (note the difference in height between the final stitch, below the hook, and the next stitch to its right)
B: slip stitch join (the yarn tail isn’t woven in here, but you can clearly see the knot just below the tail that can’t be completely hidden)

Results
I compared the 4 samples and noted my observations (don’t worry if you can’t see all these in the photos above; they are much more apparent when viewed from multiple angles):
C: height jog very visible; stitch count not maintained
D: height jog minimised; skipped stitch visible from front; stitch count is maintained
E: height jog minimised; sl st visible from front; stitch count not maintained
F: height jog minimised; sl st and skipped stitch visible from front; stitch count is maintained
C is an immediate fail: you can clearly see that it does the worst job of blending the height difference between the start and end of the final round.
F is the next to go: there’s an extra bar visible beneath the V from either a slipped stitch or a skipped stitch, and F has both while D and E only have one each, so it’s the worst in terms of invisibility, with extra bars visible beneath two stitches.
That leaves D and E. They’re both pretty good in terms of invisibility, but I’m going to award the prize to D: the fact that it maintains the stitch count around the edge makes it the most versatile; you can use it for an open-ended piece or one that will be stitched to something else with no problems, so this means you’ll have one fewer technique to remember!
Refining the Technique
While working on the test, I also noted that the downside of any of these methods is that you have to pull the duplicate stitch very carefully to the right size to make it look truly invisible, which makes it more difficult to then weave in the yarn tail without disturbing the size. So, I came up with a tiny refinement that makes it much easier to control the size of the duplicate stitch and keep it held in place once you’ve adjusted it to the right size.
Intrigued? Good! I’ll explain all in my new Invisible Finish video tutorial 😉
Continue to the Invisible Finish for Open Edges in Amigurumi video tutorial >>