PlanetJune Craft Blog

Latest news and updates from June

concussion & customer support

I think I was a bit optimistic in my last health update: post-concussion syndrome can take weeks or months to abate, and I definitely haven’t fully recovered yet. I still get incapacitating headaches on some days, and I sometimes struggle to find the right word when I’m talking. Plus fatigue, sleep problems and a severe lack of concentration and energy… I’m working when I can, but some days I’m just not up to it.

And I seem to be having some memory lapses too, which is quite unsettling. For example, I actually wrote last week’s blog post three weeks earlier, but not only did I forget to post it, I forgot I’d even written it

How does this affect you? Well, thanks to all of this, I’ve just discovered that a few customer support requests may have slipped through the cracks. I don’t have the energy to wade back through a month of email and messages from other channels and follow up with everyone to check whether I’ve completed your request, so I’m going to just start fresh from today.

  • If you’re waiting to hear from me, please email me again (june@planetjune.com).
  • If you’ve contacted me via social media or rav PM, please email me for help instead (june@planetjune.com).

Having all my customer support requests in one place will make it much easier to manage them as I continue my recovery.

Thanks for your continued patience, and I’m so sorry if your message is one that slipped past me – it’s incredibly frustrating to me too; this is not the level of customer service I’m known for, but I can’t just wish myself better! I highly recommend you try to avoid head injuries, if you have that option… 🙂

Comments (8)

amigurumi skills for Turtle Blanket makers

It’s amazing how popular my Turtle Beach blanket pattern is – I published it over four years ago, and it still gets viral boosts on social media every few months that make it consistently one of my most popular designs!

turtle beach crochet pattern by planetjune

Selling Turtle Blankets

I’ve even started a special section of my Sellers’ List page for people who are making turtle blankets to sell, because I get so many requests for finished blankets…

turtle beach crochet pattern (by planetjune) - blankets for sale by crocheters
Don’t they all look great? I love how people respond to this pattern – both makers and buyers!

(By the way, if you make turtle blankets to sell, see the bottom of that page for details of how to be added to the list.)

Turtle-Making Tips

Thanks to this unexpected and long-lasting Turtle Beach popularity, I’m seeing many experienced crocheters try to tackle amigurumi for the first time, to make the turtles for their blankets, and some are getting frustrated.

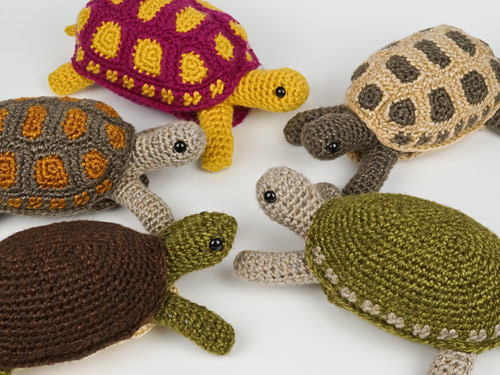
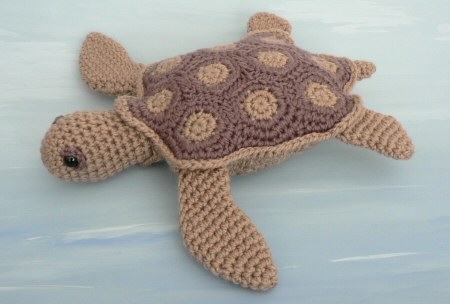
Baby Sea Turtle Collection amigurumi crochet pattern by PlanetJune

If this sounds like you, you’re not alone! Amigurumi is a special subset of crochet that requires its own skills. Even the most experienced crocheters can be startled when they pick up their first amigurumi pattern and discover it’s full of new terms and techniques, or amigurumi standards that aren’t specifically addressed within each pattern.

Although all my patterns point you to my main tutorials index (www.planetjune.com/help), the list below is a shortcut to only the tips and techniques you’ll need to tackle and master my Baby Sea Turtle Collection pattern, so you can make adorable turtles for your blankets with minimal frustration!

1. Magic Ring

The magic ring gives the perfect start to every piece of amigurumi: you can start crocheting in the round without any trace of a hole in the middle. Mastering this is a must!
Go to Magic Ring tutorial >>

2. Which loops to work into

Unless otherwise specified in the pattern, all amigurumi should be worked into both loops of the stitch below.
Go to Front, Back, Both Loops tutorial >>

3. Which is the right side

It’s very important that all your amigurumi pieces are right-side out before you stuff, close, flatten or assemble them.
Go to Which is the Right Side? tutorial >>

4. Invisible Decrease

Decreasing without leaving any bumps or gaps sounds too good to be true, but the invisible decrease (abbreviated invdec) really does live up to its name!
Go to Invisible Decrease tutorial >>

5. Changing Colour

Always change colour in the last loop of the stitch before the colour change.
Go to Changing Colour tutorial >>

6. Flattened Pieces

Vital to understand how to make your turtles’ flippers! What does it mean when a pattern says to flatten a piece of an amigurumi after crocheting it?
Go to the Flattened Pieces tutorial >>

7. Seamless Join

This technique creates a smooth, almost invisible join for stitching the flippers to the shell.
Go to Amigurumi Seamless Join tutorial >>

These seven tutorials cover every mistake I’ve ever seen anyone make with my Baby Sea Turtle pattern, so make sure you understand these seven concepts and you’ll be good to go!

Baby Sea Turtle Collection amigurumi crochet pattern by PlanetJune

Still Struggling?

Now, if you’ve decided you’re allergic to amigurumi and you never want to see an amigurumi turtle again, I understand! Although I love amigurumi, I know it isn’t for everyone, and I’m working on an alternative for you.

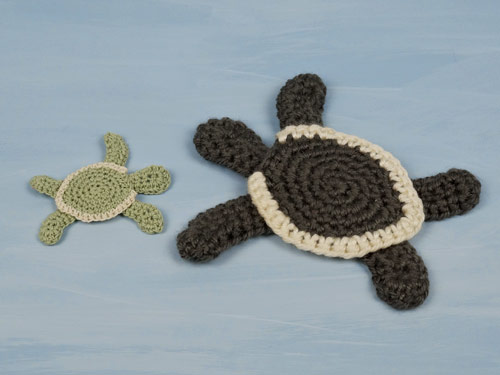
I’ve developed a flat applique-style baby turtle design that closely matches the look and size of my ami turtles, so you’ll be able to stitch those to your turtle blankets for a similar effect (except that the turtles will be flat instead of three dimensional). The new pattern will be much faster to make, with only two pieces, simple embroidered eyes, and almost no sewing! 🙂

Watch this space – I’ll post as soon as the new pattern is ready…

Comments

update: back from sick leave

Thank you all so much for your kind comments and well-wishes about my accident.

Because of the concussion, my head has been hurting too much until now to spend more than a few minutes at a time on my computer or phone, so I haven’t replied to anyone individually (either here or on social) to say thanks, but please know that it meant a lot to me to get your messages when I was feeling very sorry for myself!

A little health update

Most of my injuries are healing nicely. I have a dentist’s appointment this weekend for my broken tooth, and hopefully by then the concussion will have completely faded and it’ll be safe for me to drive myself there and back. I’m still feeling a little confused, but the killer headaches have faded and I’m coming back to myself.

It was a pretty scary experience, but reading some of the comments people have left me about their similar falls onto concrete that resulted in a broken arm or pelvis, or still having occasional head problems years later, I’m counting myself lucky that I have no lasting damage beyond a ruined pair of expensive glasses and a broken front tooth (and I’m hopeful that my dentist can restore my smile so you’d never know the difference – I know that’s just vanity, but please keep your fingers crossed for me on that front!)

And a little work update

As you’ll already know if you get my newsletter (and if you don’t, sign up now!), my next crochet pattern was due to be a Tortoise with a very detailed crocheted shell. Finishing the shell assembly instructions is still a little beyond my slightly-concussed brain, so I’m putting the pattern on hold for a couple more weeks, or until I’m completely recovered.

But I do have a different design I’ve been working on that needs none of that pesky careful thinking to find exactly the right phrase that most clearly describes an innovative process, so I should have a new pattern for you soon – it just won’t be the one I’d planned to release this month!

I’m still taking things slowly and needing plenty of naps and rest sessions, so please be patient with me as I try to catch up with everything I let slide last week without overdoing things and making my head hurt again…

Comments (7)

I’m on sick leave

I had a bad fall the other day and smashed my head into a concrete sidewalk. I’ve fractured a front tooth and broken my glasses, and I have a concussion as well as cuts and bruises, a fat lip and a big lump on my head.

It hurts my head to use the computer or my phone and I think I need to go on ‘sick leave’ for a few days to recover.

Please be patient if you need anything from me – I will get back to you, but it may take some time!

Comments (31)

adventures in making skincare products

I’ve been experimenting with making my own skincare products using natural ingredients, and I thought you might be interested to hear about it…

handmade skincare products
I’ll tell you all about these later in this post!

Hand cream and nail oil are secret weapons in my business – it’s only because of them that my hands (hopefully!) never look objectionable, even in close-up tutorial photos.

crochet tutorial photo showing my hands
Not a hangnail in sight!

How I Got Started

My journey to make my own lotions and potions began with a quest to protect my face from the harsh cold of the Canadian winter. After developing eczema while living in South Africa (where it never gets very cold), I discovered I had a whole new set of skin problems to contend with when I came home. I needed to find a way to protect my now-sensitive face, which had become extremely intolerant of the cold.

I bought and tried lots of creams that I’d been recommended, with results ranging from ineffective, to eczema-triggering, to disastrous (e.g. covering my face in Aquaphor without realising that it contained lanolin until my eyes swelled up and the allergic reaction began…)

So I decided to take the plainest moisturising cream that didn’t give me any symptoms, and supercharge it by adding extra skin-friendly oils to rebuild and protect my skin’s moisture barrier. And it worked! My skin is much happier these days 🙂

But this wasn’t just useful… it was fun! I realised I could probably mix my creams and oils in different ways, with a few extras, to make different skincare products for myself.

Choosing Oils

There are lots of 100% pure oils derived from plants that have beneficial properties for the skin: grapeseed, sweet almond, jojoba, rosehip, argan, marula, and many more. To figure out which I should try, I looked at the ingredients of products I already liked, then did some googling and borrowed books from the library to find out which oils sounded like they’d be most helpful for my needs.

And then there are essential oils: highly concentrated plant extracts that must be diluted before use. They are used for aromatherapy and may have other health benefits. There’s a passionate community of essential oil advocates and I briefly got sucked into that – the potential benefits of certain oils made them sound very appealing. After I bought a few bottles and tried them, I realised that I don’t do well with most scents – giving myself a headache was not what I intended! Now I only use the essential oils that have a scent that makes me feel happy and calm (more on that below).

Once I’d sorted out what to try, I bought some of my supplies from a local health food shop, and some online.

handmade skincare products
Supplies: ingredients and empty containers

I did some more research to figure out roughly how much of each oil I should be using (here’s a very rough starting point: up to 10% of regular oils and 1% of essential oils), and then started experimenting with adjusting the proportions until I got a result I liked.

Combining the Ingredients

If my end product will be an oil, I use droppers to add the different component oils into the container and then close the container and shake it to mix them together.

It’s a little more difficult when making a cream or lotion. First I measure or weigh out all my ingredients into a bowl and mix them together with a little spoon:

handmade skincare products

In these photos I’m making my pink grapefruit hand cream, and yes, it looks pretty unappealing at first! But after a good mixing it looks smooth and creamy:

handmade skincare products

I’ve discovered that you have to mix and mix to get the oils to emulsify properly with a cream or lotion – even if it looks well-mixed, the oils can begin to separate out after a few days or weeks. Now, I stir for an extra minute or two after it looks like its fully mixed.

Then it’s just a matter of decanting into a container and it’s ready to use and enjoy!

handmade skincare products

(All my containers are reusable: I wash them out when they’re empty and refill them, so I can be a bit more environmentally friendly.)

My ‘Products’

(I’m calling them products, but these aren’t intended for sale – they’re just for my own use.) These are my favourite skincare products that I’ve made so far:

handmade skincare products
L-R: headache oil, hand cream, nail oil

I made a spearmint headache oil in a glass rollerball bottle, with a sweet almond oil base. I massage it onto the sides of my forehead when I get a tension headache and it helps. Spearmint essential oil has a sweeter and more uplifting scent than peppermint, it’s gentler on the skin, and I find it very relaxing. And doesn’t the yellow oil look pretty in my blue/clear glass bottle?!

I came up with a really rich moisturizing hand cream enriched with jojoba, rosehip and pink grapefruit oils, which completely stops my hands from getting dry or rough (even with all the hand washing we have to do these days!) I find the sweet citrus scent of the pink grapefruit to be a great mood-lifter and very relaxing.

I replaced my favourite (and pricey) nail oil with my homemade version – sweet almond and jojoba oils and vitamin E in a container with a built-in brush applicator keep my cuticles looking good for all those close-up tutorial photos. It doesn’t have the almond fragrance of my favourite brand, but that’s just an artificial fragrance anyway, so I’m happy to live without the scent. I get the same results as the brand name for a fraction of the price, so I can use my nail oil as often as I want without feeling guilty!

Verdict

As any crafter knows, it’s always a special feeling to be able to use things you’ve made yourself.

I know this may seem like a small thing, but using my own customized creams and oils with my favourite uplifting natural scents gives me a little happiness boost every time I wash my hands or prepare my cuticles for taking photos, or comforts and relaxes me when I have a headache or eczema symptoms.

Try It Yourself

If you want to try dabbling, it can be as simple as adding a couple of drops of your favourite essential oil to a jar of lotion and then stirring it well until it’s all mixed in. For example, I add a few drops of spearmint essential oil to my tub of foot cream and it adds an extra zing to the unfragranced moisturizer.

Or, if you want to try just one moisturising oil, I’d recommend jojoba oil. Its molecules are close in size to the natural oils produced by the body, so it absorbs very easily, making it a highly effective moisturiser. You can mix it with other ingredients like I do, or use it by itself as a moisturiser (it’s safe to use anywhere on your face and body) or cuticle oil. It’s light and gentle – despite the name, it’s actually a liquid wax, not an oil – and, as it absorbs so well, it won’t leave you feeling greasy or looking shiny. It’s stable, and a little goes a long way, so one bottle will last for ages – my first bottle is still going strong after 18 months!


Do you make your own skincare products? What are your favourite ingredients? Or are you tempted to try something for the first time now? Tell me about it!

Comments (4)

PlanetJune Stories: Dorte’s Fishbowl

Today’s PlanetJune Story comes from Dorte Jensen in Denmark, who used a selection of my crochet patterns to create this gorgeous realistic fishbowl!

Dorte's crocheted fishbowl made from PlanetJune patterns

I’ll let Dorte explain how this project came to be:


My husband saw your tropical fish patterns and said that they were so cute and that he wanted these fish made for his birthday. I don’t remember when the idea came for me to use a real fishbowl for them.

Dorte's crocheted fishbowl made from PlanetJune patterns

My plan required some plants for the bottom of the bowl. I had seen your succulent collection 1 and 2 and I really wanted to crochet them but had never found the time for them. I realized that I could use those plants for the fishbowl. I also came up with my own idea for a plant that the red fish could hide in.

Dorte's improvised crocheted aquatic plant

I didn’t have “earth” to sew the plants onto so they would stand up straight. I made a white circle to sew them onto that I could hide beneath the stones in the bottom of the bowl.

Dorte's crocheted fishbowl made from PlanetJune patterns

I suspended the fish using fishing line – I thought that would be most invisible. Then some dots of glue on the edge of the fishbowl to keep the line and the fish in place. I used a line across the fishbowl so the clownfish could hang in the middle of the bowl.

Dorte's crocheted fishbowl made from PlanetJune patterns

Finally I just want to say that both the fish and the plants were so much fun to crochet, and your crochet tutorials have taught me a lot. It is always a great pleasure to follow your great, well-explained and well constructed patterns.


(Back to me, June, again!)

Thank you so much, Dorte! Isn’t this a fabulous project? Beautifully crocheted, and using the large glass fishbowl with real stones in the bottom was an effective way to add to the realism of this display.

I think the succulents and her clever plant design look perfect in there too. I was surprised to see how well my succulent patterns stand in for corals and aquatic plants (and yes, in case you’re wondering, I do have some real coral patterns planned for some point in the future too…)

I hope these beautiful colourful fish have brightened your day (and maybe even inspired you to make a crocheted aquarium of your own?) Please leave Dorte a comment if you’ve enjoyed this post!

Do you have a PlanetJune Story you’d like to share? I’d love to hear it! Please email your story to june@planetjune.com, together with one or more high quality photos showing what you’ve made from PlanetJune patterns. If I choose your story to feature here on the blog, I’ll send you your choice of pattern from my shop to say thank you!


PS – If you’re looking for the PlanetJune patterns featured above, you can find all my Tropical Fish and Succulent crochet patterns in my shop 🙂

Tropical Fish crochet patterns by PlanetJune

Cactus and Succulent crochet patterns by PlanetJune

Comments (10)

Sprouting seeds – easy, fun and tasty!

I’ve been growing my own sprouts for about a year now, and I thought now would be the perfect time to share the process with you. Even if it’s not practical to get out to buy fresh fruit and vegetables, you can still have nutrient-packed fresh and crunchy sprouts every day.

(And it’d be a great project for kids – it’s so fun to watch the sprouts grow over a few days and then be ready to eat!)

This is my almost-daily lunch:

a sandwich made with home-grown clover sprouts

Mmm, yummy! The act of germinating the seed unlocks all the nutrients contained within it, and the resulting sprout gives you a boost of fresh plant goodness.

And look how much fun it is to watch the seeds sprout – from seed to food in just 5 days!

growing clover sprouts - from seeds to sprouts

My Favourite Sprouts

There are lots of seeds you can sprout, depending on what you enjoy. I started out with broccoli sprouts, because they have loads of health benefits, but I found their flavour overpowering unless I paired it with a spicy condiment in my sandwich (mustard or horseradish are perfect choices).

After some experimentation, I decided on my favourite sprouts – these would both be a great starting point if you’d like to make your own, as they are easy to grow and have a mild flavour that you can easily add to your food without overwhelming it.

Clover
clover seeds and sprouts

Clover sprouts have a mild, fresh flavour. They are perfect in a sandwich or wrap, added to salads, or anywhere else you might use lettuce. I also like to pile them on top of burgers.

(If you can’t find clover sprouting seeds, I hear that alfalfa is similar.)

Mung Beans (Bean Sprouts)
mung bean seeds and bean sprouts

I’m sure you’re familiar with bean sprouts, most commonly used in Chinese cooking. Growing them at home in a jar means you don’t end up with the long straight sprouts you find in the supermarket, but they taste just as good and it’s incredibly easy to toss a handful into your stir fries and sauces when you’re about to serve them, and add a tasty crunch to your dish.

Supplies

To get started, you’ll need some seeds, a wide-mouthed jar and some sort of screen to cover the top of the jar with.

I started my sprouting adventures with the no-cost method: a well-cleaned pasta sauce jar with a doubled layer of cheesecloth across the top, held in place with a rubber band.

Once I knew I’d be keeping this hobby going, I invested in a set of wide-mouthed mason jars and screw-on sprouting lids (there are lots of options – if you buy some, just make sure the width of the top is the same as the mouth of your jars.)

And then, you’ll need some seeds! You can buy these from health food stores or online. Just make sure you search for sprouting seeds that are intended for consumption – regular seeds that are intended to be planted in the ground to grow into plants are usually treated with a fungicide, so the seeds are not edible.

Get Sprouting!

Here are my notes for sprouting clover. The process is the same for other sprouts; the only differences would be a) how much seed to use, b) how long to soak the seed for, and c) how many days until the sprouts are ready.

But these instructions will give you an idea of how easy it is to grow your own sprouts…

  1. Measure 2 tbsp of seed into the jar, then screw on the lid.
  2. Fill with water and soak for 8-12 hours.
  3. Tip out the soaking water.
  4. Without removing the lid, add water, swirl the seeds around and tip out the water.starting clover sprouts
  5. Repeat step 4, making sure to shake out all the water so the seeds won’t be sitting in water.
  6. Shake the seeds down away from the jar lid so air can circulate.
    starting clover sprouts
  7. Lay the jar on its side, out of direct sunlight.
  8. Every morning and evening, repeat steps 4-7.
  9. When the jar is fairly full (3-5 days) and the sprouts have leaves, leave the jar on a sunny windowsill for a day for the leaves to green up.
  10. Tip the sprouts into a large bowl and fill it with water.preparing clover sprouts
  11. Swish the sprouts around so the hulls float to the top.
    preparing clover sprouts
  12. Skim off the hulls or push them to the sides of the bowl, then grab a handful of sprouts and pull them out of the bowl.preparing clover sprouts
  13. Place into a salad spinner or onto a kitchen towel-covered plate.
  14. Repeat to get all the rest of the sprouts out (leaving a few hulls with them is fine).preparing clover sprouts
  15. Spin the sprouts to dry them, or leave them on the counter for a couple of hours to dry out.
  16. Put the sprouts in a plastic container and refrigerate for up to a week.
  17. Enjoy!

a sandwich made with home-grown clover sprouts

I hope this has inspired you to think about growing your own fresh sprouts!

And, if you’ve tried growing sprouting seeds before, which varieties are your favourites? I’d love to try some different seeds – do let me know your recommendations in the comments below…

Comments (12)

free crochet pattern: Happy Rainbows

Rainbows are a symbol of hope and unity as well as being full of bright and cheerful colours. I think we could all do with some cheer right now, as well as encouraging hope and unity.

My hope is that my Happy Rainbows pattern will brighten your day while you crochet it, and then go on to brighten the day of everyone who sees it!

Happy Rainbows crochet pattern by PlanetJune

Use these cheerful rainbows to brighten anyone’s day with a splash of colour and a message of hope and unity! Tape them to your window, hang them on the wall, or stitch them to a crocheted blanket or cushion as a colourful applique.

As buying yarn may be difficult at this time, I’ve designed this pattern so both rainbow sizes use easily-available worsted weight yarn. The only difference between the large and small rainbows is the hook size and the number of strands of yarn, so grab your brightest yarns from your stash and crochet some cheer!

Happy Rainbows crochet pattern by PlanetJune

As I like to reward people who chose to donate for my donationware patterns, the PDF version of this pattern includes a bonus pattern for matching flat-bottomed rainbows (pictured below), and additional progress photos (including left-handed photos).

Happy Rainbows crochet pattern by PlanetJune

As always, the pattern is free for you to use, and you need only donate if you’d like to thank me for my time in creating it, or if you’d like the easy-to-print PDF version.

I hope you enjoy my Happy Rainbows pattern!

Go to the Happy Rainbows pattern >>

Comments (2)

Next entries » · « Previous entries
  • Quick Links: Crochet

    navigation: arrow

    buy crochet patterns and accessories from my online store

    'Everyday Crochet' and 'The Essential Guide to Amigurumi' crochet books by June Gilbank

    Crochet video tutorials and step-by-step photo tutorials

    Free PlanetJune crochet patterns

    Frequently Asked Questions

    Quick Links: Crafts

    navigation: arrow

    Punchneedle Embroidery information, ebook & patterns

    Papercraft ebook & tutorials

    Free PlanetJune craft projects & tutorials

  • Blog Post Categories

  • Blog Archives

  • CAL Galleries

    Ravellenic Games: Team PlanetJune
    PlanetJune Reindeer Games
    PlanetJune Temperature Snake CAL

  • Welcome to PlanetJune!

    June Gilbank

    Hi, I'm June. Welcome to my world of nature-inspired crochet and crafting. I hope you enjoy your visit!

    If you'd like to get in touch, you can contact me here.
    crocheted Canadian flag by PlanetJune
  • June’s Crochet Books

    A fanned-out pile of the books Everyday Crochet and The Essential Guide to Amigurumi, with text 'The answers to all your crochet questions at your fingertips - find out more'
  • Support PlanetJune!

    Want to say thanks? You can send me money in seconds at paypal.me/planetjune (over $20) or paypal.me/planetjune2 (under $20) or send me a donation through my shop.

    Or simply click through from my links before you shop at Amazon, Etsy, KnitPicks, LoveCrafts and more, and I'll make a small commission on your purchase, at no cost to you! Start here:

    ♥ Support PlanetJune ♥

    Tip: This link is also in the footer of every page!

    Thank you so much for your support!