16 years, 1000 blog posts
16 years ago today, I hit ‘publish’ on my first post to this blog. Short and sweet, I said:
I hope I’ll be inspired to be more creative by keeping track of my crafts here.
I think I succeeded in that hope! Here are just a few of my favourite projects from the past 16 years:
 Clockwise from top left: crocheted orangutan and punchneedle embroidery globe, papercraft flowers, polymer clay R2-D2 and BB-8, knitted sweaters
And, 6 years ago, on my 10th blogiversary, I said:
Little did I know that this blog would change my life and my career path, allow me to build a successful business, and help me to meet some of my best friends and inspiring crafters all over the world. PlanetJune (the business, and my career) has all come about as a direct result of starting a little blog as a way to document the things I make, way back in 2006.
That is so true! Thanks in large part to this blog, I stumbled into becoming first a crochet designer, then a full-time self-employed business owner, then a published author, and paid teacher, speaker, YouTuber… Would PlanetJune even exist today if I hadn’t started this blog?! Probably not.
A Thousand Posts in 16 Years
This, today, is my 1000th post. That seems like an impossibly large number, but it’s only an average of 5.2 posts per month (for 192 months)! Right from the start, I vowed to only ever post when I have something to say, so I never followed the typical advice to post on a regular schedule. In my early fast-paced youthful days I’d sometimes post 2 or 3 times a week; these days, it’s more like 2 or 3 times a month, but I’m still here, and still going.
I’ve just looked back to some of those early posts, and my writing style has definitely evolved over the past 600,000 words. (That’s enough words to fill eight 300-page novels – it’s no wonder I’ve developed as a writer…)
My blog has been there through everything with me, slow and steady, chronicling my progress and sharing my creative ideas with you. I’ve made friends from all over the world and bonded over our shared love of crochet, crafting, animals and nature.

Life can be hard, but when you can make lovely things and appreciate the wonders of nature, it always makes life feel that little bit better, don’t you think?
In today’s fast-paced world of stress and social media, I hope I can provide a little oasis of calm from the overwhelm every now and then, and I’m honoured that you choose to spend a little time with me here.
The Rise and Fall of Craft Blogging
Blogging has changed a lot since I first started in 2006. There was no social media at all back then, and the craft blogosphere and forums were the main ways that crafty types met online, made friends, and shared ideas and projects. People would flock to new blog posts, nobody expected your photos to be professional quality, and you’d get lots of affirming comments whenever you posted. It was, simply, fun!
In 2013, Google Reader (the main way people kept track of blogs they followed) closed down, and blogs were ‘replaced’ by social media. Was this the end for blogs? Who would bother to visit my blog when they could see so much more stuff in one place on Facebook, or Instagram, or Pinterest..?
Never one to follow the trends, I stuck with blogging anyway, and I’m so glad I did. I have all the usual social accounts (I’m @planetjune everywhere if you want to follow me) but I really like writing: crafting a post slowly, and editing it multiple times before I hit ‘publish’.
Blogging just fits me. It’s slower, more thoughtful, and longer-lasting. Social media is fleeting – if you miss something when I first post it on a social account, it’s unlikely you’ll ever see it – but you can browse through my 16 years of blog posts (or choose a category to browse through, or search for something specific) at any time. Or when you google for something, a post I wrote over a decade ago may still be relevant and pop up for you:
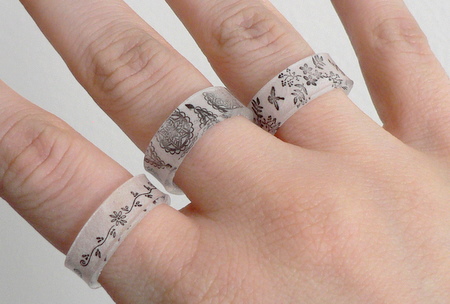 e.g. google “shrinkydinks rings” and my tutorial from 2008 is still the first result!
An Oasis of Calm
These days, most of the remaining crochet and craft blogs are jam-packed full of ads. Those ad boxes are the primary source of income for many designers, but isn’t it frustrating when a pattern, tutorial or recipe is constantly interrupted by ads?
I find it so jarring, so I’ve stubbornly stood my ground about keeping PlanetJune ad-free, even though I’m leaving hundreds – maybe thousands – of dollars per month on the table. My goal in life (and business) isn’t to make the most money by any means possible, and it just seems wrong for me to make money at the expense of your comfort… so, I don’t!
I hope you appreciate the refreshing ad-free experience here. 🙂
Thank You!
Although very few people leave comments on blogs any more, that just makes it more of a delight every time someone does leave me a comment. And every now and then I get an email from a reader who’s still out there, reading and appreciating, and sending me their own news in return – that always makes my day.
So, friend, whether you’ve been with me since the early blogosphere days or you just found PlanetJune this year, I’m so happy you’re here, and I hope you’ll stick around to see what comes next!
Cheers! ?


 New additions: Cygnet Aran, James C Brett Super Soft Baby Aran, King Cole Big Value Aran, Scheepjes Chunky Monkey, Sirdar Hayfield Bonus Aran, Sirdar Snuggly Supersoft Aran, Stylecraft Special Aran, Stylecraft Special for Babies Aran
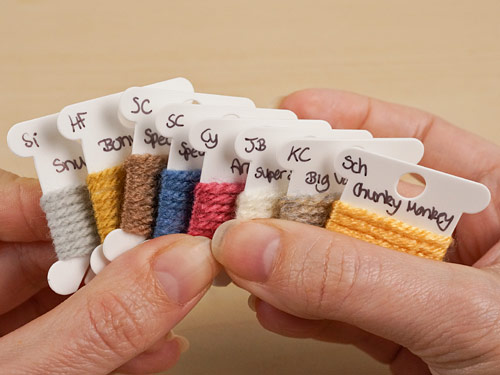


 Which is your favourite? It doesn’t matter – you can make both!


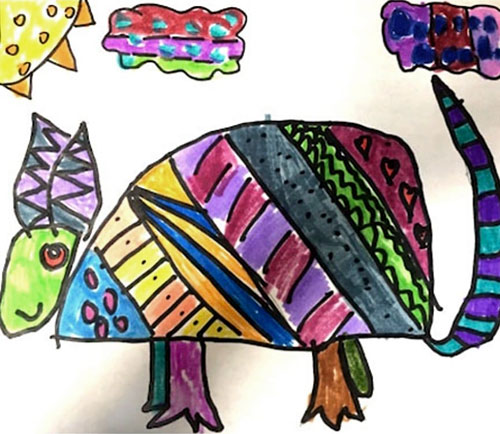 “Oaxacan Armadillo” by Isabella


