Thank you to everyone who requested a shrinkydinks ring tutorial! This tutorial is an experimental method, not an exact science – you should have fun playing with it…
UPDATE: Since posting this very popular tutorial in 2008, I’ve answered every question imaginable in the comments of this post. If you have questions, you’re welcome to trawl back through the hundreds of comments to find my answers, or, to make things easier, I’ve compiled a 3-page shrinky rings FAQ, which is available exclusively when you donate $2 or more towards my tutorial (this also entitles you to further help from me by email, should you need it). Please see the end of this post for more details about this policy 🙂
Please note: if you’ve come here via the lovely bird ‘ring’ picture on Pinterest, read this post to answer your questions.
This tutorial is Donationware – the instructions are available for free, but if you like it please consider sending me a donation to show your appreciation:
Send me a donation and receive the easy-to-print PDF version of the tutorial as a thank you! The PDF also includes a bonus 3-page FAQ compiled from all the tips I’ve shared in the comments since creating this tutorial.
Donations of any size are much appreciated. Just add the amount you wish to donate, and, once you have checked out and paid, your PDF will instantly be available to download from your PlanetJune account.
The complete instructions are available below, regardless of whether or not you choose to pay for them 🙂
This is a PlanetJune original tutorial. Please do not share or reproduce this tutorial; instead post a link to www.planetjune.com/shrinkydinks
I’ll answer some questions from the comments on my previous shrinky rings post before I get started, and add more hints and tips throughout the tutorial.
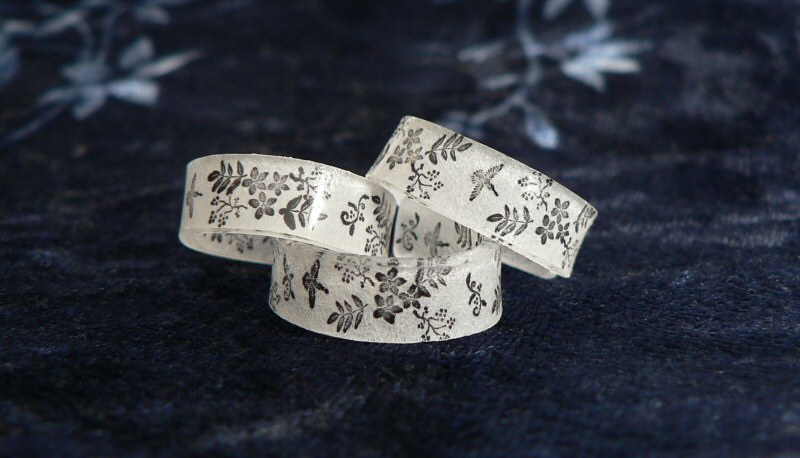
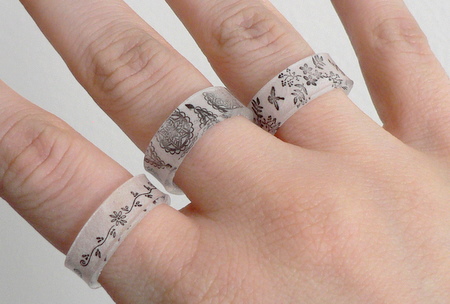
Shrink plastic, for the uninitiated, was originally marketed as a toy for kids. It starts life thin and flexible. You draw on it and then bake it in the oven, and it shrinks to become about 1/3 of the starting size, but 9 times as thick. This thickness makes it strong and hard. It will not bend after baking, so if you try to pull your ring open, or stand on it, it may snap, but it is strong enough to withstand regular use as a ring.
The last step (bending the ring into shape) is the most difficult, so I highly recommend that 1) you read through all the instructions before starting, and 2) practice on a blank piece of shrink plastic so you can get a feel for it and test your size and bending technique before putting too much effort into your design!
Full tutorial instructions are after the jump…
Read the rest of this entry »