Tiny Eggs
© June Gilbank 2014
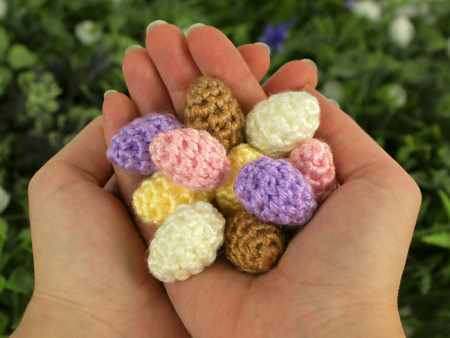
Make miniature crocheted eggs that are still perfectly egg-shaped despite their diminutive size. Decorate for Easter with a bowl of calorie-free ‘chocolate’ eggs – just don’t eat them!
This pattern is Donationware – the Tiny Eggs pattern is available for free, but if you like it please consider sending me a donation to show your appreciation:
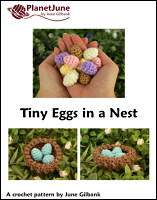
Send me a donation and receive the easy-to-print PDF version of the pattern as a thank you!
As a bonus, the PDF version, Tiny Eggs in a Nest, also includes a beautiful tiny textured bird’s nest (3″/7.5cm diameter) designed especially for these eggs, as a lovely decoration to celebrate spring or as the perfect accompaniment to an amigurumi bird.
Donations of any size are much appreciated. Just add the amount you wish to donate, and, once you have checked out and paid, your pattern will instantly be available to download from your PlanetJune account.
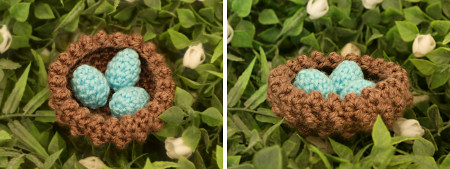
The complete pattern and instructions for the Tiny Eggs are available below, regardless of whether or not you choose to pay for them 🙂 But please consider donating, so you’ll receive the lovely mini nest pattern too!
Tiny Eggs is a free PlanetJune original crochet pattern. Feel free to use items made from this pattern however you wish, but I’d appreciate credit as the pattern designer. Please do not reproduce the pattern anywhere else; instead post a link to www.planetjune.com/tinyeggs/
Not ready to make it yet? Add it to your Ravelry queue:
Terminology
| ch | chain |
| invdec | invisible decrease Note: If you prefer, you may use a standard sc2tog decrease in place of each invdec. |
| sc | single crochet (double crochet for UK/Aus) |
| st | stitch |
Notes
- Do not join at the end of each round; rounds are worked in continuous spirals.
- Use a stitch marker to mark the beginning of each round. Move the marker up each time you start a new round.
You will need…
- E US/3.5mm crochet hook
- Small amount of worsted weight yarn
- Polyester fibrefill stuffing
- Yarn needle to weave in ends
- Stitch marker
Tiny Egg Pattern
worked from top to bottom
Make a magic ring, ch 1.
Rnd 1: 4 sc in magic ring. (4 st)
Rnd 2: (2 sc in next st, sc in next st) twice. (6 st)
Rnd 3: (2 sc in next st, sc in next 2 st) twice. (8 st)
Rnd 4: (2 sc in next st, sc in next 3 st) twice. (10 st)
Rnd 5: sc in each st around. (10 st).
Stuff egg through hole (see Stuffing Tips, below).
Rnd 6: invdec five times. (5 st).
Fasten off, stitch the remaining hole closed and weave in the end.
Roll the egg around between your palms to smooth out the stuffing and stitches, then, if necessary, help it back into its correct shape (narrower at the top and rounder at the bottom).
Stuffing Tips
- As the egg is extremely small, it can be a challenge to stuff. I prefer to leave the stuffing as late as possible, so I partially work Rnd 6 (invdec three times) before I add the stuffing through the remaining tiny space, and then complete the final two invdecs.
- To make it easier to add the stuffing neatly, try compressing it before you add it by rolling it into a ball between the palms of your hands:
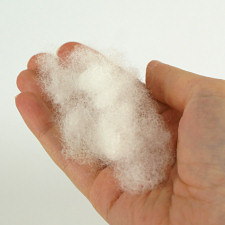
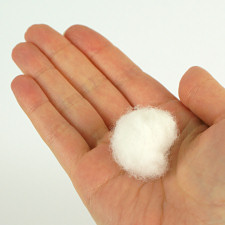
- Hold the ball of stuffing up to the egg (below, left) – if you find it is too large, pull a piece off then roll it between your palms again to form a smaller ball.
- Squash the balled up stuffing into the egg (below, right) – a Detail Stuffing Tool is perfect for this task, but if you don’t have one, use a narrow implement (e.g. try the wrong end of a pencil or wooden spoon) to push the ball of fibrefill into the egg.
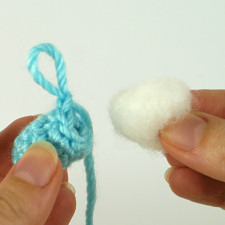
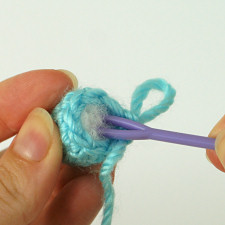
Make as many Tiny Eggs as you want! They only take minutes apiece to crochet, and they look especially good if you make multiple eggs in a selection of colours – almost good enough to eat… 🙂

I hope you enjoy this pattern. Please leave me a comment below if you do, and consider leaving me a donation (don’t forget you’ll also get the lovely textured nest pattern as a bonus if you do). Thanks!


Brenda Martin said
Will be making lots of these for a W.I. easter project. I use a chop stick for stuffing. Thank you for pattern.
Brenda
dee said
Please can I get on your email list?
DIANN
June said
Of course, Diann! You can sign up at www.planetjune.com/news – but I’ll do that for you now, so all you need to do is look for the email from my list and click the confirmation link there 🙂
patty said
Love your eggs would you be able to give me your nest pattern the nest please email me and god bless you
June said
Yes, the nest pattern is available for any size donation. Just click the ‘make a donation’ button above, choose your $ amount, and you’ll received the PDF of the Tiny Eggs in a Nest pattern 🙂
Heather Heald said
I’m new to crochet and have been trying to make these lovely eggs but I’m a bit stuck. When doing a magic ring, do you always do 6sc or does this change depending on size? Thank you.
Heather Heald said
I’ve figured it out now, I realised that I was reading it wrong. However not all patterns say how many single crochets to work in the ring, so is 6 the standard number if it’s not stated?
June said
Glad you figured it out, Heather! I’m afraid I can’t speak to how other people may choose to write their patterns, but I can tell you that the number of stitches to be worked into a ring should always be stated. If not, you should contact the pattern designer for clarification.
Heather Heald said
Thank you for replying and for clearing that up. I’m looking forward to making these as they seem like a good first project and then I can try some more challenging patterns.
Lisa Schwartz said
Great easy pattern. I look forward to trying it with a stripe as well. The yarn ends would almost work in place of stuffing!
June said
True! And it’d be a perfect opportunity to use the No-Cut Join too, to make neater stripes 🙂