Amigurumi Apples crochet pattern
© June Gilbank 2010
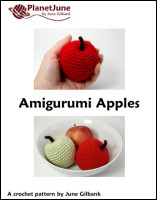
Here’s a realistic amigurumi apple: it’s not just a ball with a stalk attached, it’s actually the shape and size of a real apple! Give one to your (or your child’s!) favourite teacher, make a bowlful in red and green as a decorative centrepiece, or add a pair of safety eyes and an embroidered smile to make a sweet-as-apple-pie toy 🙂

This pattern is Donationware – the pattern is available for free, but if you like it please consider sending me a donation to show your appreciation:
Send me a donation and receive the easy-to-print PDF version of the pattern as a thank you!
Donations of any size are much appreciated. Just add the amount you wish to donate, and, once you have checked out and paid, your pattern will instantly be available to download from your PlanetJune account.
The complete pattern and instructions are available below, regardless of whether or not you choose to pay for them 🙂
This is a PlanetJune original crochet pattern. Feel free to use items made from this pattern however you wish, but I’d appreciate credit as the pattern designer. Please do not reproduce the pattern anywhere else; instead post a link to www.planetjune.com/apples
Not ready to make it yet? Add it to your Ravelry queue:
Terminology
| ch | chain |
| invdec | invisible decrease Note: If you prefer, you may use a standard sc2tog decrease in place of each invdec. |
| sc | single crochet (double crochet for UK/Aus) |
| sl st | slip stitch |
| st | stitch |
You will need…
- E US/3.5mm crochet hook
- Small quantity of worsted weight yarn in red or green, and brown or black (for the stalk)
- Stitch marker
- Yarn needle to weave in ends
- Polyester fibrefill stuffing
Notes
- Do not join at the end of each round; rounds are worked in continuous spirals.
- Use a stitch marker to mark the beginning of each round. Move the marker up each time you start a new round.
Apple
With red or green yarn, make a magic ring, ch 1.
Rnd 1: 6 sc in magic ring. (6 st)
Rnd 2: 2 sc in each st around. (12 st)
Rnd 3: sc in each st around. (12 st)
Rnd 4: (2 sc in next st, sc in next st) six times. (18 st)
Rnd 5: (2 sc in next st, sc in next 2 st) six times. (24 st)
Rnd 6: (2 sc in next st, sc in next 3 st) six times. (30 st)
Rnd 7: sc in each st around. (30 st)
Rnd 8: (2 sc in next st, sc in next 4 st) six times. (36 st)
Rnd 9-12: sc in each st around. (36 st)
Rnd 13: (invdec, sc in next 4 st) six times. (30 st)
Rnd 14: sc in each st around. (30 st)
Rnd 15: (invdec, sc in next 3 st) six times. (24 st)
Rnd 16: sc in each st around. (24 st)
Rnd 17: (invdec, sc in next 2 st) six times. (18 st)
Rnds 18-19: sc in each st around. (18 st)
Rnd 20: (invdec, sc in next st) six times. (12 st). Stuff apple through hole.
Rnd 21: invdec six times. (6 st). Cut the yarn, leaving a long (approx 12″/30cm) yarn end.
Note: Your apple will look more like a lemon at the moment, but don’t worry: that will all change in a moment!
Stalk
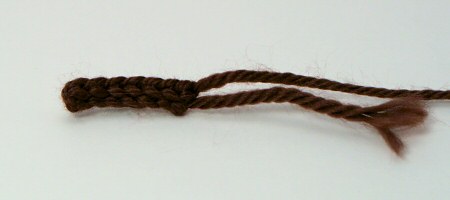
With brown or black yarn, ch 7.
Row 1: sl st in 2nd chain from hook and in each remaining chain. (6 st)
Note: I like to work into the back bumps of the chain, but you can work into the chain normally if you prefer.
Cut yarn, leaving a long (approx 12″/30cm) yarn end. Draw end through last loop and pull tight to fasten off.
Finishing
Using a yarn needle and the long yarn end from the apple, close up the remaining hole at the bottom of the apple. Use a finger to push the top of the apple down to form a dimple (don’t worry if it won’t stay in this position).
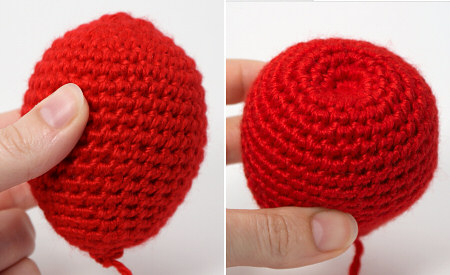
Pass the yarn from the bottom up through the apple to the magic ring at the top centre, then insert the yarn needle at the top, one stitch away from where it exited the apple, and pass the yarn end back down through the apple to the bottom. Draw the yarn tighter until you like the shape and the top dimple stays in place. Knot the yarn at the bottom of the apple so it stays in this position (the knot will be covered later).
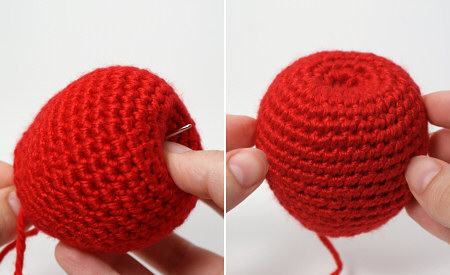
Pass the yarn end through the apple, coming out somewhere along the apple’s side. Draw the yarn tight, and snip the end close to the apple. The yarn end should retract back inside the apple after it is cut.
Using a yarn needle and the long yarn end from the stalk, pass the yarn through the apple from top middle to bottom middle, so the base of the stalk sits in the dimple at the top of the apple.
Make 3 small overlapping stitches at the bottom of the apple, to form an asterisk shape.
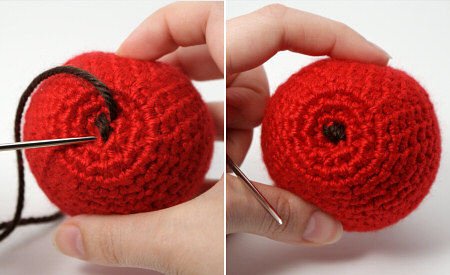
Pass the yarn end back up through the apple to the top. Knot the yarn end and the starting tail from the stalk together. Thread both ends onto the yarn needle and pass them through the apple, coming out somewhere along the apple’s side. Draw the yarn tight, and snip the ends close to the apple. The yarn ends should retract back inside the apple after they are cut.

I hope you enjoy this pattern. Please leave me a comment below if you do, and consider leaving me a donation. Thanks!


Heather S said
Absolutely the BEST written instructions I’ve ever read. So clear and every step detailed. Thank you!
Theresa Berdiel-Johnson said
Its awesome! They look so cute and realistic!!!
Char said
Such a good pattern! I’m making a bunch of these for all of my teachers at the end of the year and I think they’ll love them. Thank you! :^)
Olivia said
Hermoso trabajo muchas Felicidades y muchas gracias por compartir saludos y bendiciones
Katie said
I appreciate this beautiful free pattern. It will go perfect with my very hungry caterpillar set I am making. I will make a donation soon as a thank you for all your hard work and free patterns you publish for everyone to use. It is greatly appreciated
June said
Thank you so much, Katie – I appreciate your support!
Kerry Glen said
What a beautiful apple!! Thank you for explaining so clearly 🙂
Sarah Knitmore said
I love this pattern. I’ve been making lots of crochet food/fruit for my kindergarten classroom and this is the best apple pattern out there. Nicely sculpted and easy to follow. Thank you!
Gloria said
you do such beautiful work .it looks realistic.thank you
Tanya said
It looks really great at the end, and can you do a miniature version of the apple.
Brandi Nielsen said
An excellent post, congratulations !!
Josie Q said
:grinning: I love this pattern loads! I did a full sized apple and then reduced the pattern size and made a mini apple! Both of them turned out super adorable!
Joni said
well that was fun!! mine has a strange shape but fun. I will do more. thanks for the pattern
Karen said
I love your apple pattern. I wish more of the patterns on Pinterest were as easy to follow.