PlanetJune Craft Blog

Latest news and updates from June

Archive for Crochet

Join the Reindeer Games crochet-along!

Team PlanetJune had such a blast with the Ravellenic Games last summer, we decided that our Christmas crochet-along this year will be a Team PlanetJune special event!

PlanetJune Reindeer Games 2021

The first annual PlanetJune Reindeer Games begins on Monday November 1st, and I hope you’ll join us 🙂

Crochet anything PlanetJune as part of the PlanetJune Reindeer Games 2021 (Monday, Nov 1 – Friday, Dec 31). This is a Team PlanetJune event, hosted in the PlanetJune Ravelry group, with a similar concept to the Ravellenic Games: the idea is to challenge yourself by starting and finishing crochet project(s) before the end of the year.

It’s just for fun, like a CAL but you get to choose your projects – anything PlanetJune, including projects from my books – and earn virtual awards! During the Games, we all cheer each other on to complete our chosen projects. Our team captains will award you with your Reindeer Village medals and Antlers as you complete your project(s).

Santa and all 9 reindeer have set up their stalls in the Reindeer Games Village – have a virtual wander around and choose which you’ll visit first:

PlanetJune Reindeer Games Village awards

  • Santa’s Toy Shop – toys
  • Rudolph’s Gingerbread House – home/décor
  • Dasher’s Scarf Stand – scarves
  • Dancer’s Winter Wear – hats and mitts
  • Prancer’s WIPs Wrapping – any project started before the Games
  • Vixen’s Shawl Stall – shawls and wraps
  • Comet’s Closet – sweaters and other garments
  • Cupid’s Cowl Corner – cowls and neckwarmers
  • Donner’s Blanket Bazaar – blankets and afghans
  • Blitzen’s Bag Bonanza – bags and purses

You’ll receive the medal for the stall you ‘visited’ once you’ve finish your project! And you can also receive bonus Antler awards for your projects:

PlanetJune Reindeer Games Antler awards

  • Santa’s Helper – showing team spirit
  • Angel – charity project
  • Carolling – crochet in public
  • Cookie Decorator – colourwork
  • Deck the Halls – embellishments
  • Heirloom – using a PJ pattern you’ve owned for more than 3 months
  • Ice Sculptor – techniques: cables, lace or Tunisian
  • Snowman – modifying the base pattern
  • Master Wrapper – complete 3 WIP projects
  • Super Elf – complete any 3 projects
  • Bah! Humbug! – complete a project on Christmas Eve
  • Fireworks – complete a project on New Year’s Eve
  • Have a Cookie – a special antler for those of us who try our best but don’t quite get to the finish line

Whether you’re crocheting your favourite PlanetJune patterns as Christmas gifts, items to sell at craft fairs or online, toys for charity, or projects for yourself, we’re ready to encourage you to complete your goals and to celebrate your successes with you!

And, even if you think you may not have time to complete a project, you’re very welcome to join the team for the community spirit and friendly chat. There’s something about PlanetJune that attracts the kindest and most supportive people, and, if you enjoy PlanetJune patterns, you’re already part of our community – do come over and say hello!

Team PlanetJune in the Rav Games 2021

To give you an idea of what to expect, in the Ravellenic Games last summer, Team PlanetJune completed 54 projects, and enjoyed 56 pages of chat! Here’s a roundup of all the wonderful PlanetJune projects that we completed in just 2 weeks:

Ravellenic Games 2021 - Team PlanetJune crochet projectsRavellenic Games 2021 - Team PlanetJune crochet projectsRavellenic Games 2021 - Team PlanetJune crochet projects

Isn’t it lovely to see the variety of projects and be inspired by what other people are making? I expect the project mix will look somewhat different for the Reindeer Games, with more Christmas decorations and warm accessories – but who knows! You’ll have to join in to find out…

Join us for the Reindeer Games!

PlanetJune Reindeer Games 2021

While the Ravellenic Games is a fast-paced sprint, the Reindeer Games is more of a gentle stroll together towards the holidays. The rules are relaxed, the timeline is extended, and having fun and supporting each other is the main goal.

If that sounds good to you, please hop over to the PlanetJune group on Ravelry, and leave a message saying “I’m in!” in the Reindeer Games thread. We look forward to welcoming you into our virtual Reindeer Games Village. 🙂

Comments (3)

Turtle Beach blanket crochet patterns

I’ve revamped my incredibly popular Turtle Beach blanket design into two new patterns, showcasing two different designs and two different colour schemes that you can mix and match: cool and calm true blues or tropical teals, in the classic colourblock design or my new ombré version.

Turtle Beach blanket crochet patterns (Classic Blue and Teal Ombre versions) by PlanetJune
Left: Classic Blue Turtle Beach blanket; Right: Teal Ombré Turtle Beach blanket

The more I look at them, the more undecided I am about which Turtle Beach blanket I like best – how about you?

Turtle Beach blanket crochet patterns (Classic Blue and Teal Ombre versions) by PlanetJune

Here’s the Classic Blue Version:

Turtle Beach blanket crochet pattern (Classic Blue version) by PlanetJune

And the Teal Ombré Version:

Turtle Beach blanket crochet pattern (Teal Ombre version) by PlanetJune

Just look at that rippling wave effect!

The good news is you don’t have to choose; you can make either colour scheme in either style, or one of each! And, as well as selling the patterns separately, I’ve bundled them into a Turtle Beach Blanket multipack, including both the Classic Blue and Teal Ombré blanket patterns.

About the Patterns

I’ve packed these patterns full of information – each one includes complete row by row crochet instructions for the 8 most common classic afghan sizes, ranging from a small baby blanket through to a king size afghan. For each afghan size, the yardage for each colour is also provided, so you’ll be able to order all your yarn at once and know you have enough.

Turtle Beach blanket crochet patterns (Classic Blue and Teal Ombre versions) by PlanetJune

Blanket/Afghan sizes included:

  • Baby (approx 24×32″, 60x80cm)
  • Lapghan/crib (approx 36×48″, 90x120cm)
  • Toddler (approx 40×48″, 100x120cm)
  • Throw (approx 48×60″, 120x150cm)
  • Twin (approx 60×85″, 150x215cm)
  • Full/double (approx 74×85″, 190x215cm)
  • Queen (approx 80×90″, 200x230cm)
  • King (approx 96×90″, 245x230cm)

Choosing Yarns

For this pattern I’ve used light worsted weight yarns (medium #4 weight), specifically Red Heart Soft and Bernat Satin. You don’t need to use exactly the same yarn as me – the most important factors are to find colours that you like and that work well together, and that are readily available to you!

As worsted weight yarns can vary considerably in thickness and sheen, I also recommend that you try to choose yarns that are similar to each other if you can’t find all the shades you need within one brand and line of yarn. See my worsted weight yarn comparison for examples and my recommendations for which yarns can be mixed and matched.


The Turtle Beach Collection

With the release of these patterns, I’ve also taken the opportunity to revamp all my other related patterns into a full Turtle Beach Crochet Pattern Collection. You can mix and match patterns within the collection to make your own custom blanket:

  • Mix and match colour schemes and stripe patterns with the Classic Blue and Teal Ombré blankets.
  • Add custom details (an edging and puffy 3D seafoam effect) with the Ribbed Ripple/Turtle Beach donationware blanket pattern.
  • Add any combination of the original 3D stuffed baby sea turtles, the new flat appliqué turtles, and puffy or flat starfish.

Turtle Beach Collection crochet patterns by PlanetJune
Left: Classic Blue blanket; stuffed 3D turtles
Right: Teal Ombre blanket; flat appliqué turtles

Turtle Beach Collection crochet patterns by PlanetJune
Clockwise from top left: 3D seafoam, puffy starfish, flat starfish, squared-off edging

Turtle Beach Collection Deals!

You can explore the details of all the patterns in the Turtle Beach Collection here, but here’s a rundown of just the new deals:

  • I’ve bundled both new blanket patterns into a Turtle Beach Blanket multipack, including both the Classic Blue and Teal Ombre blanket patterns.
    Turtle Beach blanket crochet patterns (Classic Blue and Teal Ombre versions) by PlanetJune
  • Baby Sea Turtle Collection now includes a full bonus pattern for a Swimming Turtle to stitch to your blanket. (If you’ve already bought this pattern, you can download it again from your PlanetJune account and you’ll automatically get the latest version.)
    Swimming Turtle - part of the Baby Sea Turtle Collection crochet pattern by PlanetJune
  • You can also now buy a multipack of all 8 baby sea turtle patterns (turtle, hatching turtle, swimming turtle, turtle egg, with all four options in both 3D and flat versions).
    Baby Sea Turtle Collection & Appliques - 8 crochet patterns by PlanetJune
  • And, if you already donated more than the average amount of $3.50 for the original Ribbed Ripple/Turtle Beach blanket pattern, and you’d like to buy the new blanket pattern(s), I can issue you with a credit for the additional amount you paid (over $3.50), to put towards the new Classic Blue version. ETA: For the rest of October 2021 only, even if you donated under $3.50, I’ll still send you a discount code!To get your discount, just email me with the following details:
    1. The order number for your original donation (you can find this in your PlanetJune account or your confirmation email)
    2. Which option you’d like to apply your credit to:
      • Turtle Beach Blanket (Classic Blue Version)
      • Turtle Beach Blanket multipack (includes both the Classic Blue and Teal Ombre blanket patterns)

    I’ll send you a discount code, or, if you’ve already ordered the new patterns, let me know and I’ll send you a gift certificate for you to use later!


Phew! That was a lot of info to get through! I hope you’ve enjoyed seeing all the options in this post, and that you’ll have fun choosing your favourite options from the Turtle Beach Collection. Once you’ve selected your blanket size, colourway and stripe pattern, flat and/or stuffed turtles, and any of the other optional extras, you’ll be able to mix-and-match to make a gorgeous one-of-a-kind blanket.

Turtle Beach blanket crochet patterns (Classic Blue and Teal Ombre versions) by PlanetJune

I’d love to see your finished blankets (or anything else you’ve made from my patterns) – please do share photos with me! I’m @PlanetJune everywhere (on ravelry and social media) or you can email me – I always love to hear from you 🙂

Comments (9)

worsted weight yarn comparison: huge update!

I published my original worsted weight yarn comparison almost a decade ago, as a way to show that, even though two yarns are both labelled as 100% acrylic and worsted weight, they may be too different (in terms of thickness, softness and/or shininess) to mix within the same project and get a good result.

Since then I’ve had many requests for an update including more common and modern yarns, so we could all use it as a lookup table to find suitable matches. With more local craft stores closing and the trend towards online shopping, it’s becoming more difficult to just go into a shop and compare yarns directly, so I decided to go for it and create a useful resource for all of us!

I asked my Ravelry group members to send me samples of worsted weight acrylics from their stashes, and they really came through for me – I had dozens of different yarns to compare! A huge thanks goes to ravelers SilentSilence, MagicalAmigurumi, JEMCCreations, somelady42 and abjCrochet for their help with this project. 🙂

worsted weight yarn samples

I sorted and labelled all the samples, then I realised I had a daunting task ahead of me: trying to figure out how to categorize and catalogue these samples in a way that would a) be useful and b) let me add to the results in future…

Can We Just Calculate the Thickness?

With my wide range of samples, I was hoping to discover a trend that we could use to determine yarn similarities in future without having to compare specific yarns side by side. I hoped to come up with some numbers so you could just look up the details of a yarn online and then do the calculation to figure out for yourself whether it should be a lighter or heavier worsted weight yarn.

Using the weight and yardage info from the ball band of each yarn, I calculated the weight per metre of each of my yarn samples in the hope that this would give an indication of the thickness of the yarn. While this may work for broader differences between yarn weights (e.g. a fingering weight yarn would definitely weigh less per metre than a bulky weight yarn!), within the worsted weight category I found absolutely no correlation between the nominal length per gram according to the ball band and the actual thickness of the yarns.

So no, we definitely can’t use the information on the ball band as a way to compare different worsted weight acrylic yarns.

My Testing Methods

I had an idea that winding bobbins with the yarns may be a good way to compare yarns without crocheting a sample with each, so I tested my theory by carefully winding bobbins with leftover yarn from the exact same balls I crocheted my original samples from, way back in 2012! (Luckily I never throw anything away…)

And here are the results! First, the original samples:

worsted weight acrylic yarns

And secondly, the bobbins:

worsted weight acrylic yarns

Each of my bobbins is wound in exactly the same way, with the same number of wraps. I’ve arranged my yarn bobbins in the same colour order as the size order from my crocheted samples, and you can see that there are clear height differences in the yarn wound onto the bobbins that correspond to the size difference I found in the crocheted samples. So this seems like a good indicator of yarn weight.

But that’s not the only factor; the best chance of getting a good match between yarns seems to be by visual and tactile comparison, so I’ve looked at, touched and compared samples of each yarn side by side to assess their thickness, sheen and texture.

Categories

As with my original comparison, I’ve split the yarns by two measures:

Weight: I’ve named my categories the same as before:

  • light worsted weight
  • worsted weight
  • heavy worsted weight

Appearance and Texture: In my original comparison, I called these sheen, slight sheen and no sheen. I’ve clarified the category headings now:

  • soft and shiny
  • slightly soft/shiny
  • sturdy and matte

Here’s an example from each of the categories (I’ve chosen samples that vary in both weight and appearance/texture):

worsted weight acrylic yarns - differences

Left: light worsted weight; soft and shiny
Middle: worsted weight; slightly soft/shiny
Right: heavy worsted weight; sturdy and matte

Hopefully you can see the differences! Between the left and right samples there’s a huge difference in both thickness and appearance, and the middle sample lies somewhere between the two in both measures.

So, I’ve ended up with 9 different categories: for each of the three weights, there are three appearance/texture options.

Results

With over 40 samples wound, labelled and categorized, I’m finally ready to share the results with you!

worsted weight acrylic yarns

I’ve published the results in a table here: Worsted Weight Yarn Comparison. The blog isn’t the best format to display them in, so, I’ve also compiled them into a 3×3 table in a downloadable PDF file, with weight across the top and appearance/texture down the side. This is a free download that you can grab from my shop for no charge 🙂

Worsted Weight Yarn Comparison - a free 2 page PDF file by PlanetJune

I’ll keep both versions updated as and when I receive new yarns to include. (And, if you have a worsted weight acrylic yarn you’d like me to add to the list, please scroll to the ‘What’s Missing’ section at the bottom of the Worsted Weight Yarn Comparison webpage for details of how you can send me a sample!)

I hope you find this resource useful! And don’t forget to download the PDF version from my shop now – no charge, no catch – it’s my gift to you 🙂

Comments (5)

Baby Sea Turtle Hatchlings applique crochet pattern

Since I released my Baby Sea Turtle Appliqué pattern, I’ve had multiple requests from people making a Turtle Beach blanket and wanting matching flat turtle eggs, hatching turtles and swimming turtle hatchlings to complete the scene.

Some of my best ideas come directly from my customers, and this was one of them: of course I should design the full set, to match my original turtle blanket, but with flat applique turtles! So, here are the Baby Sea Turtle Hatchlings:

Baby Sea Turtle Hatchlings crochet pattern by PlanetJune

Baby Sea Turtle Hatchlings crochet pattern by PlanetJune

Baby Sea Turtle Hatchlings is an Expansion Pack for the Baby Sea Turtle Appliqué crochet pattern, that includes all the modifications required to crochet flat appliqué versions of a hatching turtle emerging from its egg and a half-submerged swimming turtle, plus the pattern for a turtle egg appliqué.

What is an Expansion Pack?

Expansion Packs by PlanetJune

  • An Expansion Pack is an add-on to an existing PlanetJune pattern.
  • The Expansion Pack lets you modify or add to the original pattern to create something else.
  • You cannot use the Expansion Pack alone – you must also purchase the original pattern in order to be able to complete the pictured items in the Expansion Pack pattern.

An Appliqued Turtle Blanket

Here’s an example of how the appliqué turtles look on a Turtle Beach blanket:

Turtle Beach blanket with Baby Sea Turtle Appliques - crochet patterns by PlanetJune

Isn’t that lovely?! The PlanetJune patterns I used to make this are:

Top Tip: If this picture is tempting you to make a Turtle Beach blanket for the first time, I’d recommend you get started on your turtles now, but hold off on donating for the blanket pattern just yet – I’ll have a new option coming in the next couple of weeks that you may prefer…

I’m so happy with how these appliqué versions of my baby sea turtles work on a blanket – for me, they seem much more practical than attaching stuffed turtles to a blanket.

As you can see above, it has the same visual appeal as the original turtle blanket, but the flat appliqués create a more sophisticated beach blanket for adults and older children.

Or, if you want a blanket for babies and young children, because I designed the flat turtles to match my original Baby Sea Turtle Collection in size, shape and style, you can make a blanket with applique turtles and gift it together with one or two matching amigurumi baby sea turtles to play with!

Purchase Options

Baby Sea Turtle Applique and Hatchlings crochet patterns by PlanetJune

Launch Discount

Now, if you’ve already bought the Baby Sea Turtle Appliqué pattern, you won’t be able to save that dollar. But, for 7 days only, add the Baby Sea Turtle Hatchlings Expansion Pack pattern to your shopping cart, together with anything else (totalling $5 or more), then use the code TURTLEPOWER at checkout and you’ll still get your discount! (Valid until next Wednesday: 15th September 2021.)

Note: If you don’t need anything else right now, this also applies to Gift Certificate purchases, so you can pick up a $5 gift certificate now, get your discount, and have $5 in your PlanetJune account ready for your next purchase, or to send to a crocheting friend!

Baby Sea Turtle Hatchlings crochet pattern by PlanetJune


If you’re not ready to make your Baby Sea Turtle appliqués just yet, don’t forget to heart and queue the pattern on Ravelry so you don’t forget about it:

Baby Sea Turtle Hatchlings: 

Baby Sea Turtle Appliqué:

Baby Sea Turtle Hatchlings crochet pattern by PlanetJune

I hope you’ll enjoy adding these turtles to your next beach blanket!

Which do you prefer: the flat or stuffed turtles? (Or both?!) Would you like to see more PlanetJune Appliqué patterns, or should I focus only on amigurumi designs?

Do let me know what you think in the comments…

Comments (5)

amigurumi Maggie & Maui

I’ve avoided making any ‘small white fluffy dog’ designs to date, but now I have a fluffy white dog of my own I just had to give it a go and make an amigurumi version of my sweet Maggie, who’s (mostly) a mix of miniature poodle, maltese and bichon frise.

amigurumi Maggie dog by planetjune

One of the problems with designing patterns for long-haired dogs is that they can look quite different depending on how their fur is clipped – for show, for practicality, or something in between. And lots of the small dogs I know are mixed breeds, so they may not look exactly like a specific breed archetype anyway… It’s a challenge to make a pattern that will please people, so I thought starting with my own pup as the model will at least make me happy 😉

To make my ami-Maggie, I started with the closest parts from several of my existing AmiDogs designs, and then made a few tweaks to get a closer match to my little maltipoochon. I used mainly off-white yarn, with light brown for the ears, as Maggie is a little apricot-coloured in places, and not bright white anywhere! And here’s the result:

amigurumi Maggie dog by planetjune

Aww! I debated brushing ami-Maggie all over to give her a fluffier look, but in the end I decided that the fluffy ears were enough to make her mini-me look like her. Do you agree? (I might still brush the top of her head a bit too…)

amigurumi Maggie dog by planetjune

You’ve probably guessed what’s coming next, huh? I adore both my babies, and I couldn’t just make an ami-Maggie without making an ami-Maui to complete the set!

amigurumi Maui cat by planetjune

To make my ami-Maui, I used my AmiCats Tabby pattern, with only basic modifications to make Maui’s white chin and unstriped tail.

amigurumi Maui cat by planetjune

Maui doesn’t have very defined tabby stripes, so I chose two similar heathered shades of taupe/brown (Lion Brand Heartland in Mammoth Cave and Sequioa) to give an impression of mottled tabby colours without modifying the pattern, and I think that was pretty effective.

amigurumi Maui cat by planetjune
My amigurumi versions of my babies aren’t perfect matches for their real-life counterparts, but even at a glance there’s no doubt who they represent, and I just love them!

amigurumi Maggie dog and Maui cat by planetjune


Crochet your own Cats & Dogs!

If you’re looking for cat or dog crochet patterns, look no further than my AmiCats and AmiDogs collections. With 8 cat and 24 dog designs, I have a wide selection for you to choose from:

amigurumi AmiCats and AmiDogs crochet patterns by PlanetJune

So many options! And you can mix and match parts from different patterns to make a closer match to a specific dog or cat.

I know I still have some gaps in my design collection though – do you have a little fluffy dog that you’d like to recreate in crochet? Let me know! Leave me a comment below with the breed of your dog and what you think of my ami-Maggie, and/or email me (june@planetjune.com) with a pic of your baby! If there’s enough interest, I may be inspired to create some more AmiDogs patterns in future…

Comments (13)

free pattern: Fuzzy Hedgehog

Ready for some cuteness? Fuzzy Hedgehog is a simple and adorable pattern that makes the most of a novelty textured yarn such as eyelash or fur! From realistic shades to bright and colourful options, there are no wrong choices to make – any novelty yarn looks good as hedgehog spines.

Fuzzy Hedgehog crochet pattern by PlanetJune

With just two pieces to stitch together, you’ll be able to whip up the sweetest little hedgehog buddy in no time, sized to fit perfectly in the palm of your hand. The ears are crocheted as you go, so all you need to do is stitch the head to the body and you’re done.

Fuzzy Hedgehog crochet pattern by PlanetJune

Please don’t be scared of eyelash-type yarn – with a simple pattern like this, it’s fine if you skip or add a stitch here or there! Using your start-of-round stitch marker means you can add a quick increase or decrease to get back to the right number of stitches at the end of each round, so no harm done – nobody will ever know! And the effect is absolutely perfect for hedgehog spines.

Fuzzy Hedgehog crochet pattern by PlanetJune

As I like to reward people who choose to donate for my donationware patterns, the PDF version of the Fuzzy Hedgehog pattern also includes additional instructional photos and my bonus ‘About Fuzzy Patterns’ PDF, which compiles all my tips on working with fuzzy yarns. As always, the pattern is free for you to use online, and you need only donate if you’d like to thank me for my time in creating it, or if you’d like the easy-to-print PDF version with the bonuses.

Go to the free Fuzzy Hedgehog pattern >>

Or jump straight to donate:

Order the Fuzzy Hedgehog pattern >>

Not ready to make one yet? Add this pattern to your Ravelry queue:


Join Team PlanetJune for the Ravellenic Games!

If you’re new to the Ravellenic Games, the idea is to challenge yourself by starting and finishing project(s) during the timeframe of a certain summer 2021 global sports event (July 23 – August 8). It’s just for fun, like a CAL but you get to choose your own projects, and you’ll be awarded virtual medals for projects you complete. Join Team PlanetJune and you can crochet anything PlanetJune during this timeframe – including a Fuzzy Hedgehog for the ‘Toy Toss’ event – and your teammates will cheer you on as you race to the finish!

Ravellenic Games 2021 - Team PlanetJune

For more info on how this all works, see the Team PlanetJune FAQ, or ask in the Team PJ thread on ravelry – my amazing co-Captains and I are standing by and waiting to help.

Please join us in the PlanetJune group on Ravelry and post to the Team PlanetJune thread to register as part of the team! The games begin on Friday (but latecomers are welcome too). I hope to see you there – it’ll be fun for us to all crochet together this summer 🙂

Comments

Badger crochet pattern

That’s right, it’s taken a while but I have a new pattern for you! It’s a Badger crochet pattern and I’m so happy to have finally brought this idea in my head to life! Badgers have such a distinctive shape with their stocky grey bodies, black and white striped faces, tiny ears, and cute upturned noses…

Badger crochet pattern by PlanetJune

Looking back through my notes, I first started planning this design in March 2014… that’s over 7 years ago! So if I haven’t made your favourite animal yet, don’t think that means it’ll never get made – sometimes it just takes a while for the inspiration and available time to coincide…

Badger Fun Facts

  • Badgers are members of the weasel family, Mustelidae.
  • The variety of badger I’ve made for my pattern is the European badger, arguably the best-known and most beloved badger. You’ll find lots of European badgers as characters in classic children’s books like The Chronicles of Narnia, Fantastic Mr Fox and The Wind in the Willows – and of course, as the Hufflepuff emblem in the Harry Potter books!
  • Other types of badger around the world include the American badger, the honey badger from Africa, and various Asian badgers. They all look somewhat similar, but aren’t very closely related.
  • Badgers are masters of digging. They dig for food and live in family groups underground in burrows called setts.
  • They are largely nocturnal and eat a variety of food including worms, fruit and eggs. European Badgers can eat hundreds of earthworms per night!

About the Pattern

As always, the pattern includes full instructions and detailed step-by-step photographs for assembly and all special techniques used, so you can follow along and make a perfect badger.

Badger crochet pattern by PlanetJune

You can’t have a badger without those unmistakable black and white face stripes, but there are only 12 rounds of follow-carefully colour changes, and the pattern includes lots of tips – specific to this pattern – to make the colour changing easier and ensure you’ll get a beautifully tidy result.

Badger crochet pattern by PlanetJune

After you’ve finished the colourwork on the head and chest, it’s all plain sailing and you’ll be able to enjoy watching the rounded body of your badger take shape as you crochet! The head and body is all worked as one piece and there are only 3 pieces (plus the tiny ears) to sew onto the body, so the final finishing stage is quick and simple.

Badger crochet pattern by PlanetJune

Colourwork Magic!

You’ll often see photos of amigurumi designs with colourwork that only show you one side of the completed item, because the colourwork on the other side looks much worse. There’s a good reason for that – amigurumi stitches don’t stack exactly on top of each other, so there’s a built-in slant, which makes symmetrical colourwork essentially impossible.

I’ve been working for years on techniques to make paired vertical or slanting stripes at various angles for my amigurumi (and I still haven’t mastered every effect I’m looking for – there’s lots more research for me to do for future designs!) but I never release a design without getting everything to match as closely as I can.

So here, for your viewing pleasure, are close-ups of both sides of my badger’s head and chest, so you can see how the colourwork looks good, with smooth black face stripes with matching angles and no awkward jagged transitions, from either side 🙂

Badger crochet pattern by PlanetJune

Just follow the pattern and you’ll be able to achieve the same effect!

Buy Now & Launch Discount

Ready to get started? Pick up my Badger crochet pattern from my shop right now. Or, if you’re not ready to make it just yet, add it to your Ravelry queue or favourites so you don’t forget about it:

And for one week only, you can take an extra 50c off the price: add the Badger pattern to your shopping cart, and enter the discount code TRUFFLEHUNTER at checkout! (Offer ends Tuesday 6 July, 2021.)


Badgers play an essential part in popular culture, and their real-life counterparts are just adorable. I’ve never had the pleasure of seeing one in real life, but I always enjoy watching them on wildlife documentaries, and now I can see a (crocheted) badger whenever I want!

Badger crochet pattern by PlanetJune

I really hope you’ll enjoy my Badger pattern. Don’t forget to share photos with me when you’ve made one:

…I always love to hear from you, and to see what you’ve been making from my patterns. 🙂

Comments (6)

Scaling Amigurumi: a crochet investigation

I’m often asked how to scale one of my amigurumi patterns up or down by a specific amount. It’s hard to answer that without relevant data, so that means it’s time for another crochet experiment – yay!

Want to skip straight to the results? Jump down to the Amigurumi Size Conversion Table.


Method

I made 8 versions of my Tiny Whale pattern, ranging from the largest 25mm hook I own down to the smallest hook I felt I could manage (0.9mm), and choosing the most appropriate yarn size for each hook.

resizing amigurumi by scaling up and down, by planetjune

Of course, it’s possible to crochet outside this range – massive 40mm hooks exist (or you can crochet using your whole hand instead of a hook!), and some talented people are able to crochet with sewing thread and a 0.4mm hook – but I had to set some limits for my experiment…

The three dark blue whales in my photos mark these limits: largest, smallest, and the standard size (made with worsted weight yarn and a US E/3.5mm hook).

I’ve named all eight sizes so we have something to refer to throughout this post, from largest to smallest (and top to bottom in the photo above):

  1. Extreme Amigurumi
  2. Giant Amigurumi
  3. Mini Giant Amigurumi
  4. Large Amigurumi
  5. Standard Amigurumi – regular amigurumi!
  6. Small Amigurumi
  7. Mini Amigurumi
  8. Micro Amigurumi

The difference in scale is incredible – one stitch of an Extreme Amigurumi whale is larger than an entire Micro Amigurumi whale!

resizing amigurumi by scaling up and down, by planetjune

And here’s a top-down photo of all 8 sizes (this is a single photo so the scale is exact; the only editing I did was to add the pink spiral for clarity):

resizing amigurumi by scaling up and down, by planetjune

Look for the three dark blue whales to see the differences in size between the Standard size and the Micro (smallest) and Extreme (largest).  Isn’t that something?!


Calculations

Time to quantify those differences. To get an idea of the scale change, I took four measurements from each of my whales:

  1. the average width of one stitch (sampled over several stitches for higher accuracy)
  2. the average height of one round (sampled over several rounds for higher accuracy)
  3. the overall length of the whale
  4. the width of the whale at its widest part

Then, for each whale, I compared each measurement with the same measurement on my standard sized whale (made with worsted weight yarn and a US E/3.5mm hook). I used the average of the four comparisons, rounded to a nice number, to give me an approximate overall scale factor for each amigurumi size.

There’s a lot of variability here – not only in the numbers I measured from my samples and the accuracy of my measurements, but in the difference between specific yarn and hook combinations and the individual crocheting style of each crocheter – so a rough conversion factor is the best we’re going to get.

My scale factor is not intended to be an accurate number, but a rough idea of the size difference you can expect from scaling up or down.


Results: Amigurumi Size Conversion Table

resizing amigurumi by scaling up and down, by planetjune
Pictured above are the main amigurumi sizes with the hooks used to crochet them (L-R): Micro, Mini, Small, Standard, Large, Mini Giant, Giant, Extreme

In the table below, for each amigurumi size I’ve given the yarn weight and hook you’ll need to make that size, and its approximate scale factor compared with standard amigurumi (the row marked in bold in the table below).

Amigurumi Size Yarn Hook1 Scale Factor
Micro2 crochet thread #30;
pearl cotton #12
0.9mm (14) 0.3
Mini crochet thread #20;
pearl cotton #8
1.4mm (8) 0.4
Small sport (#2) – DK (#3) 2.25-2.75mm
(B-C)
0.8
Standard worsted (#4) 3.5mm (E) 1
Large 2 strands worsted (#4);
1 strand bulky (#5)
5mm (H) 1.5
Mini Giant super bulky (#6) 8mm (L) 2.4
Giant 2 strands super bulky (#6);
1 strand jumbo (#7)4
15mm (P/Q-19) 3.6
Extreme3 6 strands super bulky #6;
1 strand jumbo (#7)4
25mm 6.5
Notes:
  1. As hook size names can vary between brands, I’ve given the mm size first, followed by the common (US) size name. The best hook size for you will vary depending on the exact yarn you choose and how tightly you crochet – the hook sizes given here are good starting points, but you should choose an appropriate hook for your project, no matter the scale of the amigurumi:
    • If your stitches stretch open too much and the stuffing is clearly visible, reduce the hook size.
    • If you cannot insert the hook into your previous stitches, increase the hook size.
  2. Micro Amigurumi refers to any extremely small amigurumi, so you may also find ‘micro amigurumi’ made with sewing thread and a 0.4-0.6mm hook – those could be much smaller than the sample I measured, so the scale factor would also be smaller.
  3. Extreme Amigurumi refers to any extremely large amigurumi, so you may also find ‘extreme amigurumi’ made with unplied roving and a 40mm hook (or hand-crocheted with no hook) – those could be much larger than the sample I measured, so the scale factor would also be larger.
  4. Jumbo #7 weight is a catch-all term for any yarn thicker than super bulky, so these yarns can range widely in weight, with recommended hook sizes of between 15mm and 40mm! For Giant Amigurumi, you’ll need a jumbo yarn that recommends using a 15-19mm hook; for Extreme Amigurumi you’ll need a jumbo yarn that recommends using at least a 25mm hook.

How to Use the Size Conversion Table

Note: There are many factors that affect the exact size of an amigurumi. As you can see from my worsted weight yarn comparison, even using the same hook and pattern with different worsted weight yarns can result in a remarkable range in size. (And that doesn’t account for other factors: the differences between our hook styles; how tall we each draw up our loops; our tension…)

So please be aware that the scale factor in my table is only a rough estimate. This isn’t an exact science; crochet is handmade, after all!

Reading the Scale Factor

I’ve given the scale factor as the difference from standard size (1), so, for example, 6.5 (for Extreme Amigurumi) means the amigurumi will be 6.5 times larger than standard.

How Large will my Amigurumi Be?

To find out roughly how large your amigurumi will be at a different scale, look at the standard size in the pattern, and find the scale factor that corresponds to the hook and yarn you want to use.

final size = [starting size] x [scale factor]

So, for a 4″ long standard amigurumi, converting it to Extreme Amigurumi scale (6.5) means:

final size = 4 x 6.5 = 26″

Resizing To a Specific Size

To find your scale factor, look at the standard size in the pattern, and the size you want your amigurumi to be.

scale factor = [desired size] / [starting size]

So, for a 6″ tall amigurumi that you’d like to reduce to 3″ tall:

scale factor = 3 / 6 = 0.5

Then find the closest scale factor from my table to find the hook and yarn you should use.

Resizing in Between the Options

If you’d like to go for a scale in between two of my options, look at the closest size option on either side and choose a yarn weight and hook size that lie in between the two.

Example 1: Half Size (0.5x)
From the table, you can see that Mini Amigurumi is 0.4 and Small Amigurumi is .08, so you’ll want to choose yarn and hook sizes between those listed for those two sizes, i.e. a yarn weight in between size 20 crochet thread and sport (#2) yarn, and a hook size between 1.4 and 2.25mm.

  • As a starting point, I’d try a size 10 or 5 crochet thread, or a super fine (#1) or lace (#0) yarn, and a 1.6-1.8mm hook.

Example 2: Double Size (2x)
From the table, you can see that Large Amigurumi is 1.5 and Mini Giant Amigurumi is 2.4, so you’ll want a yarn weight in between bulky (#5) and super bulky (#6), and a hook size between 5mm (H) and 8mm (L).

  • As a starting point, I’d try holding 3 strands of worsted weight (#4) yarn together, or 1 strand of bulky (#5) and 1 of worsted (#4),  and a 6mm (J) hook.

resizing amigurumi by scaling up and down, by planetjune

So there you have it – a way to make amigurumi in any size from extremely small to extremely large! You can use my table of results as:

  • A starting point for figuring out how big your amigurumi will be when you use a different yarn and hook
  • A reference for the yarn and hook sizes to choose to make an amigurumi of a specific size

I hope you’ll find this conversion table as helpful as I will!


How to Go Giant!

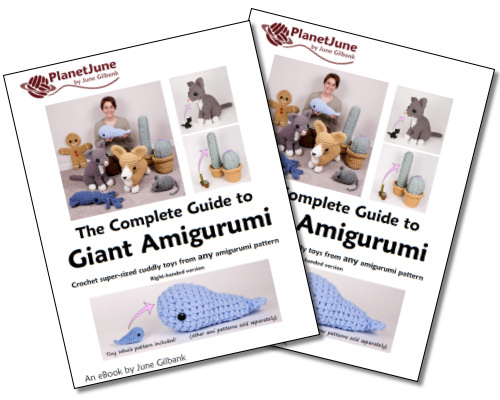
Learn all my upsizing tips and techniques (including patterns for the giant eyes!) in my ebook The Complete Guide to Giant Amigurumi:

The Complete Guide to Giant Amigurumi ebook by June Gilbank - available in right-handed and left-handed versions

This is the perfect guide for all your Mini Giant, Giant and Extreme Amigurumi – every stage of making a super-sized amigurumi is slightly different from what you might expect, and I’ve designed this book as a comprehensive reference guide that covers everything from the absolute basics to tips for fixing problems and making complex amigurumi.


The Essential Guide to Amigurumi book by June Gilbank

Loved this tutorial? I have so many more amigurumi tips and tricks to share with you!

Boost your amigurumi skills with my latest book, The Essential Guide to Amigurumi, your comprehensive guide to amigurumi techniques and tips.


Do you find my tutorials helpful? If so, please consider making a contribution towards my time so I can continue to create clear and concise tutorials for you:

Thank you so much for your support! Now click below for loads more crochet video and photo tutorials (and do let me know what else you’d like me to cover in future tutorials…)

See more helpful PlanetJune crochet tips and technique tutorials

Comments (17)

Next entries » · « Previous entries
  • Quick Links: Crochet

    navigation: arrow

    buy crochet patterns and accessories from my online store

    'Everyday Crochet' and 'The Essential Guide to Amigurumi' crochet books by June Gilbank

    Crochet video tutorials and step-by-step photo tutorials

    Free PlanetJune crochet patterns

    Frequently Asked Questions

    Quick Links: Crafts

    navigation: arrow

    Punchneedle Embroidery information, ebook & patterns

    Papercraft ebook & tutorials

    Free PlanetJune craft projects & tutorials

  • Blog Post Categories

  • Blog Archives

  • CAL Galleries

    Ravellenic Games: Team PlanetJune
    PlanetJune Reindeer Games
    PlanetJune Temperature Snake CAL

  • Welcome to PlanetJune!

    June Gilbank

    Hi, I'm June. Welcome to my world of nature-inspired crochet and crafting. I hope you enjoy your visit!

    If you'd like to get in touch, you can contact me here.
    crocheted Canadian flag by PlanetJune
  • A fanned-out pile of the books Everyday Crochet and The Essential Guide to Amigurumi, with text 'The answers to all your crochet questions at your fingertips - find out more'
  • Support PlanetJune!

    Want to say thanks? You can send me money in seconds at paypal.me/planetjune (over $20) or paypal.me/planetjune2 (under $20) or send me a donation through my shop.

    Or simply click through from my links before you shop at Amazon, Etsy, KnitPicks, LoveCrafts or Crochet.com, and I'll make a small commission on your purchase, at no cost to you! Start here:

    ♥ Support PlanetJune ♥

    Tip: This link is also in the footer of every page!

    Thank you so much for your support!