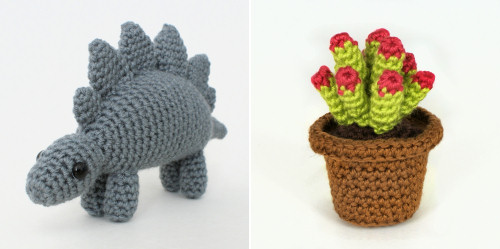
PlanetJune Craft Blog

Latest news and updates from June

Archive for Crochet

AmiCats: a design evolution study

In January 2015, I released my AmiCats Collection, and their reception has blown me away – in well under a year, they’re already within my top 20 bestselling patterns of all time!

Sometimes you strike gold with a design, and this was definitely one of those times, but it wasn’t just a lucky break; it was the result of an unprecedented amount of work, and my most difficult challenge to date.

AmiCats amigurumi cat crochet patterns by PlanetJune

I mentioned at the time of release that it took me more than a dozen prototypes over a period of three years to complete these designs to my satisfaction. Let’s look back at some of the development stages, so you can appreciate the process that finally got me to the AmiCats you see today, and see how far removed they are from my first (terrible) attempts at making a cat!

This is a story of dogged persistence and refusal to admit defeat, even though there were moments where I thought I’d set myself an impossible task…

Initial Research & Prototyping

Although I’ve always been a cat person and have loved cats my whole life, I’d never really examined their overall shape that closely. I started out, as always, with research, and sketched some basic cat studies to give me a better idea of cat poses and movement.

amicats prototypes
A few of my initial quick sketches

I narrowed the position down to a sitting-up pose, as I felt this was a typically feline pose – like the way a cat sits when it’s watching something out of a window.

After 3 or 4 prototypes, I felt I had a good clever cat design. The body had a strong kidney shape to allow the legs to sit directly beneath the chest instead of splaying out in front of the body, and the muzzle – unlike a dog’s – was tiny and triangular. I completed assembly of my design, taking all the step-by-step photos that would go into the pattern as I went, and thought it was pretty much finished.

amicats prototypes
Not one of these photos appears in the final patterns!

Then I showed a photo of my prototype to a trusted friend, and she said ‘it’s nice, but it looks kind of like a wolf cub’. And she was right, of course! Try not to laugh too hard, now:

amicats prototypes
Woof?

Somehow, despite my efforts at clever design, the essence of ‘feline’ was missing, and I was so close to the design I hadn’t noticed how terribly wrong it had gone until I stepped back and took a proper look at the result.

I decided that my design was missing the fluidity of a cat – you don’t see a cat’s haunches and muzzle as defined shapes, and crocheting them separately lost the smooth lines that are so distinctly ‘cat’.

And there was another problem niggling at me: the front legs had proven fairly difficult to attach smoothly to avoid an awkward crease where they joined the chest. If this gave me problems, with my years of experience of stitching pieces together as smoothly as possible, would it be fair to inflict that on my customers? Of course not.

Major Redesign

With all this in mind, I set myself the challenge of going back to the drawing board to solve these problems. My goal was to reproduce the exact shape of my cat prototype, using completely different shapes and techniques that would give a seamless feline appearance without needing amazing sewing skills…

amicats prototypes

  1. The muzzle shaping is now built into the face
  2. The front legs and body are crocheted together smoothly
  3. The haunches are built into the body shape

I truly thought I’d nailed it with this prototype – the overall shape was very similar to the previous prototype, but it looked so much better and smoother than my previous attempt! And this cat (nicknamed Proto Kitty) was the basis for the final AmiCats, but of course the story doesn’t end there…

Design Refinement

I began to crochet the ‘final’ cats, developing the colourways and marking patterns as I went. I also spent hours watching my cat Maui, feeling his bone structure and trying to analyse his shape more closely, as I still had that nagging feeling I was missing something.

I’d started all the cats, and completed the two below, before I began to have doubts about the shape of them (although these cats were pretty cute!)

amicats prototypes

  1. The eyes stuck out too much from the head
  2. The chest was underdeveloped
  3. The front legs were too long and chunky and splayed forwards more than I’d like
  4. The front paws were overly-large, giving the cats too much of a kittenish look
  5. The straight back didn’t have that unquestionably feline curve

These niggles didn’t all present themselves at once, so I made many more prototypes as I refined and further refined my design to tweak the shaping to create subtle eye sockets, reduce the size of the paws and the length and thickness of the front legs while bulking out the chest, add that magical cat curve to the back, and create a completely new innovative leg-joining technique that keeps the legs sitting correctly beneath the cat.

With each of these changes, the cat shape grew slowly closer to what I’d hoped for when I began this project, and I started to think that my impossible task may just work out after all….

Resting Period

Finally, finally, I couldn’t find anything else I was unhappy with, and I left each cat sitting next to the TV as I finished it and continued to work on the rest, so I’d see them all the time and let any remaining niggles come to the front of my mind.

I had thought, once again, that they were finished, but this resting period wasn’t wasted: although even I thought I was crazy by this point, I remade the entire Calico cat so I could modify the markings slightly. In doing that I changed it from my least favourite cat to (possibly) the cutest of all – that last tweak is always worth it!

And, when all 4 were truly finished, I decided this was really it, and it was time to take a deep breath and bring my beautifully-shaped AmiCats into the world…

AmiCats amigurumi cat crochet patterns by PlanetJune

This was the scariest release date of my life, as these designs represented so much love and care, and I was terrified that everyone would be disappointed or critical of them. Thankfully, that wasn’t the case, and I’m as delighted as I am relieved to see people appreciating all the little details that took years to get just right and that make these patterns so unique.

The End?

Not necessarily! Even now, the collection isn’t complete the way I’d originally planned: AmiCats was originally conceived as an ebook, including 6 cat designs. In addition to the 4 standard-body-type designs you see in the AmiCats Collection, I’d intended to make one design each of the two other major body types: the shorter, wider, flat-faced exotic (e.g. a Persian) and the elongated, elegant, long-nosed oriental (e.g. a Siamese). The ebook was also to contain additional bonus supporting matter with embellishment options and examples (different eyes, whiskers, expressions, etc).

I devoted weeks to the prototypes for the other body types, but I still haven’t completed them to my satisfaction, so I made the executive decision that 4 perfect cats now are better than 6 perfect cats in another year or more, and I scrapped the ebook. Although that was a difficult decision, the work I’ve already invested in the remaining designs hasn’t necessarily been wasted: there’s always the possibility of my designing a second AmiCats Collection at some point in the future. (If there’s a particular type or breed of cat that you’d like me to consider for a possible new collection, please do let me know, so I can add it to my Ideas List.)

But, for now, I’m content to leave the AmiCats Collection as this set of four very special and meticulously-developed designs…

AmiCats amigurumi cat crochet patterns by PlanetJune


I hope you’ve found this 3-year design journey interesting! This project was an extreme example of my design process, partly because cats are so difficult to capture realistically, and partly because I was so invested in the result.

Although my designs usually take a few months (instead of a few years) to go from concept to completion, I always bring this tenacity to my work – whether I want to or not! – exploring alternatives until I’m satisfied that I’ve found the best balance between instructions that are easy to follow and results that are cute, realistic, and unmistakeably PlanetJune. 🙂

Comments (12)

AmiDogs Set 8 crochet patterns

I’m so very excited by today’s achievement: not only do I have a complete set of three brand new AmiDogs patterns to launch, but this means I’ve completed 3 of the 4 remaining commissioned designs – finally, I’ve almost caught up with that crazily long waiting list for commissions!

Now, please allow me to introduce AmiDogs Set 8, consisting of three very diverse dog breeds: the Bernese Mountain Dog, Miniature Schnauzer, and King Charles Spaniel:

AmiDogs Set 8 crochet patterns by PlanetJune
L-R: King Charles Spaniel, Miniature Schnauzer, Bernese Mountain Dog

In case you don’t want to read this whole post and just want to buy some dog crochet patterns, here are the relevant links:

Now, if you’re still with me, let’s take a closer look at the three new dog designs…


About the Patterns

It’s been an interesting challenge to make three such different dogs simultaneously. Domestic dogs, more than almost any other animal, have such a variety of shapes and colourings (and sizes, and temperaments, although those don’t really translate into my designs!) It’s amazing to think that people have encouraged this diversity with selective breeding over the centuries, and fascinating to compare how completely different various types of dog look, while still all being so obviously dogs.

The Bernese Mountain Dog is a sturdy tri-colour breed with distinctive markings.

AmiDogs Bernese Mountain Dog crochet pattern by PlanetJune

And a bonus: you can also use the same pattern to make an Appenzeller, Entlebucher, or Greater Swiss Mountain Dog, or a tri-colour Australian Shepherd.

AmiDogs Bernese Mountain Dog crochet pattern by PlanetJune

Queue/fave AmiDogs Bernese Mountain Dog on Ravelry now:

The Miniature Schnauzer is a real character with his fluffy beard and eyebrows!

AmiDogs Miniature Schnauzer crochet pattern by PlanetJune

(Of course, this pattern will also make a Standard Schnauzer or Giant Schnauzer if you’re looking for a pattern for either of those breeds – the only real difference is the scale…)

AmiDogs Miniature Schnauzer crochet pattern by PlanetJune

Queue/fave AmiDogs Miniature Schnauzer on Ravelry now:

And finally, the sweet King Charles Spaniel. My design is based on the Blenheim (chestnut and white) colouring of the Cavalier King Charles Spaniel.

AmiDogs King Charles Spaniel crochet pattern by PlanetJune

You can also use this pattern to make a King Charles Spaniel (non-Cavalier), Toy Spaniel, or Japanese Chin.

AmiDogs King Charles Spaniel crochet pattern by PlanetJune

Queue/fave AmiDogs King Charles Spaniel on Ravelry now:


The Complete AmiDogs Collection

These 3 designs bring the total number of AmiDogs patterns to 24. And, while I’ll never say ‘never again’, I think I’d need a long break before I even consider taking on any more dog breed designs. Although you may think it’d get easier with each new design, trying to distill the defining characteristics of each breed into a design that fits the overall aesthetic of the rest of the AmiDogs range – a range I started 8 years ago! – actually seems to get more difficult and constraining with time.

So, for now at least, I’m going to call it a day with these 24 designs and declare the AmiDogs range complete. 24 dog patterns, all completely different from each other – that’s quite an achievement!


I’d like to thank my commissioners for supporting me to make the final 3 designs and round out my collection. (If you haven’t already, you can log into your PlanetJune account to download whichever of the pattern(s) you helped to make possible!)


Choose Your Favourites!

If you’d like to pick up the final AmiDogs patterns, you can now buy them individually from my shop (links: Bernese, Schnauzer, King Charles), or save money when you buy all 3 as the complete AmiDogs Set 8.

Or, mix and match your favourites from all 24 AmiDogs patterns: you can choose any 3 breeds for a special price when you buy the AmiDogs Custom Set. (And if you want 6, or 9, or any multiple of 3, just add the Custom Set to your cart multiple times, choosing 3 different breeds each time!)


I hope you’ll enjoy these final 3 additions to my AmiDogs collection as much as I enjoyed designing them. Dogs are such special animals and I’ve really enjoyed getting to know much more about them over the 8-year course of this design series. 🙂

Comments (9)

Tip: Feeding Yarn Through Button Holes or Beads

Whether you’ve made a sweater, a phone cosy, or jewellery, sometimes you want to add a button to your yarn project and run into a problem… For a perfect match, it’s nice to use the project’s yarn to attach the button – whether that’s to minimise ends to weave in, or just give a polished look. But, while it’s fairly easy to find a button with holes big enough to fit the yarn through, it’s very rare to find a button that has a hole large enough for both the yarn (doubled) and the eye of a yarn needle!

crochet braid bracelet pattern by planetjune

Below, I’ve shown an example (from a Crochet Braid Bracelet, pictured above). The hole on this shank-backed button is just large enough for my yarn to fit through, but the yarn is too floppy to push through the hole. When I try, it either bunches up and refuses to go through, or separates into plies.

feeding yarn through buttonholes

The simplest trick is to wet the end of the yarn to keep the plies together while you thread the end through the buttonhole – the same technique as licking your sewing thread before you thread a hand-sewing needle. But sometimes that just isn’t enough, and with a long buttonhole like this one and/or a close fit, the yarn is still too floppy to make it right through the buttonhole.

There’s just no way to get that yarn through that buttonhole… Or is there?

feeding yarn through buttonholes

Yes there is! Here’s the magic, you need to stiffen the end of the yarn before you thread it through the button, so it’ll act like its own needle and pass easily through any buttonhole that’s large enough to fit a single strand of the yarn.

The easiest way to do that is with basic white craft glue, and here’s how to do it:

  1. Squeeze a small drop of white glue onto the end of the yarn.
  2. Using your thumb and fingertips, press and roll the end of the yarn to distribute the glue through the fibres of the yarn. For threading normal buttons, you only need to dampen about 1/2″ (1 or 2 cm) of the yarn with glue.
  3. Twist the wet plies together by rolling between your fingertips in the direction of the twist of the yarn, to hold the plies neatly together.
  4. Press the tip of the yarn gently between your fingertips to form a nice rounded point (see above photo).
  5. Leave the glued yarn to dry for a few minutes (while you wash/rub the glue off your fingers) – although, if you’re impatient, it doesn’t need to be perfectly dry to work!
  6. Thread your yarn through your buttons as desired.
  7. Snip off the hardened end of the yarn with scissors.

Easy! It works the same way as the plastic-coated ends of your shoelaces: compressing the yarn into a tight, stiff point that can pass easily through the hole. This method also works on embroidery floss, crochet cotton, or any other type of thread you want to pass through a small hole.

Bonus tip: You can also use this technique for stringing beads onto yarn or thread where the bead hole is too small to fit a doubled strand of the yarn – perfect for bead crochet, or even stringing children’s necklaces!

I hope you find this helpful next time you’re trying to feed yarn through a buttonhole (or bead) – it’s a handy little trick. 🙂

Comments (14)

free pattern: Crochet Braid Bracelet

Even though I’m in the middle of winter, I’m channeling summer with my new free PlanetJune Accessories pattern: the Crochet Braid Bracelet.

Crochet up a speedy braided bracelet with this decorative cord technique that’s deceptively easy to crochet as it uses only single crochet stitches! Customize the length and look to match your own style or make a personalized gift. Simply change the yarn colour and button fastener to go from playful children’s jewellery to a rugged man’s bracelet, or from a beachy summer look to a fashion accessory in your favourite colour.

crochet braid bracelet pattern by planetjune

Isn’t it lovely? This bracelet uses a special technique that uses single crochet stitches worked in an unusual way to create a decorative cord. It’s very easy once you’ve seen it in action, so I’ve made a new video tutorial for this technique: Basic Crochet Cord (as always, my videos are available in right- and left-handed versions). Once you’ve made a bracelet or two, you’ll probably want to make more of these cords to use for other things (I have some suggestions on the video page!)

Although the basic Crochet Braid Bracelet is a free pattern, I’ve included lots of bonuses if you choose to donate for the PDF version:

  • Step-by-step text and photo instructions for the Basic Crochet Cord (in right- and left-handed versions), so you can make the bracelet without having the video in front of you
  • Bonus tips and advice
  • Instructions to make a double-stranded variation – a neat two-strand bracelet with the button centred over the crossover point

crochet braid bracelet pattern by planetjune

I hope you’ll enjoy crocheting bracelets as much as I do – as you can see, I couldn’t stop once I got started… More colours! More button styles! So much fun…

Go to the free Crochet Braid Bracelet pattern >>

Or jump straight to donate:

Order the Crochet Braid Bracelet pattern >>

Not ready to make it yet? Add it to your Ravelry queue:

Comments

Summer of Dinosaurs CAL: Tutorials

We’re only 1 week into the Summer of Dinosaurs crochet-along, and the PlanetJune Ravelry group is already teeming with dinos. Just look…


Rawr!

It’s a thrill to see new unique colourful dinosaurs popping up every day, and to have lots of new participants joining our regular band of CALers! There are 6 more weeks to go, so that’s plenty of time for even a complete beginner to crochet a dinosaur to join our virtual herd…

If you’re tempted to join the CAL but you’re new to amigurumi, or haven’t made a PlanetJune pattern before, this is a great opportunity to have a go. Even if you’ve been crocheting for years, amigurumi (and my patterns in particular) use a specific set of techniques that you may not be familiar with.

PlanetJune Summer of Dinosaurs CAL: Tutorials

For your first dinosaur (or even your first amigurumi!) I recommend you choose the Brachiosaurus (who’s also our CAL mascot, pictured above left), as it has simple shaping, only a few pieces to stitch together, and an undeniably cute result.

I have a comprehensive range of amigurumi tutorials at www.planetjune.com/help, but you’ll only need a few of them for this CAL. To set you on the track to success, let’s take a look at the tutorials for making the best-looking dinosaurs…


The Essential Tutorials

To make beautiful amigurumi with no lumps, bumps or holes, all you need are these 4 absolutely essential techniques:

Magic Ring for Crochet
Start crocheting in the round with no hole in the middle.
video tutorialphoto tutorial (right-handed)photo tutorial (left-handed)

Invisible Decrease for Amigurumi
Decrease without leaving any bumps or gaps.
video tutorialphoto tutorial (right-handed)photo tutorial (left-handed)

Ultimate Finish for Amigurumi
Close up the remaining hole neatly with a smooth, gap-free finish.
video tutorialphoto tutorial

Amigurumi Seamless Join
Create a smooth, almost invisible join when you stitch an open-ended piece to a closed piece.
video tutorial

Bonus Tips for Dinosaurs

For those dinos with horns, spikes, plates, wings and flippers, these tutorials have you covered:

Flattened Pieces
What does it mean when a pattern says to flatten a piece of an amigurumi after crocheting?
photo tutorial

Narrow Pointed Tubes for Amigurumi
My tips for making thin pointy bits on amigurumi, such as spikes, legs, horns and tails.
video tutorial

Basic Techniques and Troubleshooting

If you’re new to amigurumi-making or find your stitches don’t quite look right, try these tutorials (or see my Amigurumi Troubleshooter for further assistance):

Which is the ‘Right’ Side?
Which side of your work should face outwards? (And does it matter?)
video tutorialphoto tutorial

Front, Back, Both Loops
Which loop(s) should you work into to make a crochet stitch?
video tutorial

Yarn Over
How exactly should you wrap the yarn over your hook for crochet?
video tutorial

And if you still have any questions, that’s what the PlanetJune community is here for: we have lots of friendly crocheters in the PlanetJune Ravelry group who understand exactly what you’re going through, and are waiting to offer any help and advice you need. 🙂


PlanetJune Summer of Dinosaurs CAL - pattern options

I hope this post has tempted you to join the dino fun this summer (and, don’t forget you may win a great prize too, thanks to our CAL sponsor, Lion Brand!)

Comments (4)

Armadillo crochet pattern

Time to show you the results of my latest crochet pattern commission: I’ve designed an amigurumi Armadillo!

Armadillo crochet pattern by PlanetJune

Armadillo Fun Facts

  • Armadillos are very unusual-looking mammals; they are covered in bony plates of armour that form a protective shell over their backs.
  • They are primarily nocturnal, live in burrows, and eat insects.
  • Armadillos come from South and Central America, and there are 20 different species. My design is based on the nine-banded armadillo (the only variety that’s also found in the United States).
  • The bands in an armadillo’s armour provide flexibility. The nine-banded armadillo may actually have between 7 and 11 bands (my design has 7)!
  • Although you’ve probably heard that armadillos roll into a ball to escape predation, only three-banded armadillos have this ability; other armadillos run away or can jump several feet into the air to escape danger.
  • A nine-banded armadillo always gives birth to exactly 4 identical babies (quadruplets!)

Armadillo crochet pattern by PlanetJune

About the Pattern

It was an interesting challenge to come up with techniques to replicate the shape and texture of an armadillo’s amazing armour while still creating a sturdy toy without any holes that could leave ugly gaping holes. I spent a long time playing with different stitches and shaping techniques to give the effect I wanted without making the pattern overly-complicated, and I’m really happy with how it turned out.

I hope my photos convey the shape of the armour and the way it curves over the neck and tail just like it does on a real nine-banded armadillo. The armadillo uses three different techniques to produce that wonderful textured armour over the back and on the tail, but the pattern still only uses combinations of the most basic crochet stitches.

Armadillo crochet pattern by PlanetJune

My nine-banded armadillo is 13″ (33cm) long – although a large fraction of that is tail! The special techniques used for crocheting and assembling the armadillo’s armour are all explained in full in the pattern, with lots of step-by-step photos to help you along the way.

Armadillos & Aardvarks…

Armadillos and Aardvarks are an example of convergent evolution – although they hail from different continents and aren’t closely related, they have similar diets and lifestyles and they independently evolved to look similar. I find this concept fascinating, so I designed my Armadillo to form a matched set with my Aardvark – don’t they look cute together?

Armadillo crochet pattern by PlanetJune

(Now I just need to design an Anteater and Pangolin to complete the ‘family’ of long-nosed insectivorous mammals!)

Ready to Crochet?

I’d like to thank everyone who commissioned this design – it was certainly a challenge to develop such innovative techniques, but one I was very happy to undertake! You can download the pattern from your PlanetJune account whenever you’re ready – I hope you’re as pleased with the results as I am…

Armadillo crochet pattern by PlanetJune

If you weren’t one of the commissioners, my Armadillo pattern is now available to purchase from the PlanetJune shop.

Or, if you’re not ready to buy just yet, please add my Armadillo to your queue or favourites on Ravelry, so you don’t forget about it:

I really hope you like my Armadillo design!

Comments (17)

Summer of Dinosaurs CAL

The PlanetJune Summer of Dinosaurs crochet-along (CAL) starts today and runs through to the end of July. If you haven’t joined a PlanetJune CAL before – maybe you’re intimidated about joining Ravelry, or just haven’t found the time to sign up? – this is a great time to join, as this is a prize CAL, sponsored by Lion Brand, with prizes for all participants!

PlanetJune Summer of Dinosaurs CAL - pattern options

You can join this CAL by making any of the 18 PlanetJune amigurumi dinosaur patterns (all pictured above). These patterns are always popular because they’re simple to follow (with no colour changes), work equally well in any colour you can imagine, and make lovely sturdy toys for both girls and boys of all ages.

How to Join

It’s really easy to join a PlanetJune CAL:

  1. Join Ravelry and add a profile pic to your profile.
  2. Join the PlanetJune Crochet Designs group.
  3. Make a dinosaur based on any PlanetJune dinosaur pattern and enter it in the CAL (instructions are given in the Rules below, and in the CAL thread)

(See my FAQ How do I enter a PlanetJune CAL? for more details on how to complete steps 1 and 2.)

Prize Details

PlanetJune Summer of Dinosaurs CAL - prizes
Note: pictured yarn colours and crochet patterns are just examples – winners may choose any colours/pattern

Grand Prize: 3 skeins Vanna’s Choice (the yarn I used to make all my dinosaurs!) and 1 skein of the gorgeous new Textures yarn (all generously provided by Lion Brand, winner can choose colours) plus a PlanetJune crochet pattern of your choice

Second Prize: a PlanetJune Amigurumi Essentials Kit plus a PlanetJune crochet pattern of your choice

Third Prize: a PlanetJune crochet pattern of your choice

Runner-up Prizes: there are no losers at PlanetJune! All other participants who complete one or more entries in the CAL will receive a 10% discount code towards your next order from PlanetJune.com 🙂

Rules

For each entry in the CAL (and contest), make a dinosaur based on any PlanetJune dinosaur pattern and enter it as follows:

  1. CREATE a new project for your dinosaur
  2. LINK the project to the PlanetJune pattern you’re using
  3. TAG your project PJDinoCAL2015
  4. ADD a photo of your completed project
  5. MARK your project as ‘Finished’
  6. POST the photo in the CAL thread

(If any of this doesn’t make sense, don’t worry – the PJ group moderators are ready to help and answer any of your questions. New Ravelry users are always welcome and no question is too stupid!)

To be counted as a valid entry, your project must be started on or after June 12 2015, and it must meet all of the above criteria by the end date of this CAL: before the end of July 31 2015 (in your local time).

That gives you 7 full weeks to make your dinosaur(s), and you’re welcome to complete and submit multiple entries – just make sure you create a new project for each dinosaur and follow the CAL instructions for each one.

The contest is open to everyone, worldwide – yay! Prizewinners will be drawn as follows: one entry into the draw per completed project that meets all the CAL requirements. Grand, Second and Third prizewinners will be chosen by random drawing; all other participants who complete at least one project as specified will receive the Runner-up prize. Prize notifications will be made by me (June) by Ravelry mail, so check your Rav inbox!

Grand Prize yarn to be provided by Lion Brand and shipped to the winner (if you’re from outside the US you’ll be responsible for any duty and/or import taxes on the prize); all other prizes to be provided by me 🙂


PlanetJune Summer of Dinosaurs CAL

Are you as excited as I am? I think this is going to be an especially fun CAL, and I hope you’ll join us! Let the Summer of Dinosaurs begin…

Comments (5)

Crochet Terminology

This is the final post in my three-part series aimed predominantly at crocheters outside North America. For the rest of the series, see Yarn for Amigurumi and Crochet Hook Styles.

Non-Standardised Terminology

The names of the crochet stitches are, unfortunately, not standardised throughout the English-speaking world. Most crochet patterns you’ll find through online sources are written in US terminology (which is why I call this ‘standard’ terminology) – but if you buy/use a pattern written or published in UK/Aus, that may not be the case.

Conversely, if you learnt crochet from a British or Australian source, or some other countries with a historical British influence, you probably know the UK terminology. Your ‘double crochet’, for example, refers to a different stitch (US single crochet) than a US double crochet (which is equivalent to your ‘treble crochet’) – confusing, huh?

Note: If you’re not sure which terminology you use, look at my single crochet tutorial: right-handed or left-handed. If you know this stitch as a ‘double crochet’, you’re using UK terminology!

US/UK Conversion Table

Here are the most common stitches with their equivalent US and UK names:

US Stitch Name UK Stitch Name
chain chain
double crochet treble crochet
half double crochet half treble crochet
slip stitch slip stitch
single crochet double crochet
triple (or treble) crochet double treble crochet

The basic rule is that the UK stitches are always named one step higher than their US counterparts.

Converting Amigurumi Patterns

Amigurumi patterns aren’t too difficult to decipher, as they are (almost) always worked in (almost) all single crochet stitches (i.e. ‘double crochet’ stitches in UK terminology), so it’s very easy to convert these patterns between US/UK. Using the above table, you’ll see that chain and slip stitch are unchanged, so it’s just the single/double crochets you may need to change to convert to your preferred terminology.

Note: All PlanetJune patterns – amigurumi and accessories – are written in standard (US) terminology, but, to prevent confusion, my patterns always also include a conversion table at the start for all stitches used, so you can look up the pattern abbreviations and see which stitch should be used, whichever terminology you’re used to.

Terminology Tips

  • There is no stitch known as ‘single crochet’ anywhere in UK terminology, so, if you see any pattern that uses ‘sc’ stitches, you know it’s a standard/US pattern. UK/Aus: work a dc in place of every sc, and convert all other stitches.
  • If you see an amigurumi pattern worked in ‘dc’ stitches, but the stitches look like those of a regular amigurumi, it’s almost certainly a UK pattern and you should work a US single crochet everywhere the pattern calls for a double crochet. UK/Aus: work the pattern as written.
  • If in doubt when you use an indie pattern that doesn’t have a terminology table to clarify the stitches, check with the pattern designer.
  • A pattern in a book or magazine will almost always use the terminology of the publication’s country of origin, but you can check the description of the stitches used (usually at the start or end of the book/magazine) to make sure.

It’s very unfortunate that when you find a crochet pattern that calls for, for example, a ‘double crochet’ stitch, that may mean one of two different stitches depending on where the pattern was published (or which terminology the designer/publisher decides to use), but I hope this post will help to clear up the confusion!


The Essential Guide to Amigurumi book by June Gilbank

Loved this tutorial? I have so many more amigurumi tips and tricks to share with you!

Boost your amigurumi skills with my latest book, The Essential Guide to Amigurumi, your comprehensive guide to amigurumi techniques and tips.


Do you find my tutorials helpful? If so, please consider making a contribution towards my time so I can continue to create clear and concise tutorials for you:

Thank you so much for your support! Now click below for loads more crochet video and photo tutorials (and do let me know what else you’d like me to cover in future tutorials…)

See more helpful PlanetJune crochet tips and technique tutorials

Comments (4)

Next entries » · « Previous entries
  • Quick Links: Crochet

    navigation: arrow

    buy crochet patterns and accessories from my online store

    'Everyday Crochet' and 'The Essential Guide to Amigurumi' crochet books by June Gilbank

    Crochet video tutorials and step-by-step photo tutorials

    Free PlanetJune crochet patterns

    Frequently Asked Questions

    Quick Links: Crafts

    navigation: arrow

    Punchneedle Embroidery information, ebook & patterns

    Papercraft ebook & tutorials

    Free PlanetJune craft projects & tutorials

  • Blog Post Categories

  • Blog Archives

  • CAL Galleries

    Ravellenic Games: Team PlanetJune
    PlanetJune Reindeer Games
    PlanetJune Temperature Snake CAL

  • Welcome to PlanetJune!

    June Gilbank

    Hi, I'm June. Welcome to my world of nature-inspired crochet and crafting. I hope you enjoy your visit!

    If you'd like to get in touch, you can contact me here.
    crocheted Canadian flag by PlanetJune
  • A fanned-out pile of the books Everyday Crochet and The Essential Guide to Amigurumi, with text 'The answers to all your crochet questions at your fingertips - find out more'
  • Support PlanetJune!

    Want to say thanks? You can send me money in seconds at paypal.me/planetjune (over $20) or paypal.me/planetjune2 (under $20) or send me a donation through my shop.

    Or simply click through from my links before you shop at Amazon, Etsy, KnitPicks, LoveCrafts or Crochet.com, and I'll make a small commission on your purchase, at no cost to you! Start here:

    ♥ Support PlanetJune ♥

    Tip: This link is also in the footer of every page!

    Thank you so much for your support!