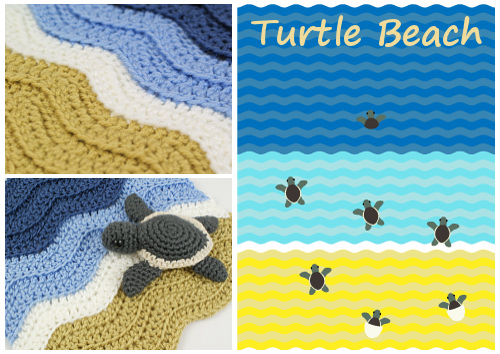
It’s amazing how popular my Turtle Beach blanket pattern is – I published it over four years ago, and it still gets viral boosts on social media every few months that make it consistently one of my most popular designs!
Selling Turtle Blankets
I’ve even started a special section of my Sellers’ List page for people who are making turtle blankets to sell, because I get so many requests for finished blankets…

Don’t they all look great? I love how people respond to this pattern – both makers and buyers!
(By the way, if you make turtle blankets to sell, see the bottom of that page for details of how to be added to the list.)
Turtle-Making Tips
Thanks to this unexpected and long-lasting Turtle Beach popularity, I’m seeing many experienced crocheters try to tackle amigurumi for the first time, to make the turtles for their blankets, and some are getting frustrated.
If this sounds like you, you’re not alone! Amigurumi is a special subset of crochet that requires its own skills. Even the most experienced crocheters can be startled when they pick up their first amigurumi pattern and discover it’s full of new terms and techniques, or amigurumi standards that aren’t specifically addressed within each pattern.
Although all my patterns point you to my main tutorials index (www.planetjune.com/help), the list below is a shortcut to only the tips and techniques you’ll need to tackle and master my Baby Sea Turtle Collection pattern, so you can make adorable turtles for your blankets with minimal frustration!
1. Magic Ring
The magic ring gives the perfect start to every piece of amigurumi: you can start crocheting in the round without any trace of a hole in the middle. Mastering this is a must!
Go to Magic Ring tutorial >>
2. Which loops to work into
Unless otherwise specified in the pattern, all amigurumi should be worked into both loops of the stitch below.
Go to Front, Back, Both Loops tutorial >>
3. Which is the right side
It’s very important that all your amigurumi pieces are right-side out before you stuff, close, flatten or assemble them.
Go to Which is the Right Side? tutorial >>
4. Invisible Decrease
Decreasing without leaving any bumps or gaps sounds too good to be true, but the invisible decrease (abbreviated invdec) really does live up to its name!
Go to Invisible Decrease tutorial >>
5. Changing Colour
Always change colour in the last loop of the stitch before the colour change.
Go to Changing Colour tutorial >>
6. Flattened Pieces
Vital to understand how to make your turtles’ flippers! What does it mean when a pattern says to flatten a piece of an amigurumi after crocheting it?
Go to the Flattened Pieces tutorial >>
7. Seamless Join
This technique creates a smooth, almost invisible join for stitching the flippers to the shell.
Go to Amigurumi Seamless Join tutorial >>
These seven tutorials cover every mistake I’ve ever seen anyone make with my Baby Sea Turtle pattern, so make sure you understand these seven concepts and you’ll be good to go!

Still Struggling?
Now, if you’ve decided you’re allergic to amigurumi and you never want to see an amigurumi turtle again, I understand! Although I love amigurumi, I know it isn’t for everyone, and I’m working on an alternative for you.
I’ve developed a flat applique-style baby turtle design that closely matches the look and size of my ami turtles, so you’ll be able to stitch those to your turtle blankets for a similar effect (except that the turtles will be flat instead of three dimensional). The new pattern will be much faster to make, with only two pieces, simple embroidered eyes, and almost no sewing! 🙂
Watch this space – I’ll post as soon as the new pattern is ready…


Leave a Reply