Amigurumi Double Ring
The double ring is a more secure version of the magic ring for crocheting in the round. As the name implies, you work over a doubled ring of yarn instead of a single ring.
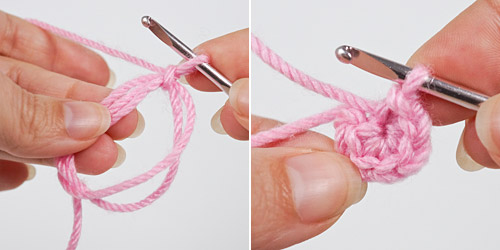
This method is a little more time-consuming and slightly more difficult than a standard magic ring, so I don’t recommend you switch to a double ring for all your amigurumi! But it’s a very handy technique in certain circumstances where you need extra strength or security:
- If you need to cut off the starting tail, you can do so with a double ring without first weaving in the starting tail.
- If you’re making many stitches into the ring or using a yarn where the magic ring doesn’t want to stay closed, a double ring will help to hold the stitches together more securely.
If you don’t need these benefits, go to my Magic Ring for Amigurumi tutorial instead!
How do I make a Double Ring?
Continue to:
Amigurumi Double Ring for right-handers
This tutorial assumes you’re already comfortable with making a standard magic ring. For this demo, I’ll show 6 single crochet stitches made into the double ring before pulling it closed. To use this technique you’ll make all the stitches of Rnd 1 into your double ring before you pull it closed.
Start by wrapping the yarn twice around your fingers to make a doubled loop (below, left). Insert your hook into the ring and draw up a loop, ch 1 (below, right).
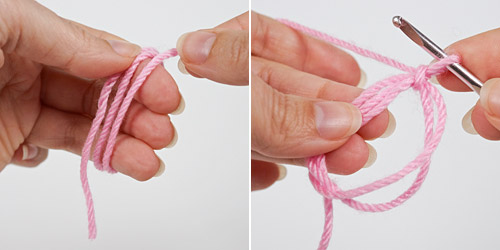
For each stitch, you’ll work around three strands of yarn: the two loops and the starting tail (below, left). Work all the stitches of Rnd 1 into the ring (below, right).
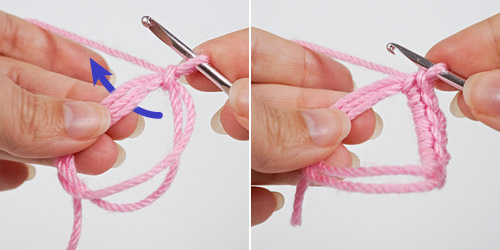
Start to pull on the starting tail (below, left) and you’ll see that one of the two loops starts to shrink (below, right).
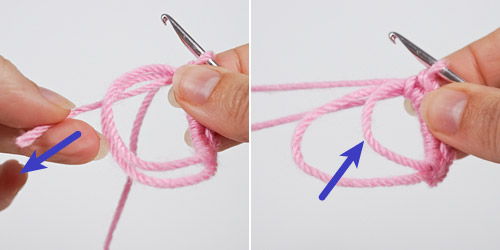
Grab that smaller loop (below, left) and pull whichever side of it starts to shrink the second (larger) loop. Keep pulling until the second loop is completely closed (below, right).

Now pull on the starting tail again (below, left) to pull the remaining loop closed (below, right).
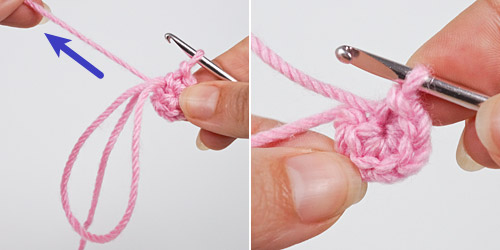
The end result looks exactly like a magic ring, but the ring is more securely closed.
Amigurumi Double Ring for left-handers
This tutorial assumes you’re already comfortable with making a standard magic ring. For this demo, I’ll show 6 single crochet stitches made into the double ring before pulling it closed. To use this technique you’ll make all the stitches of Rnd 1 into your double ring before you pull it closed.
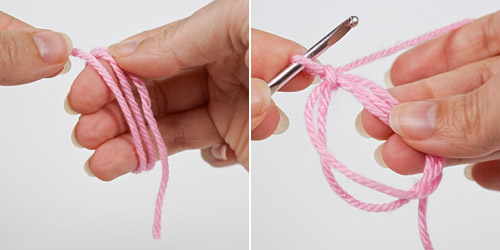
Start by wrapping the yarn twice around your fingers to make a doubled loop (below, left). Insert your hook into the ring and draw up a loop, ch 1 (below, right).
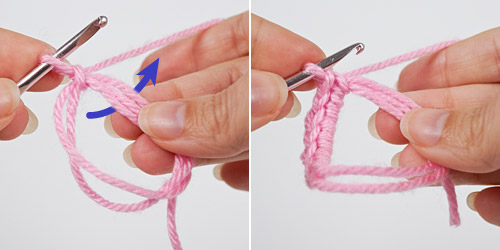
For each stitch, you’ll work around three strands of yarn: the two loops and the starting tail (below, left). Work all the stitches of Rnd 1 into the ring (below, right).
Start to pull on the starting tail (below, left) and you’ll see that one of the two loops starts to shrink (below, right).
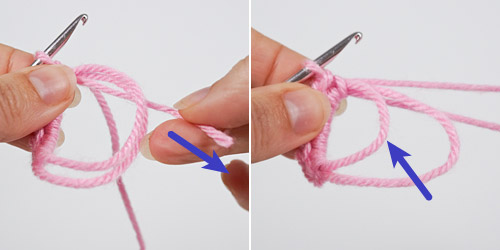
Grab that smaller loop (below, left) and pull whichever side of it starts to shrink the second (larger) loop. Keep pulling until the second loop is completely closed (below, right).

Now pull on the starting tail again (below, left) to pull the remaining loop closed (below, right).
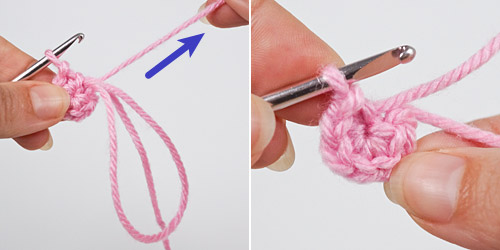
The end result looks exactly like a magic ring, but the ring is more securely closed.
Loved this tutorial? I have so many more amigurumi tips and tricks to share with you!
Boost your amigurumi skills with my latest book, The Essential Guide to Amigurumi, your comprehensive guide to amigurumi techniques and tips.
Do you find my tutorials helpful? If so, please consider making a contribution towards my time so I can continue to create clear and concise tutorials for you:
Thank you so much for your support! Now click below for loads more crochet video and photo tutorials (and do let me know what else you’d like me to cover in future tutorials…)


Leave a Reply