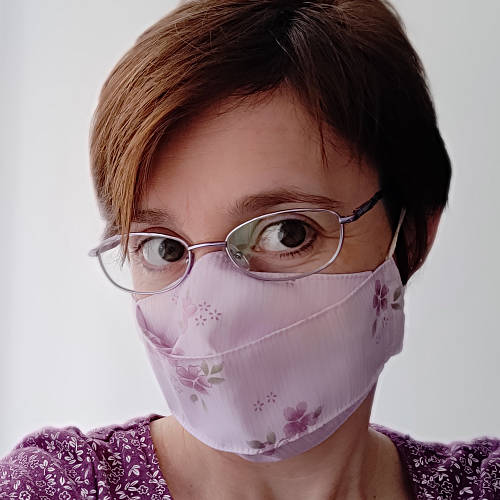
I’ve been experimenting with various mask sewing patterns since April. With the possibility of a second wave of COVID-19 imminent as schools start up again, I decided to spend part of my Labour Day long weekend making a batch of masks I’ll really enjoy wearing, now I’ve settled on my favourite design.

This is the Contoured 3D Face Mask pattern from the Japanese Sewing Books blog and I love it because the structured shape keeps it away from your nose and mouth (so I find it much easier to breathe), while also fitting closely all around the edges (so it’s more effective) and going right up to my eyes (so it doesn’t steam up my glasses).
I also love it because of the clever design – it’s like fabric origami! There’s only one piece of each fabric (outer and lining), and the shape and structure is all formed from folding and seaming.

image courtesy of Japanese Sewing Books blog
The video instructions are incredibly clear and I’d encourage you to watch it even if you don’t plan to make one of these masks – it’s so satisfying watching it come together! I do wish there were also text instructions with diagrams, but once you’ve made a couple of masks you won’t need the instructions anyway; just the printable template.
Tip: This pattern comes in 6 sizes to cover all head sizes from children to men, which is great, but I think the sizes run a little small. I used the ‘ladies’ size (L), but I’m quite petite and this size is only just large enough for me, so you may well need to size up.

I’ve only made one change to the mask design, and it doesn’t change the sewing instructions at all: I like to use one long tie instead of elastic. I thread a 48″ length of cotton tape onto a yarn needle and pass it down through one side casing and then up through the other. The loop goes around your neck, then you pass the ends above your ears and tie them together at the back of your head to get a secure fit without the discomfort of elastic behind the ears.

My other innovation is in folding the mask so I can keep one in my bag or pocket. Instead of just folding it in half, I tuck the lower third up under the upper third and fold in the sides so it lies flat. Then I fold the resulting rectangle in half and wrap the ties around it to secure it in a compact square shape – it’s so small and convenient!

Until I find something like the gorgeous Japanese Hello Kitty fabric used in the tutorial video, I’m using my favourite sakura fabric to make all my masks. I bought it as a remnant many years ago and the need to make masks has finally given me a reason good enough to use it – and a way to make wearing masks at least somewhat enjoyable.
Isn’t this a great mask design? I highly recommend it. I hope you’ll try making one, or at least enjoy watching the video to see how it works!
Do you have a favourite mask pattern? Please share a link and why you like it in the comments – I’d love to see your recommendations too.


Nicole said
Very nice pattern!
I have a similar pattern design for my favorite masks.
If I had a working printer, I’d try this, too. :blush: I need new ink 😉
Krupa P. Patel said
want me to mail you them? The pattern?
Reggie Smith said
please send written instructions for mask. Thanks
Jesse said
Agreed, these are definitely the most comfortable. They do take a long time to dry after washing, though. The cup-shaped ones have an advantage there. I modified mine by making the lining in 2 pieces that overlap in the middle (which allows for a removable filter to be added), and sewing the short sides of the mask shut, sewing ties into the corners at the same time. The lining gap allows turning inside out, and the corner ties reduce some of the bulk, which means a bit less ironing trying to get the fabric dry.
June said
Ooh, I should have known you’d come up with some clever improvements, Jesse! Drying isn’t an issue for me – I keep a lingerie bag by the front door and toss the used masks inside whenever I come home, then throw the whole bag in the washer and dryer every time I do my laundry. Of course, that does require having a dryer, though…
Miriam P. said
This is awesome. I had wanted to make myself more masks but wasn’t sure about doing more of the same pattern, which I got from one of my favorite bloggers, Mathbabe.org (a.k.a. Cathy O’Neil). I used several layers of bandana cotton which I feel gives me good protection but which is really hard to breathe through. I’m going to try making some of these!
June said
Excellent, I hope you like it, Miriam!
And for anyone else interested in seeing the Mathbabe pattern, I found it here 🙂
Lindy said
Very clever design and so interesting. Your masks are lovely and beautifully made, June!
Love,
Lindy xx
June said
Thanks, Lindy! I feel like an added bonus is making masks is really helping build my sewing skill/confidence – all that topstitching! I was pleasantly surprised how good my stitching looks. It’s not perfect, but it turns out that really doesn’t matter… what a revelation 😀