Everyday Crochet
Everyday Crochet by June Gilbank is the essential guide to learning crochet stitches and techniques, starting from the absolute basics, with hundreds of full-color photographs and instructions that clearly show how each stitch is executed. Reinforce your new skills by trying the included practice projects, then move on to the unique and beautiful crochet patterns and stitch pattern galleries.
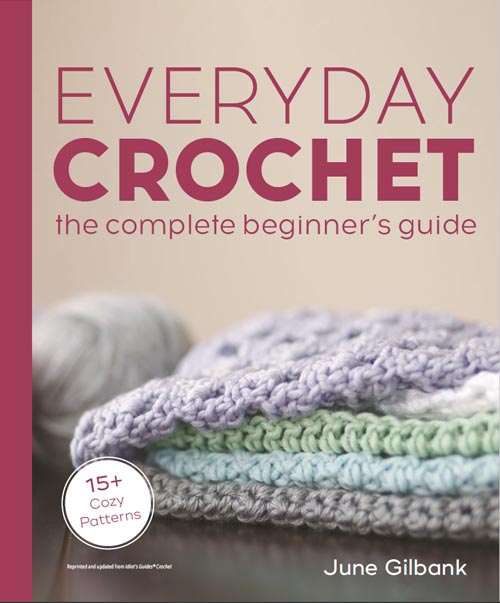
Everyday Crochet by June Gilbank is now available from all good bookstores. You can order Everyday Crochet from amazon or find it in your favourite bookshop, and why not also order a signed bookplate directly from me to go in your copy?
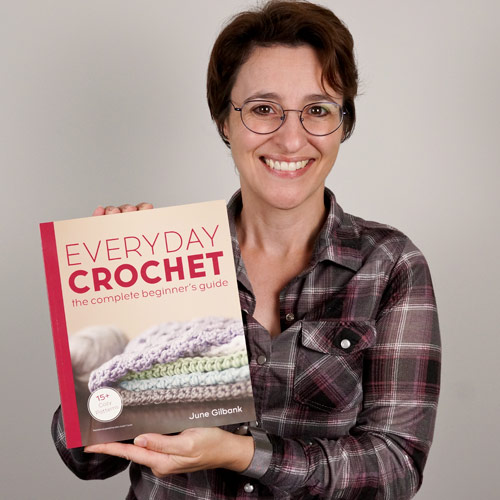
Everyday Crochet is a fully revised and updated reissue of my 2014 book IG: Crochet, with a new clean, easy-to-read format.
With this book, I wanted to write the definitive crochet reference book that I wished I’d had when I was learning to crochet, with projects to practice what you’ve learnt along the way, simple instructions with clear close-up photos for every technique, beautiful photographs, and a wide variety of patterns, stitch patterns, and motifs.
I had three goals for this book, because I wanted to make an ambitious 3 books in 1 volume:
- The complete beginner’s guide: To create the clearest, most comprehensive learn-to-crochet tutorials, with ultra close-up photos of every single step, so people really can learn to crochet from my book.
- The crochet tips guide: To distill all the knowledge and tips I’ve picked up over my crocheting life into clear, easy to follow instructions.
- The beautiful pattern book: To create a collection of stylish original accessories and home decor patterns that would make perfect gifts, so you’ll want to make everything in the book! The patterns need to be simple to work (but not boring for experienced crocheters) and show some of the variety possible in crochet, so you’ll learn more as you make each pattern.
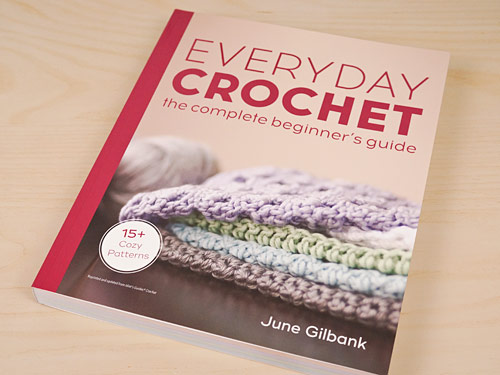
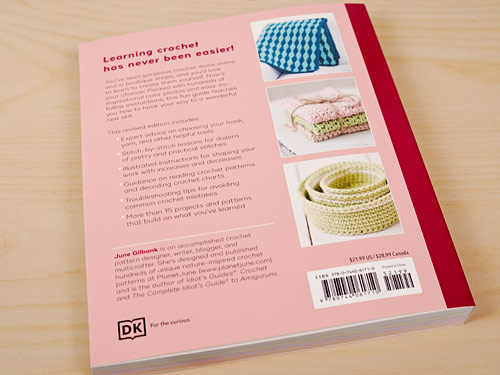
This book is different from every other crochet book on the market and excellent value for money, whatever your crochet skill, as it’s perfect for both beginners and more experienced crocheters. I hope you’ll find it a valuable resource, whether your goal is to learn to crochet, to improve your crochet skills and knowledge, to find a selection of clean, timeless designs to crochet, or all of the above 🙂
The tutorials have all the detail and clear step-by-step photos you’d expect from me, and the patterns include stitch diagrams and all the added tips and extras you find in my PlanetJune Accessories patterns. I’m so excited about this book, and I hope you will be too!
Fully Updated and Revised
I completely revised the old book to create Everyday Crochet, and we’ve given it a new clean easy-to-read format. I’ve combed through it page by page and added lots of little touches, such as:
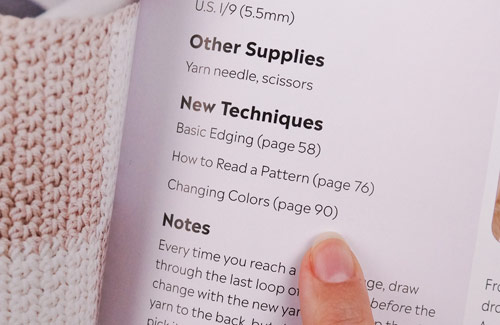
Page references for all the new techniques you’ll need for each practice project:
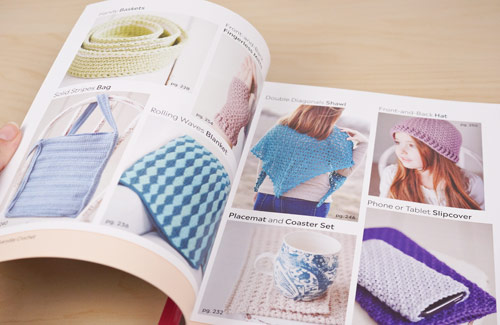
A gorgeous visual table of contents so you can see the projects you can make as soon as you open the book:
A left-handed reference section at the end of the book that shows you all the basics. Lefties now get step-by-step left-handed photos for every step from learning how to hold a hook and yarn through to completing their first project.
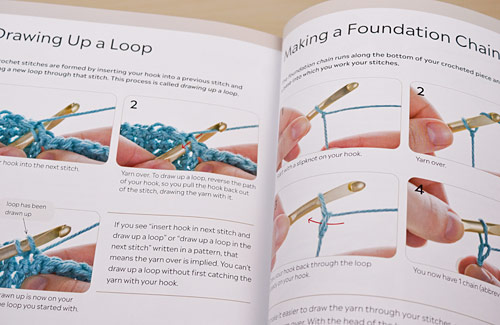
I’m most excited about this last point – I campaigned hard for this, and I think it may be a first for a craft book! (I had to fight to even get one page for left-handers in IG: Crochet, and I know that wasn’t enough.) As a lefty myself, I understand the struggle of trying to learn everything from a right-hander’s perspective, so it was important for me to have this available for others like me – we lefties make up 10% of the population, but are rarely catered for.
With my 16-page left-handed reference section, you, a fellow left-hander, can go from picking up a hook for the first time to completing your first crochet project (a single crocheted dishcloth) without ever having to consult a right-handed photo and trying to mirror it so you can figure out what you need to do. Once you’ve got those basic crochet skills down, adding on new stitches and techniques will be much easier, even in this world of right-handed instruction. (And you can always come back to PlanetJune too, where I always provide additional instruction to lefties where it’s needed!)
What’s New (and What’s Not)
I should make it clear: although it has a new name and has been fully revised, Everyday Crochet is not a substantively different book from IG: Crochet – all the patterns, projects and tutorials are the same. If you’ve bought IG: Crochet, you already know that it’s a high-quality book packed full of useful tips, beautiful photos and my original patterns, and nothing has changed there.
There were only a few tiny errata in IG: Crochet that have now been corrected. Other than that, and a couple of errant arrows that had previously turned up in the wrong place, the changes are in clarity and clarification only.
But wow, it is so much clearer now!
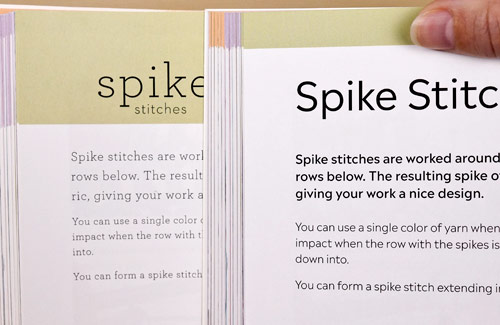 Old (left) vs new (right) – see how much clearer it is to read now?
Design: You may have noticed that the old font was very thin and pale and not the easiest thing to read. The new text design is modern, clean and super-clear – it’s so much easier on the eyes! And I’ve replaced all the arrows that point to specific stitches in the tutorial photos to make them clearer – the old coloured arrows were pretty, but clean black arrows are much easier to see.
Content: I’ve made little tweaks and improvements throughout the entire book that make it a better experience to use. I’ve fully edited the content, breaking up long paragraphs into lists, highlighting keywords, and clarifying anything that wasn’t phrased exactly how I wanted it to be in the previous book.
Tutorials
If you’ve bought my Complete Idiot’s Guide to Amigurumi, you’ll know I like to cover every detail in my books, so you’ll have a valuable reference source you’ll consult over and over again as you want to learn about new techniques or refresh your memory on something you haven’t done for a while. But, in this book, I’ve been able to go into much more detail, starting from the very basics of crocheting, and creating a clear, easy-to-follow, comprehensive guidebook, with hundreds of full-colour close-up photos.
Making really clear, easy to follow tutorials is something I’ve been perfecting for years, so I knew exactly what I wanted for the tutorials in this book:
- Lots of photos, so you’re walked through every stitch step-by-step.
- Ultra-close-up full-colour photos with relevant loops/stitches highlighted so you can really see exactly what you’re looking at.
- Arrows that show exactly where to put your hook and point out any features to watch out for.
- Extra tips and tricks to make your crocheting life easier.
In short, I made this experience as close to one of my video tutorials as I could manage in book form, so you can see exactly what my hook is doing at every stage of each stitch.
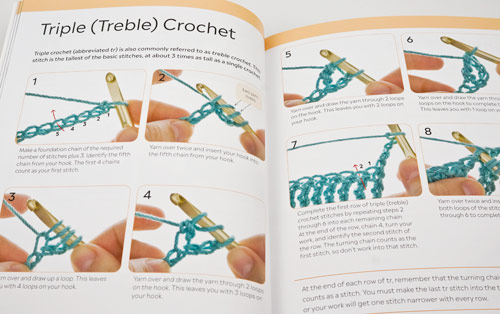
My instructions are detailed and complete, and the hundreds of photos are in full colour, clear and close-up, so a beginner with no prior crochet knowledge can watch my fingers and replicate my movements as I walk you, step-by-step, through every stage of learning to crochet.
I’ve covered everything from the very basics that most books gloss over in a sentence (e.g. How exactly do you ‘yarn over’? What does ‘draw up a loop’ really mean?) in a series of chapters that build your skills gradually until you’re ready to learn a variety of more advanced stitches and techniques to help you perfect your work (e.g. How do you ‘weave in ends’? What is ‘blocking’ and how and when should you do it?).
Practice Projects
Throughout the chapters I’ve included a selection of practice projects – original patterns that let you try out your new skills and make something pretty in the process. Your first projects shouldn’t have to be embarrassing or dull!
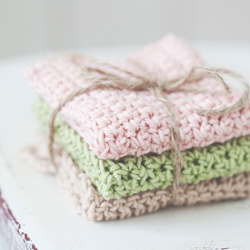
Three Simple Washcloths – a perfect first project for the novice crocheter.
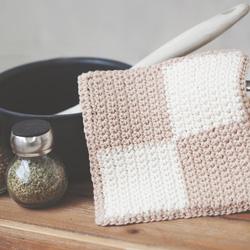
Colorblock Potholder – get to grips with colour changes and basic edgings.
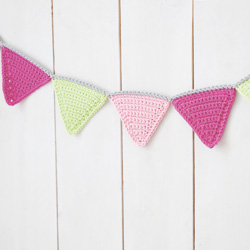
Triangle Bunting – make top-down and bottom-up triangles that form exactly the same final shape, so you can practice both increases and decreases and make a pretty decoration in the process.
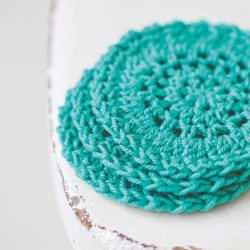
Circular Coasters – try out working in the round and using a combination of different basic crochet stitches in the same pattern.
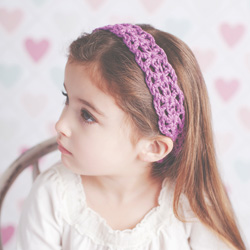
Pretty Headband – make a chainless foundation and try your hand at reading a charted stitch diagram.
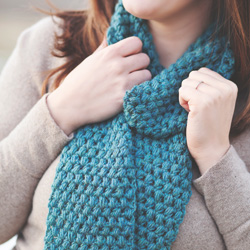
Puff Stitch Scarf – an introduction to combination stitches, and perfecting those tricky puffs!
Of course, even if you’re not a crochet newbie, these beginner-friendly projects are also pretty enough to be given as gifts, or just to make for yourself 😉
Tip: If you’re beyond absolute beginner level, I’d recommend you add a little more pizzazz to the most basic project – the washcloths – by adding my Basic Edging (p58-59), or any of the other edgings from Edgings & Adornments (Chapter 14).
Stitch Galleries
The beauty of crochet is that you can create a huge variety of stitch patterns from a few simple stitches. The Easy Stitch Gallery (Chapter 10) shows you how to create completely different effects using only the most basic stitches: chain, single crochet, half double crochet, and double crochet.
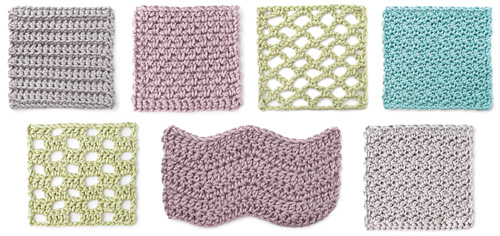
Easy Stitch Gallery patterns
The Intermediate Stitch Gallery (Chapter 15) demonstrates how you can combine all the crochet stitches you’ve learnt in the previous chapters to create a huge variety of decorative effects, from lacy, open stitch patterns, to densely textured patterns, and everything in between.
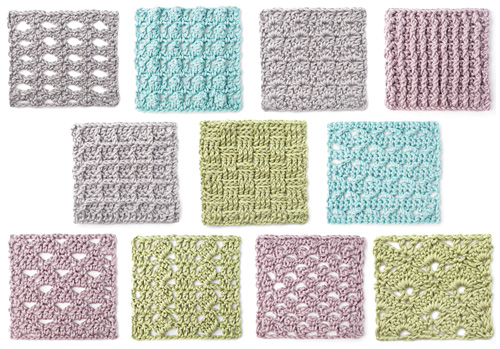
Intermediate Stitch Gallery patterns
All my stitch patterns in both chapters include a clear swatch photo, full written instructions, and a charted stitch diagram. If you follow my advice on swatching (see Gauge, p64-67) to make sure you select a hook size that will work with your yarn to produce a fabric you love, you can choose any of these stitch patterns to easily make any rectangular shaped object, such as a dishcloth, a scarf, or a blanket – just pick a stitch pattern and decide how big you want to make it, then start crocheting!
Motifs
And I’ve also included a chapter on Motifs (Chapter 13), with useful info and tips for making perfect motifs, and a selection of 5 patterns: the classic granny square, a solid variant on a granny square, a circle-in-square design, and a granny triangle and hexagon. You’d be amazed how many different formulae there are for making motifs like these, and I used a combination of maths and lots of prototyping to come up with what I consider to be the best patterns for each of these designs, that give the flattest and straightest-edged results, even before blocking.
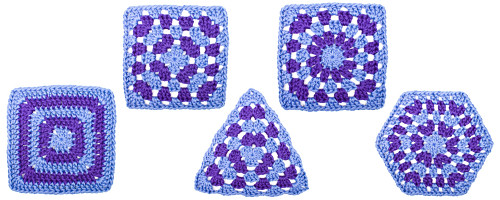
My motif patterns
I alternated between two colours for the rounds in my motifs, to make the pattern as clear as possible for you to follow. All my motif patterns include full round-by-round text instructions (with photos of each round, for those new to motif-making), a charted stitch diagram, and a general pattern for extending the motif to be as large as you want.
And then you can choose any of the joins from the several options I demonstrate in Finishing Techniques (Chapter 9 – my favourite is the Flat Slip-Stitched Seam) to crochet or stitch your motifs together into a blanket, bag, scarf, or whatever else you want!
Tips and Tricks
If you’re already an intermediate or advanced-level crocheter, please don’t think there’s nothing in this book for you! I’ve included all my helpful tips and tricks throughout the book – I bet you’ll find at least something you didn’t already know in there…
Patterns
To round out the book, I’ve designed a range of stylish original accessories and home decor patterns in a variety of simple, textured and lacy stitches. All the patterns include stitch diagrams and schematics where needed, and give modification tips if you want to use a different gauge or make a different size.
My patterns are definitely not only for beginners. Although they are all easy to intermediate level, I didn’t let that stop me from creating beautiful, elegant designs for every project. You’ll also find all the pattern extras that I always include in PlanetJune Accessories designs: full text instructions, charted stitch diagrams, schematics, and helpful resizing tips so you can customise your project with my guidance.
I’ve arranged the patterns in approximate order of difficulty, so you’ll learn more as you make each one, using the stitches and techniques I taught you earlier in the book.
Here’s a little insight into the thought processes behind my designs and what makes each one special.
Flecked Scarf
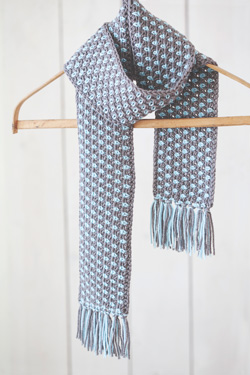
I love this design! I spent ages fiddling around with swatches to develop this stitch pattern that cleverly adds flecks of the contrast colour in an offset pattern, while each row of the scarf is crocheted in only one colour, so there’s no colour changing to worry about!
Can it get any better? Yes, it can: the fringe has the dual purpose of incorporating all the yarn ends, so there’s no weaving in either!
A simple and fun pattern with a stylish and impressive end result for not much work – isn’t that the best kind of pattern?!
Cozy Cowl
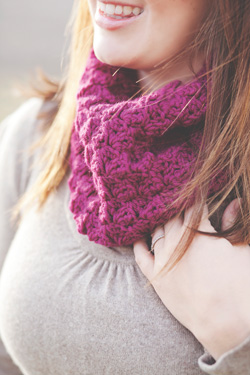
This cowl should be a go-to pattern for quick gifts. I came up with this stitch pattern that adds texture without too much chunky stiffness – getting a nice drape is always a concern when designing crocheted accessories.
As this cowl is worked flat, you have the freedom to keep crocheting until you like the feel of it wrapped around your neck. You can keep going to turn it into a long scarf, or even add buttons to make it a button-up cowl – there are large enough holes between the stitches that you won’t need to make buttonholes.
The best part for me is the ends: if you choose not to join the cowl into a loop, you get a lovely wiggly line along each end – no need to add an edging! But if you do join it as I show in the pattern, I’ve designed the wiggles to mesh together perfectly, so your seam will be practically invisible.
Phone or Tablet Slipcover
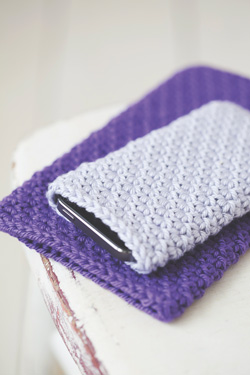
This slipcover will let you throw your device into your bag without worrying about it getting scratched. It’s easy to customise the pattern to fit any size of portable electronic device, there are no fasteners to grapple with, and the slim fit means you can travel light without carrying a bulky case.
I came up with a simple but beautiful solid, cushioning stitch pattern that will protect your devices without looking boring. I’ve put this design through its paces: my phone has been thrown into my handbag (in my original prototype of the phone case) every day for over a year and is completely unscathed.
Note: The phone used in this photo is slightly smaller than the one I crocheted the case for, so don’t worry – follow my instructions for your own devices and the slipcover will be a perfect snug fit.
Handy Baskets
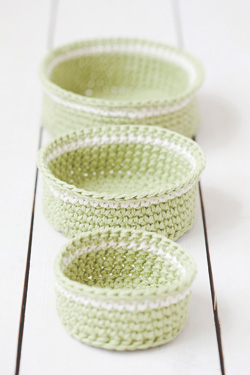
Sometimes single crochet really is the best choice – and not just for amigurumi! It makes a solid, sturdy fabric that’s perfect for more dimensional items like baskets.
But, to keep my design original and interesting, I gave my set of 3 nesting baskets a few clever twists: they are seamless, with a sharp, crisp corner around the bottom, and I developed an amazing but simple new invisible join for single row stripes, which makes the contrast stripe and the top edge look totally seamless! They are worked with 2 strands of yarn to give a thick, sturdy result.
Placemat and Coaster Set
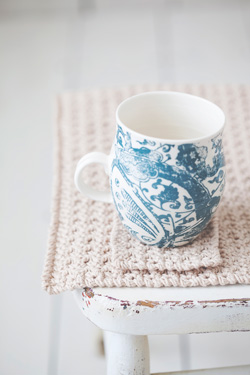
I wanted a solid but textured stitch pattern for my placemat and coaster set: too open or too textured a pattern leaves your mug in danger of tipping over! I played with all sorts of stitch combinations and swatched until I found the perfect match, with a simple but interesting looking stitch pattern, and a little (but not too much!) texture. The reverse single crochet edging adds the perfect finishing touch.
I chose a natural-coloured linen-blend yarn for my samples, for a natural, rustic feel, but standard kitchen cotton would be a perfect choice for yours. Of course you can use any colour (or stripes of colour, alternating every 1 or 2 rows) to match the style of your dining room.
Rolling Waves Blanket
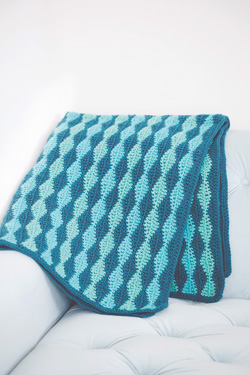
I really enjoyed crocheting this blanket – the hardest part was knowing how long I’d have to wait to keep it looking nice and neat before Maui and I could snuggle up in it! This design has a beautiful stitch pattern but it’s easy to memorise. You only need to change colour once every 2 rows, so you won’t have hundreds of ends to weave in.
It’s easy to customize this design to make any size of blanket – from a baby blanket to an afghan for a king-sized bed – or even to crochet just the first 8 rows and you have a lovely wave pattern scarf.
I named this blanket Rolling Waves for the stitch pattern, and the colour choices for my sample support the name, but the wave pattern would look equally lovely in a non-aquatic colour scheme – just choose any main colour (the dark teal in my sample) and add one, two or more contrast colours. Pastels would make a sweet baby blanket, or how about a bold rainbow of different coloured wavy stripes against a black background?
Solid Stripes Bag
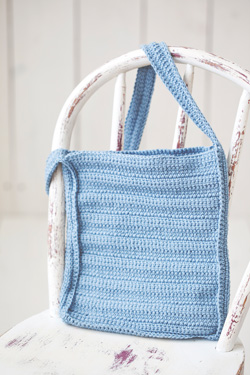
This design was a challenge for me – I’m really not keen on most crocheted bags, as they almost always need to be lined to be useful, and the straps stretch out as soon as you put anything in them (unless you add a fabric backing to the straps too). Another challenge I set out to solve with my design!
Would you believe the lovely textured stripes of this bag are created with only one stitch? The linked stitch pattern has no holes, so you don’t need to line it with fabric, and small items such as pens (and crochet hooks!) won’t fall out. The tall stitches work up quickly, and the finished bag is large enough to be useful without taking forever to make. I was thinking of a bag for carrying library books when I made my sample, although of course you can use my modification notes to make a bag of any size.
My clever strap design creates an inelastic strap that won’t stretch out, and, possibly the best part of all: this design is almost no-sew – you just need a few stitches to join the ends of the strap together, and all the rest of the assembly is crocheted. I’ve included assembly diagrams to make that process even simpler.
Double Diagonals Shawl
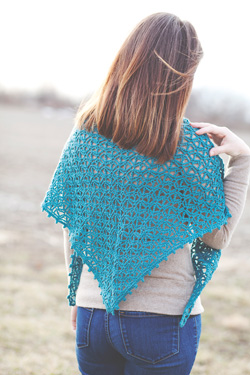
This may be my favourite pattern in the book. I thought I’d nailed the design several times, but then came up with a tweak to make it even better and had to redo the whole thing with the improved stitch pattern, over and over again. But it was worth every frogging and redoing – the final stitch pattern is infinitely prettier than my original concept! It looks to me a little like flowers and a little like snowflakes, but, either way, the parallel diagonal stitches throughout (that give this design its name) are uniquely beautiful.
The shawl is a shallow triangular shape, which means it’ll work up more quickly than a standard right-angled triangular shawl. As it’s worked from the bottom up, you can just keep crocheting until you like the size – or until you run out of yarn! A subtle picot edging makes the perfect finishing touch for this stunning shawl.
Front-and-Back Hat
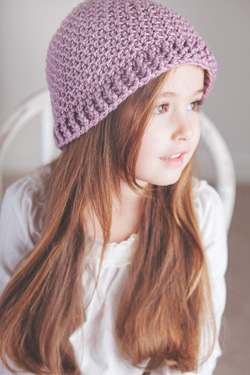
My editors were pretty insistent that I should design a hat for this book, but after browsing pages and pages of hat designs on Ravelry, I realised that I just don’t like crocheted hats… I don’t like the bulls-eye shape the rows make on the top of the head; I don’t like the helmet-like structure of a single crochet hat, or the gappiness of a hat made with taller stitches; I really don’t like hats with a plain top and a fancy stitch pattern that only starts on the sides.
So I set out to design a hat that avoided everything I don’t like about crocheted hats – quite a challenge as I’m so picky! Finally, I came up with a seamless stitch pattern that gives a subtle all-over texture, with no obvious rows, and no transition between the increase part at the top of the hat and the straight sides. Even the increases are pretty much invisible!
I love the texture of this hat – it gives the hat a beautiful appearance and a nice stretch but without leaving any gaps for the wind to sneak through. The ‘Front-and-Back’ name refers to the trick that makes this hat unique – a combination of front and back loop only stitches (which are mirrored in the front and back post stitches in the ribbing).
I designed this hat in 3 sizes (child, adult small and adult large), but I’ve also included a recipe that works by size, so you can make this hat with any yarn and any gauge, and end up with a hat that fits anyone beautifully. Note: the beautiful girl in this photo is wearing the adult small size hat, which is why it’s a little large on her.
Front-and-Back Fingerless Mitts
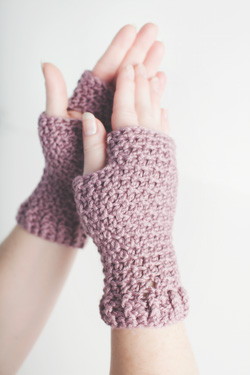
And now to the final pattern. If your book has one hat and one set of fingerless mitts, it just makes sense to design the patterns so you can crochet a matching set!
I was originally going to just make basic wristwarmers with a slit for the thumb, but I decided it’s important for your thumb joint to be warm too, so I set out to design a shaped, fitted, no-sew fingerless mitt where the thumb shaping doesn’t disrupt the stitch pattern. I designed these mitts to be long enough to cover your knuckles and keep you cosy, or of course you could add extra rows above or below the thumb gusset to make your mitts longer still.
If you’ve already made the hat, the mitts are a natural progression – slightly more complex due to the thumb gusset shaping, but you’ll still find it easy, as it uses the same front-and-back stitch patterns you used for the hat.
I’ve supplied the mitts pattern in 2 sizes that should cover pretty much all women’s hand sizes, and – as I mention in the pattern – you can modify it further by intentionally not meeting gauge, to make your mitts a little smaller or bigger, as necessary.
Modifications
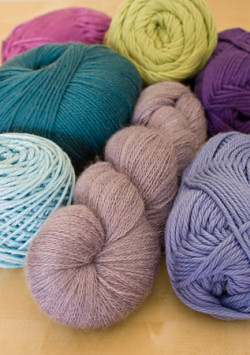
I strongly feel that crochet patterns are not just there to be followed to the letter: a good pattern should be a jumping-off point, and crocheters should be emboldened to change colours, finished size, yarn type and thickness, and know you can still end up with beautiful results and have created something uniquely your own, using a yarn you really love.
I’ve seen the lovely results of this time and again with the projects people have made from my PJ Accessories designs, and yet most patterns are written so rigidly, without inviting the possibility of making your own tweaks. In Everyday Crochet I encourage this kind of customisation, and include tips with every pattern as starting points for making your own modifications.
Photography
This book was a whole new experience for me, as it had 2 photographers: I photographed my hands and my test samples for all the tutorials and technical photos, but all the stylish photos of my finished projects and the appealing photos on each chapter opener page were taken by the talented photographer Becky Batchelor (who also did the graphic design and layout).
This means you get the best of both worlds: my clear, close-up detailed photos wherever I’m teaching you something, and Becky’s gorgeous eye-candy photos everywhere else. They show off my designs beautifully and make the book a pleasure to flip through and enjoy visually.
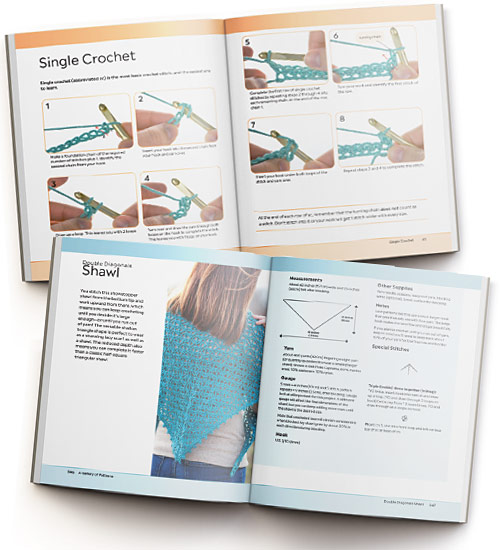 Spot the difference? The top spread has my close-up technical photos and the bottom spread includes one of Becky’s lovely photos.
So that’s it – everything you could possibly want to know about my book, Everyday Crochet! I hope it will help you along in your crocheting journey, and that it’ll earn a permanent place on your bookshelf.
Everyday Crochet by June Gilbank is now available from all good bookstores. You can order Everyday Crochet from amazon or find it in your favourite bookshop, and why not also order a signed bookplate directly from me, to go in your copy?


